

Table of Contents
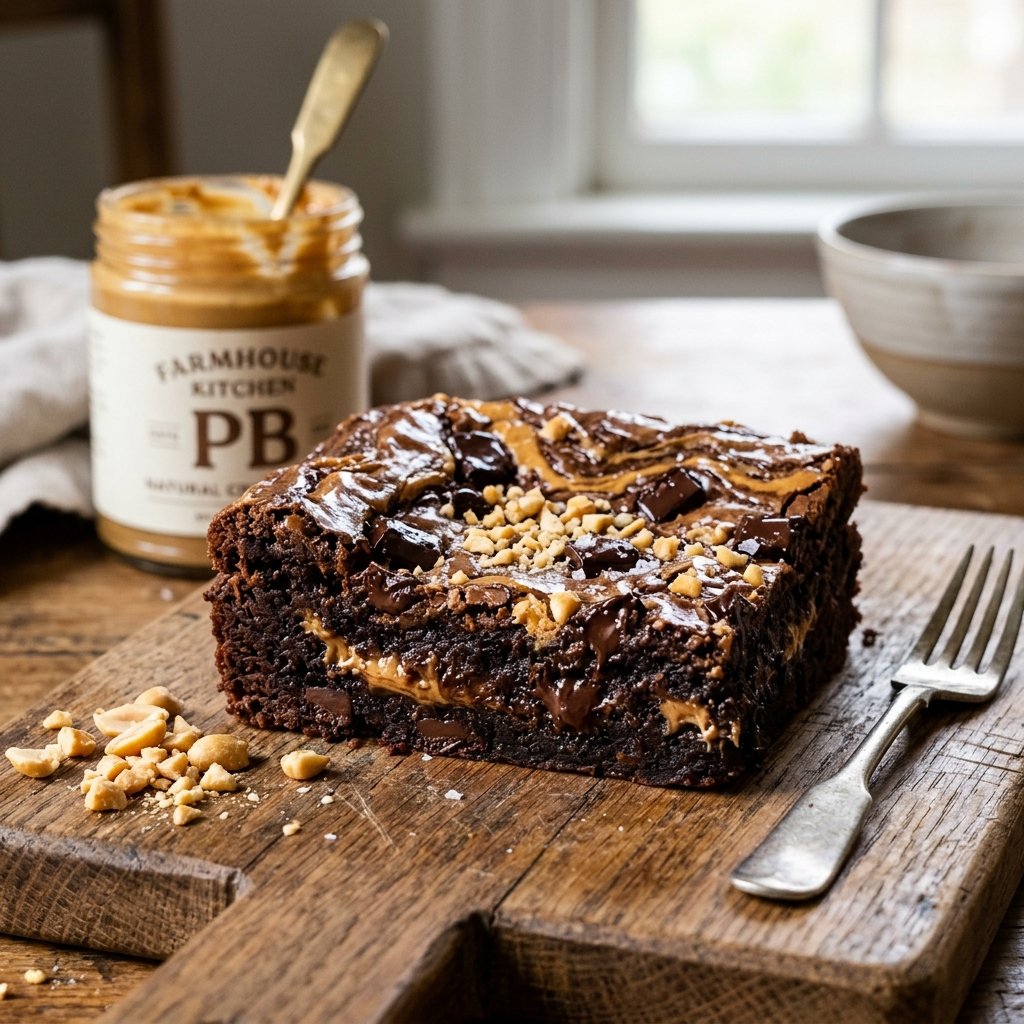
Irresistible Peanut Butter Swirl Brownies: Salty-Sweet Marbling and Fudgy Decadence
Category: Brownies
Image: peanut-butter-swirl-brownies.jpg
Meta title: Peanut Butter Swirl Brownies Recipe – Fudgy Chocolate & Peanut Butter
Meta description: Bake bakery-quality peanut butter swirl brownies with this foolproof recipe. Featuring an ultra-fudgy dark chocolate base marbled with salty-sweet peanut butter ribbons.
Keywords: peanut butter swirl brownies, peanut butter brownies, marbled peanut butter brownies, fudgy chocolate brownies, salty sweet brownies, best brownie recipe
Prep time: 20 minutes | Bake time: 30 minutes | Cooling time: 90 minutes | Serves: 16 squares
Introduction
There is an undeniable magic when rich, bittersweet dark chocolate collides with creamy, roasted peanut butter. It is one of gastronomy’s most beloved pairings, yet capturing this synergy in a brownie requires thoughtful pastry technique. A great peanut butter swirl brownie must never become dry or cloying. Instead, it should celebrate an intense textural contrast: an ultra-fudgy, melt-in-the-mouth dark cocoa foundation interwoven with luxurious ribbons of salty-sweet, creamy peanut butter that remain silky and tender even after baking.
Many home bakers run into frustration when attempting peanut butter swirls. If you simply spoon straight peanut butter onto raw brownie batter, the intense oven heat quickly bakes out the natural moisture, leaving behind chalky, cracked, and dry patches that crumble away when sliced. Furthermore, plain natural peanut butter contains heavy separated oils that puddle on the surface, ruining the crisp crinkle crust of the chocolate.
The secret to bakery-window peanut butter brownies lies in tempering the peanut butter mixture before swirling. By whisking creamy peanut butter with a touch of melted butter, powdered sugar, and a pinch of fine salt, you create an emulsion with matching viscosity to the chocolate batter. This prevents oil separation, keeps the swirl unctuous and custardy, and guarantees stunning golden swirls that slice like velvet.
Why You Will Love This Recipe
- The Ultimate Salty-Sweet Balance. Bittersweet 70% dark chocolate and alkalized Dutch cocoa meet the savory, roasted richness of creamy peanut butter and flaky sea salt.
- Silky, Never-Chalky Swirls. Our specialized peanut butter tempering method ensures the ribbons stay moist and tender rather than drying out in the oven.
- Dense and Ultra-Fudgy Base. A low-flour, butter-rich chocolate batter delivers a luscious, fudgy crumb with chewy corner edges.
- Glossy Crinkle Top. Meticulous egg and sugar aeration yields the signature paper-thin, crackly brownie crust alongside the golden peanut butter marbling.
- Bakery-Sharp Slices. Following our cooling and chilling protocol ensures clean, professional cuts that hold their shape proudly on any dessert tray.
- No Fancy Gadgets Required. Prepared with simple bowls, a hand whisk, and an 8-inch square metal baking pan.
Ingredients and Why They Matter
Harmonizing dense chocolate fudge and creamy peanut butter requires understanding how fats and moisture interact under oven heat.
For the Fudgy Chocolate Brownie Base
- 7 oz (200 g) Bittersweet Dark Chocolate (60% to 70% cacao), roughly chopped. Pure baking bars or couverture chocolate provide authentic cocoa butter, the essential fat that firms into a rich, velvety crumb. Avoid chocolate chips, which contain stabilizers that impede emulsification.
- 3/4 cup (170 g) Unsalted Butter, cubed. Melted alongside the chocolate, high-grade butter creates the moisture foundation that tenderizes the crumb.
- 1/2 cup (50 g) Dutch-Processed Cocoa Powder, sifted. Alkalized cocoa deepens the dark mahogany hue and imparts a smooth, intense cocoa flavor that stands up to the bold peanut butter.
- 1 cup (200 g) Granulated White Sugar. Crucial for dissolving into the egg foam to generate the iconic crackly crinkle crust.
- 1/2 cup (100 g) Light Brown Sugar, packed. Adds caramel depth and hygroscopic moisture for chewiness.
- 3 Large Eggs, at room temperature. Eggs provide structure and moisture. Room-temperature eggs whip readily into a voluminous ribbon stage.
- 1 Large Egg Yolk, at room temperature. Adds extra emulsifying lecithin and richness, keeping the brownie fudgy and melt-in-the-mouth.
- 2 teaspoons Pure Vanilla Extract. Elevates the cacao notes and bridges the flavor between chocolate and peanut butter.
- 1/2 teaspoon Fine Sea Salt. Enhances sweetness and accentuates dark cocoa aromas.
- 3/4 cup (95 g) All-Purpose Flour. A minimal quantity of flour keeps gluten strands weak, preventing cakeyness.
For the Luscious Peanut Butter Swirl
- 1/2 cup (130 g) Creamy Commercial Peanut Butter. Standard commercial creamy peanut butter (such as Jif or Skippy) works best here. Its homogenized hydrogenated vegetable oil keeps the emulsion stable under direct oven heat. If using natural drippy peanut butter, see our notes below.
- 2 tablespoons (28 g) Unsalted Butter, melted. Adds liquid butterfat to thin the peanut butter to the exact viscosity of the chocolate batter, allowing effortless swirling.
- 3 tablespoons (25 g) Powdered (Confectioners’) Sugar. Lightly sweetens the peanut butter and binds residual oils, preventing the swirl from turning greasy or drying into a chalky crust.
- 1/4 teaspoon Pure Vanilla Extract. Enhances the roasted aroma.
- 1/8 teaspoon Fine Sea Salt. Accentuates the savory, salty-sweet contrast.
- Optional Garnish: 2 tablespoons finely chopped roasted peanuts and flaky sea salt for finishing.
Equipment You Will Need
- 8-inch (20 cm) Square Metal Baking Pan. Metal conducts heat evenly and quickly, ensuring chewy edges and a fudgy center. Avoid glass or ceramic dishes, which retain heat too long and dry out the edges.
- Parchment Paper. Two overlapping strips forming an “X” sling for lifting out the brownies intact.
- Heatproof Mixing Bowl & Saucepan. For creating a gentle double boiler (bain-marie) to melt butter and chocolate.
- Medium Bowl & Small Bowl. For mixing the brownie batter and the peanut butter swirl mixture.
- Balloon Whisk & Silicone Spatula. For whipping eggs and folding flour.
- Butter Knife or Wooden Skewer. For swirling the batters.
- Chef’s Knife & Tall Pitcher of Hot Water. For clean, bakery-style cuts.
Step-by-Step Instructions
Follow these step-by-step instructions to create stunning, marbled peanut butter swirl brownies.
Step 1: Prep Oven and Parchment Sling
Preheat your oven to 350°F (175°C) with the rack positioned in the center. Lightly grease an 8-inch square metal baking pan with butter or cooking spray. Line with two crisscrossing strips of parchment paper, leaving 2-inch overhangs extending over the sides. Press into the corners.
Step 2: Melt Chocolate and Butter
Place the chopped bittersweet chocolate and cubed unsalted butter in a heatproof bowl set over a saucepan of gently simmering water. Stir occasionally with a spatula until smooth and glossy. Remove from heat, sift in the Dutch cocoa powder, and whisk until fully dissolved and bloomed. Set aside to cool to lukewarm (about 105°F / 40°C).
Step 3: Whip Eggs and Sugars to Ribbon Stage
In a large mixing bowl, combine the 3 eggs, 1 egg yolk, granulated sugar, packed light brown sugar, vanilla extract, and fine sea salt. Using a sturdy balloon whisk or electric hand mixer on medium-high speed, beat vigorously for 4 to 5 minutes.
The mixture will turn remarkably pale, thick, and velvety. When you lift the whisk, the batter should fall back in ribbon ribbons that rest on the surface for a couple of seconds before sinking. This step dissolves the sugar in the egg protein matrix—the key to the shiny crinkled crust.
Step 4: Fold the Batter and Pan the Base
Pour the lukewarm melted chocolate mixture into the whipped egg ribbon. Whisk gently until fully combined and glossy.
Sift the 3/4 cup of all-purpose flour directly over the bowl. Switch to a flexible silicone spatula and fold gently with circular strokes just until no dry white pockets remain. Do not overmix.
Measure out and reserve 1/3 cup of the chocolate batter in a small cup for topping. Pour the rest of the chocolate batter into your prepared pan, spreading it into an even layer with an offset spatula.
Step 5: Prepare the Peanut Butter Swirl
In a small microwave-safe bowl, combine the 1/2 cup creamy peanut butter, 2 tablespoons melted butter, 3 tablespoons powdered sugar, vanilla extract, and a pinch of salt. Whisk vigorously with a fork or small whisk for 60 seconds until satiny smooth, glossy, and easily pourable. (If the mixture feels slightly stiff, microwave for 10 seconds to loosen).
Step 6: Dollop and Marble the Batters
Using a tablespoon or small cookie scoop, drop dollops of the peanut butter mixture evenly over the chocolate batter in the pan. Next, drop small spoonfuls of the reserved 1/3 cup chocolate batter into the gaps between peanut butter dollops.
Take a wooden skewer or butter knife. Insert it halfway into the batter (avoid scratching the parchment bottom). Glide the skewer in sweeping “figure-8” or serpentine S-curve motions horizontally, then vertically. Make 4 to 6 gentle sweeps across the pan. Stop as soon as you see an intricate, defined marble pattern. Over-swirling will blend the layers into a murky brown instead of crisp, contrasting ribbons.
Step 7: Bake to Fudgy Perfection
Place the pan on the center rack of your preheated oven. Bake at 350°F (175°C) for 28 to 32 minutes.
Check doneness carefully:
- The outer edges should look set, slightly puffed, and matte.
- The peanut butter swirls will look set and matte with barely golden edges.
- A wooden toothpick inserted into a chocolate section 2 inches from the side should come out clean.
- When inserted into the center, the toothpick should emerge with several moist, sticky chocolate crumbs attached (not runny batter, and not bone dry).
Step 8: Cool, Chill, and Slice
Remove the pan and set it on a wire rack to cool completely to room temperature for 1 hour.
Transfer the cooled pan to the refrigerator for 60 to 90 minutes. Chilling solidifies the natural peanut butter oils and cocoa butter fats, ensuring immaculate, razor-sharp cuts.
Lift the chilled brownie slab out of the pan using the parchment overhangs and place onto a cutting board. Warm a long chef’s knife in hot water, wipe it completely dry, and slice straight down in one firm, continuous motion. Wipe and reheat the knife between each cut. Cut into 16 uniform squares.
The Science of Baking with Peanut Butter
Why does swirling plain peanut butter into brownies often fail, and how does tempering it fix the problem?
- Viscosity Matching: Brownie batter is dense, glossy, and viscous due to melted chocolate and whipped egg ribbons. Raw peanut butter is thick, sticky, and paste-like. By whisking peanut butter with melted butter and powdered sugar, we lower its yield stress and match its specific gravity to the chocolate batter. This allows both batters to swirl smoothly together without sinking to the bottom.
- Moisture and Oil Syneresis: Commercial peanut butter is an emulsion of finely ground roasted peanuts, vegetable oil, and salt. Under dry oven heat, peanut proteins denature and tighten, squeezing out free oils (syneresis) and leaving behind a crumbly, chalky paste. The small addition of melted butterfat and confectioners’ sugar coats the peanut solids, preventing moisture evaporation and preserving a creamy, melt-in-the-mouth texture.
- The Sugar Crust Mechanism: The shiny crinkle crust on the chocolate sections is formed by dissolved sucrose and egg albumen evaporating during baking. Because peanut butter contains very little free sucrose and no egg whites, it will not form a crinkle crust on its own; instead, it bakes into a soft, velvety ribbon that contrasts with the crackly chocolate top.
- Fat Solidification for Slicing: Peanut oil consists predominantly of monounsaturated oleic acid, which remains liquid at room temperature. Chilling the brownies in the refrigerator temporarily solidifies these oils alongside the saturated fats of the cocoa butter, allowing a sharp knife to cut through cleanly without smearing the golden swirls into the chocolate.
Pro Tips for Bakery-Style Peanut Butter Swirls
- Use Commercial Creamy Peanut Butter: Standard creamy peanut butter (Jif, Skippy) produces the smoothest, most stable swirl. Natural “drippy” peanut butters have free-floating oils that separate in the oven, creating greasy puddles.
- Temper the Peanut Butter Mixture: Never skip adding melted butter and powdered sugar to the peanut butter. This single step is the difference between chalky, cracked swirls and silky, creamy ribbons.
- Reserve Batter for Topping: Always save 1/3 cup of the dark chocolate batter to dollop over the peanut butter before swirling. This ensures an interwoven, two-tone marble effect rather than a flat sheet of peanut butter.
- Limit Your Swirl Strokes: Swirl with 4 to 6 continuous figure-8 motions. Over-mixing blurs the visual contrast into a dull, muddy brown.
- Weigh Your Ingredients: A digital kitchen scale ensures exact flour and cocoa measurements. Even 20 extra grams of flour will convert your fudgy brownie into a dry cake.
- Chill Before Cutting: While irresistible warm, clean bakery-standard squares are only possible after the brownies have spent at least an hour in the refrigerator.
Try Our Next Recipe!
Looking for another delicious dessert? Try our Strawberry Cream Cake Recipe and enjoy another sweet homemade treat!
Common Mistakes and How to Fix Them
| Problem | Likely Cause | Solution |
|---|---|---|
| Peanut butter swirl is chalky and dry | Used untempered peanut butter straight from the jar | Mix peanut butter with 2 tbsp melted butter and 3 tbsp powdered sugar before swirling. |
| Greasy puddle on top of the brownies | Used natural peanut butter with separated oil | Use homogenized commercial peanut butter, or thoroughly stir natural peanut butter until no oil floats. |
| Muddy brown surface with no distinct swirls | Over-swirled the batters | Limit swirling to 4-6 smooth figure-8 strokes with a wooden skewer or knife tip. |
| Peanut butter layer sank to the bottom | Swirled too deep or peanut butter mixture was too heavy | Swirl only the top half of the batter; thin peanut butter with melted butter to match batter viscosity. |
| Cakey, dry brownie texture | Too much flour or overbaked | Weigh flour with a digital scale (95g); remove from oven when center toothpick has moist sticky crumbs. |
| Messy, jagged slices | Cut while brownies were warm | Cool completely to room temperature, then chill in fridge for 1 hour before slicing with a hot knife. |
Substitutions and Variations
- Crunchy Peanut Butter Swirl: Use commercial crunchy peanut butter for an added layer of textured nut crunch throughout the ribbons.
- Peanut Butter Cup Brownies: Press 1 cup of chopped mini peanut butter cups into the top surface along with the peanut butter swirl before baking.
- Flaky Sea Salt Finish: Sprinkle 1/2 teaspoon of coarse Maldon sea salt flakes over the brownies immediately after pulling them from the oven. The sharp salt bursts elevate the chocolate and peanut butter.
- Almond Butter or Cashew Butter Swirl: Swap the peanut butter 1:1 with creamy almond butter or cashew butter for a delicious alternative nut profile.
- Gluten-Free Version: Substitute the all-purpose flour 1:1 with a high-quality gluten-free baking blend containing xanthan gum (such as Bob’s Red Mill 1-to-1).
Make-Ahead, Storage, and Freezing
Make-Ahead: These brownies taste phenomenal on Day 2! The peanut butter and chocolate flavors meld together overnight, and the crumb settles into an even fudgier consistency.
Room Temperature Storage: Store completely cooled brownie squares in an airtight container at room temperature for up to 5 days. Place sheets of parchment paper between stacked layers.
Refrigeration: Store in the refrigerator for up to 7 days for an ultra-dense, fudge-truffle texture.
Freezing Instructions: Wrap individual squares tightly in plastic wrap, then pack them into a heavy-duty freezer bag. Freeze for up to 3 months. Thaw individual brownies at room temperature for 45 minutes, or microwave for 15 seconds on 50% power for a warm, gooey treat.
Serving Suggestions and Pairings
- Tall Glass of Cold Milk: The quintessential pairing for any chocolate-peanut butter dessert.
- Brownie Sundae: Warm a square for 15 seconds, top with a generous scoop of vanilla or peanut butter gelato, and drizzle with warm chocolate fudge sauce.
- Coffee and Espresso: Pair with a dark-roast pour-over, latte, or cold brew coffee to complement the roasted peanut and cacao notes.
Nutrition Notes
Each square (1/16 of the batch) provides approximately 310 calories, 19 g total fat (10 g saturated fat, 6 g healthy monounsaturated fat), 33 g carbohydrates, 25 g sugars, 3 g dietary fiber, and 5 g protein. The peanut butter adds a boost of plant protein and rich flavor, making each square deeply satisfying.
Frequently Asked Questions
Can I use all-natural peanut butter (just peanuts and salt)?
You can, but you must stir the jar thoroughly until no free oil remains on top. Natural peanut butter is runnier and contains more gritty ground particles. Be sure to whisk it with the 2 tablespoons of melted butter and 3 tablespoons of powdered sugar to stabilize the emulsion and prevent oil separation.
Can I use chunky peanut butter?
Yes! Commercial chunky peanut butter creates an appetizing textural crunch within the smooth swirl ribbons.
Why did my peanut butter swirl sink to the bottom of the pan?
If you insert your skewer all the way to the bottom and swirl aggressively, the heavier peanut butter will be pushed down. Insert your skewer only halfway down into the batter, keeping the swirl focused on the upper half.
How do I get clean, straight cuts without smearing?
Chill the brownies in the refrigerator for at least 1 hour before slicing. Use a large chef’s knife dipped in hot water, wiped dry, and slice straight down in one confident motion. Clean the knife between every cut.
Recipe Card Summary
| Prep time | 20 minutes |
| Bake time | 30 minutes |
| Cooling & chilling | 2 hours 30 minutes |
| Total time | About 3 hours 20 minutes |
| Yield / Servings | 16 squares |
| Difficulty | Easy / Intermediate |
| Storage | Airtight container at room temperature up to 5 days, or freeze up to 3 months |
