

Table of Contents
Introduction
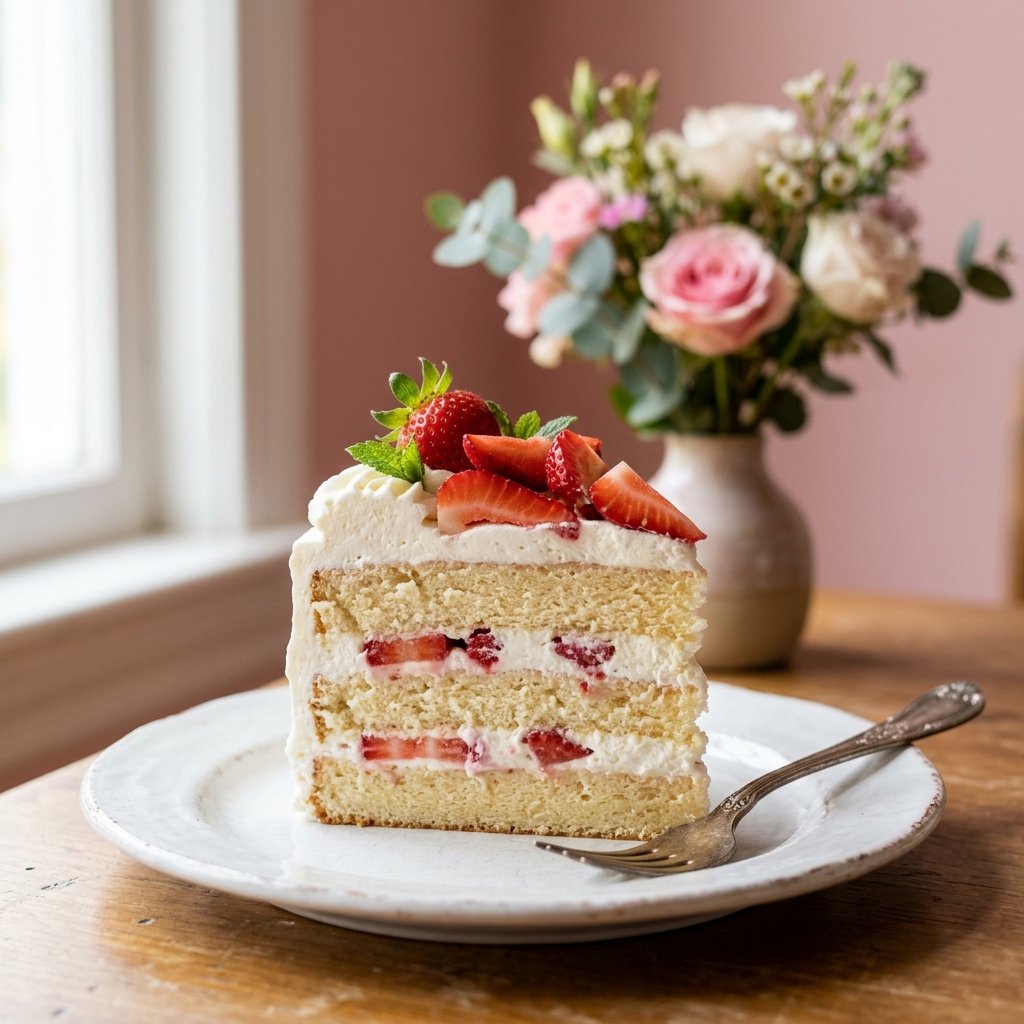
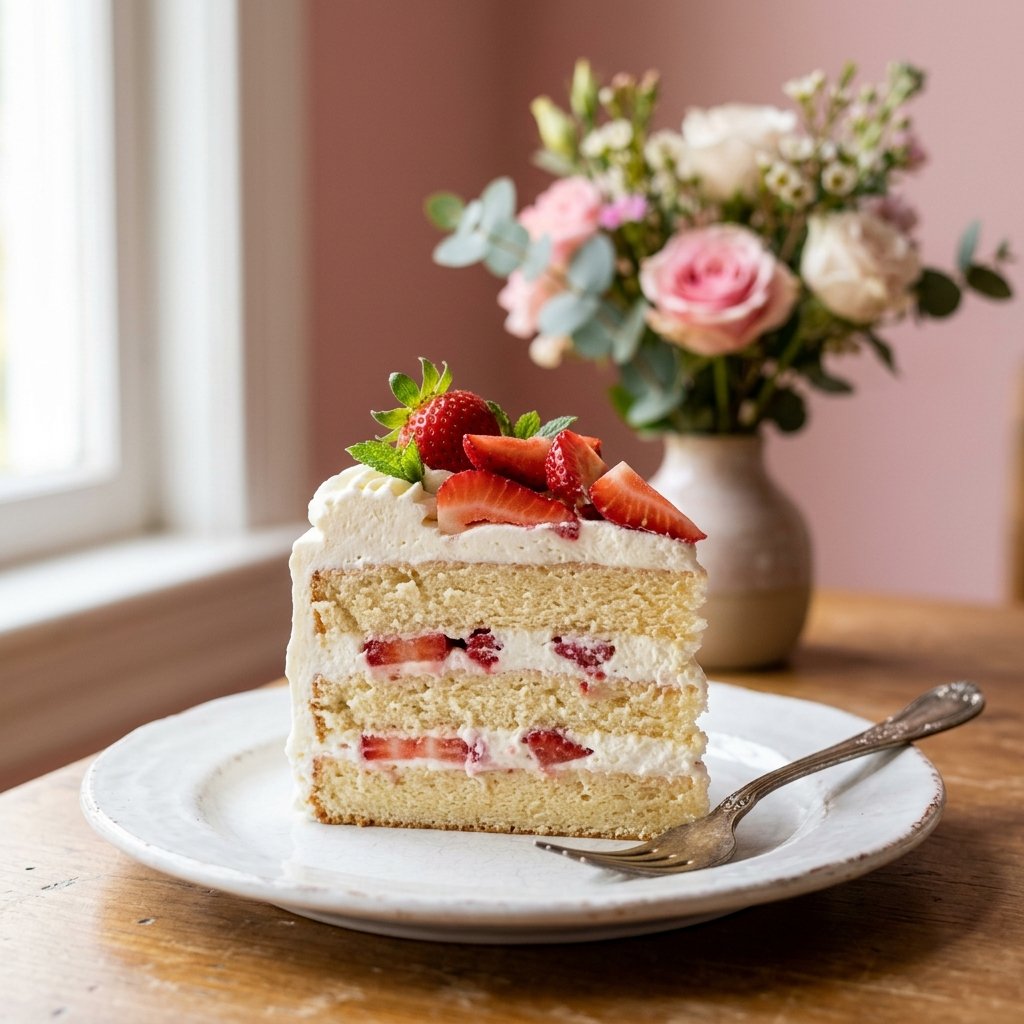
Few desserts say “spring” like a strawberry cream cake. Soft vanilla sponge layers are lightly soaked with strawberry syrup, layered with fluffy whipped cream and ripe strawberries, and topped with more fresh berries. It is light, juicy, and elegant—a cake that tastes as good as it looks.
This recipe is inspired by Japanese-style strawberry shortcake and American strawberry shortcake, combining a delicate, airy sponge with a creamy fruit filling. Stabilized whipped cream helps the cake hold its shape.
Below is a complete guide with ingredients, step-by-step instructions, assembly and decoration tips, troubleshooting, variations, storage advice, and frequently asked questions.
Why You Will Love This Cake
- Light and airy sponge made with whipped eggs.
- Fresh strawberry flavor in every bite.
- Stable whipped cream that helps the cake hold its shape.
- A balanced sweetness that lets the fruit shine.
- Beautiful pink and white layers for special occasions.
- Perfect for birthdays, spring gatherings, and celebrations.
Ingredients and Why They Matter
For the Vanilla Sponge
- 4 large eggs plus 2 yolks, at room temperature
- 3/4 cup (150 g) granulated sugar
- 1 1/4 cups (150 g) cake flour, sifted twice
- 1/4 cup (30 g) cornstarch
- 1 teaspoon baking powder
- 1/3 cup (80 ml) whole milk, warmed
- 1/4 cup (55 g) melted butter, cooled
- 2 teaspoons vanilla extract
- A pinch of salt
For the Strawberry Syrup
- 1/4 cup (60 ml) water
- 1/4 cup (50 g) sugar
- 1/2 cup (about 80 g) mashed strawberries
For the Stabilized Whipped Cream
- 3 cups (720 ml) cold heavy cream
- 1/2 cup (60 g) powdered sugar
- 8 oz (225 g) cold mascarpone
- 2 teaspoons vanilla extract
For the Filling and Topping
- 1 1/2 pounds (700 g) fresh strawberries, hulled and sliced
- Mint leaves and extra whole strawberries for decoration
Equipment You Will Need
- Three 8-inch (20 cm) round cake pans and parchment paper
- Stand mixer or hand mixer with a whisk attachment
- Fine-mesh sieve
- Offset spatula and serrated knife
- Piping bag with a star tip
- Cake turntable (optional)
Step-by-Step Instructions
Step 1: Prepare the Pans and Oven
Preheat the oven to 340°F (170°C). Line the bottoms of the cake pans with parchment paper. Leave the sides ungreased so the sponge can climb as it bakes.
Step 2: Whip the Eggs
Beat the eggs, yolks, sugar, and salt in a heatproof bowl set over simmering water until warm to the touch, about 110°F (43°C). Remove from the heat and whip on high for 8 to 10 minutes, until pale, thick, and tripled in volume. When you lift the whisk, the ribbon should hold for about 5 seconds.
Step 3: Fold in the Dry Ingredients
Sift the flour, cornstarch, and baking powder over the egg foam in three additions. Gently fold with a spatula after each addition. Avoid stirring, as folding helps preserve the air in the batter.
Step 4: Add the Milk and Butter
Whisk the warm milk, melted butter, and vanilla together. Stir a small scoop of batter into the liquid to lighten it, then gently fold the mixture back into the main batter until just combined.
Step 5: Bake
Divide the batter evenly between the pans. Tap each pan once on the counter to release large air bubbles. Bake for 25 to 28 minutes, until golden and springy to the touch.
Let the cakes cool in their pans for 5 minutes, then turn them out onto a wire rack and allow them to cool completely.
Step 6: Make the Strawberry Syrup
Simmer the water, sugar, and mashed strawberries for 5 minutes. Strain and let the syrup cool completely. It adds moisture and a subtle strawberry flavor to the sponge.
Step 7: Whip the Cream
Beat the cold cream, powdered sugar, and vanilla until soft peaks form. Add the cold mascarpone and whip just until stiff peaks form. Avoid overwhipping, which can make the cream grainy. Refrigerate until ready to use.
Step 8: Slice and Soak the Layers
Trim the tops of the cakes if needed to create even layers. Lightly brush each layer with the cooled strawberry syrup.
Step 9: Assemble the Cake
Place the first cake layer on a serving plate. Spread about 1 cup of whipped cream over it and arrange sliced strawberries on top, pressing them gently into the cream.
Add the second cake layer and repeat. Place the final layer on top, then cover the top and sides with the remaining cream. Smooth with an offset spatula.
Step 10: Decorate
Pipe cream rosettes around the top edge and arrange fresh strawberries in the center. Add mint leaves if desired. Refrigerate for at least 1 hour before slicing so the cake can set.
Pro Tips for the Best Strawberry Cream Cake
- Choose ripe, in-season strawberries for the best flavor.
- Pat the berries dry to prevent excess moisture from softening the cream.
- Keep the cream, mascarpone, and mixing bowl cold.
- Use mascarpone or a suitable stabilizer to help the cream hold its shape.
- Stop whipping as soon as stiff peaks form.
- Fold the dry ingredients gently to keep the sponge airy.
- Chill the assembled cake before slicing.
- Use a clean, warm, dry knife for neat slices.
Common Mistakes and How to Fix Them
| Problem | Likely Cause | Solution |
|---|---|---|
| Sponge sinks | Underwhipped eggs or opening the oven too early | Whip until thick and avoid opening the oven during baking |
| Dense sponge | Overfolding the batter | Fold gently and stop as soon as combined |
| Watery cream | Wet strawberries or warm cream | Dry the berries and keep the cream cold |
| Grainy cream | Overwhipping | Stop when stiff peaks form |
| Slippery layers | Too much syrup or filling | Use less syrup and chill the cake |
| Cake too sweet | Too much sugar | Adjust the powdered sugar to taste |
| Cracked top | Oven temperature too high | Check the oven temperature and adjust if needed |
Substitutions and Variations
- Other fruit: Try raspberries, peaches, or mixed berries.
- Cream cheese cream: Replace mascarpone with cream cheese for a slightly tangy flavor.
- Chocolate version: Add 2 tablespoons of cocoa powder to the sponge, adjusting the dry ingredients as needed.
- Gelatin stabilizer: Use properly prepared gelatin according to its package instructions.
- Dairy-free option: Try a suitable plant-based whipping cream.
- Gluten-free option: Use a tested gluten-free cake flour blend.
- Strawberry jam layer: Add a thin layer of strawberry jam between the cake layers.
- Cupcakes: Adapt the batter for cupcakes and begin checking for doneness earlier.
- Mini cakes: Cut small rounds from the sponge for individual desserts.
Make-Ahead, Storage, and Freezing
Make ahead: The sponge can be baked a day in advance and wrapped once completely cool. Assemble the cake on the day of serving or the evening before.
Storage: Keep the assembled cake covered in the refrigerator for up to 3 days. For the freshest appearance and texture, enjoy it within the first day or two.
Freezing: Unfrosted sponge layers can be wrapped well and frozen for up to 2 months. Freezing the assembled cake with fresh strawberries is not recommended because the berries can become soft after thawing.
Serving Suggestions
- Serve chilled with a drizzle of strawberry sauce.
- Pair with tea or coffee.
- Add extra fresh berries on the side.
- Dust lightly with powdered sugar just before serving.
- Slice with a clean, warm, dry knife.
Decoration Ideas
- Arrange strawberry halves in a crescent around the top.
- Pipe a rosette border using a star tip.
- Press sliced berries gently against the cream on the sides.
- Add food-safe edible flowers for a garden-inspired look.
- Arrange strawberry slices into a heart shape for Valentine’s Day.
Nutrition Notes
One slice, based on 12 servings, contains approximately 470 calories, 30 g fat, 44 g carbohydrates, and 6 g protein. These values are estimates and may vary depending on the ingredients and serving size.
For more delicious recipes, we recommend trying our Cinnamon Banana Bread! A soft, moist, and cozy treat perfect for breakfast or a sweet afternoon snack.
Frequently Asked Questions
Can I use frozen strawberries?
Frozen strawberries work well for the syrup, but fresh strawberries are best for the filling and decoration because they hold their shape better.
How do I stabilize the cream?
Cold mascarpone can help stabilize whipped cream. Cream cheese or a suitable gelatin-based method may also work when prepared correctly.
Why did my sponge deflate?
The egg foam may not have been whipped enough, or too much air may have been lost while folding in the dry ingredients.
Can I make the cake a day ahead?
Yes. Bake the sponge in advance and assemble the cake the day before serving. Keep it covered in the refrigerator.
Do I need to soak the layers?
No, but a light brushing of strawberry syrup helps keep the sponge moist. Avoid adding too much, as excess liquid can make the layers slippery.
Can I use whipped topping instead of homemade whipped cream?
Yes, if you prefer a convenient alternative. The flavor and texture will differ from freshly whipped cream.
How do I slice the cake neatly?
Chill the cake before slicing and use a clean knife warmed in hot water and wiped dry between cuts.
Final Thoughts
Strawberry cream cake is a celebration of fresh fruit and homemade goodness. With its light sponge, fluffy cream, and sweet strawberries, it makes a beautiful dessert for everyday treats and special occasions alike.
Choose ripe strawberries, keep the cream cold, and take your time assembling the layers for the best results.
If you make this cake, share your experience in the comments and explore more delicious ideas in our Cakes collection.

1 thought on “Strawberry Cream Cake: Light, Fresh and Fit for a Celebration”