

Table of Contents
Prep Time: 35 minutes | Bake Time: 30 minutes | Assembly: 40 minutes | Servings: 14
Introduction Vanilla Birthday Cake
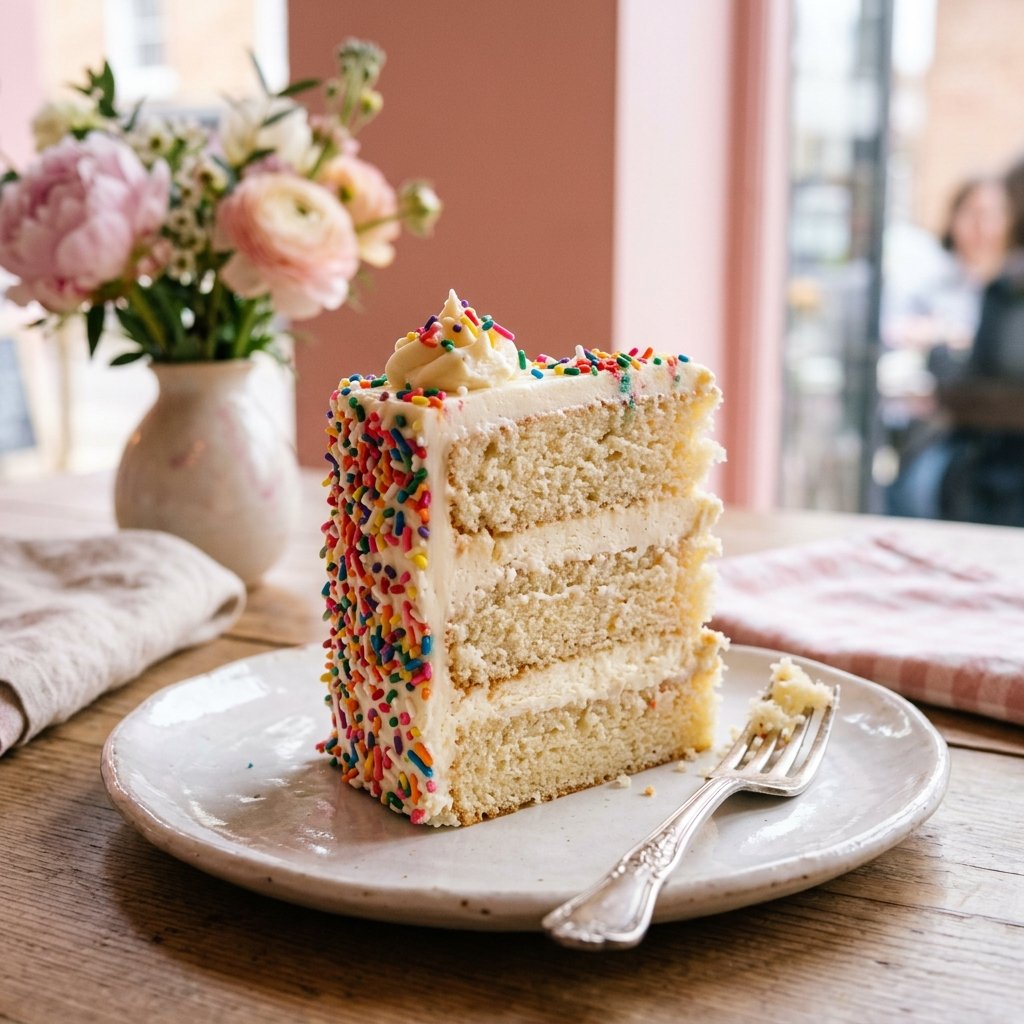
Every home baker needs one recipe they can trust for birthdays, and this classic vanilla cake is exactly that. The layers are soft, buttery, and fine-crumbed, the vanilla flavor is warm and fragrant, and the buttercream is silky rather than gritty or overly sweet. Covered in rainbow sprinkles, it looks like a celebration before anyone has taken a bite.
Vanilla cake has a reputation for being plain, but done well, it is anything but. Because there is no strong flavor to hide behind, technique matters. Properly creamed butter, correctly measured flour, and real vanilla all make a noticeable difference. This guide walks you through each detail so your cake comes out bakery-quality the first time.
Below, you will find the complete ingredient list, clear step-by-step instructions, buttercream and assembly methods, troubleshooting tips, substitutions, make-ahead plans, storage advice, serving ideas, and answers to frequently asked questions.
Why You Will Love This Cake
- Soft and tender: Cake flour and the reverse-creaming method create a velvety crumb.
- Real vanilla flavor: Vanilla extract and vanilla bean paste add depth and fragrance.
- Stable and easy to slice: The layers hold up well to stacking and decorating.
- Customizable: Change the sprinkles, colors, or frosting to match any theme.
- Make-ahead friendly: The layers and buttercream can be prepared in advance.
- Perfect for celebrations: Children and adults alike love a well-made vanilla cake.
Ingredients and Why They Matter
For the Vanilla Cake Layers
- 3 cups (340 g) cake flour
- 1 3/4 cups (350 g) granulated sugar
- 1 tablespoon baking powder
- 1 teaspoon fine salt
- 3/4 cup (170 g) unsalted butter, softened
- 4 large eggs, at room temperature
- 1 1/4 cups (300 ml) whole milk, at room temperature
- 1/4 cup (60 ml) neutral oil
- 1 tablespoon pure vanilla extract
- 1 teaspoon vanilla bean paste
- 1 teaspoon white vinegar (optional)
Cake flour has a lower protein content than all-purpose flour, producing a lighter, finer crumb. Sugar adds sweetness and helps retain moisture, while butter provides richness and tenderness. A little neutral oil helps the cake stay moist for days.
The vanilla extract and vanilla bean paste give the cake a warm, fragrant flavor. The optional white vinegar helps maintain a soft, light-colored crumb.
For the Vanilla Buttercream
- 1 1/2 cups (340 g) unsalted butter, softened
- 5 cups (600 g) powdered sugar, sifted
- 1/4 cup (60 ml) heavy cream
- 2 teaspoons vanilla extract
- A pinch of salt
For Decorating
- 1 cup rainbow sprinkles for the sides and top
- Optional piping tips
- Birthday candles
- Gel food coloring, if desired
Equipment You Will Need
- Three 8-inch (20 cm) round cake pans
- Parchment paper and baking spray
- Stand mixer or hand mixer
- Rubber spatula and offset spatula
- Bench scraper and cake turntable, optional
- Kitchen scale
- Wire cooling rack
- Piping bag with a large star tip
Step-by-Step Instructions
Step 1: Prepare the Oven and Pans
Preheat the oven to 350°F (175°C) and position a rack in the center.
Grease three 8-inch round cake pans, line the bottoms with parchment paper, and lightly grease the parchment. Properly prepared pans help the cakes release cleanly after baking.
Step 2: Combine the Dry Ingredients
In the bowl of a stand mixer, whisk together the cake flour, sugar, baking powder, and salt on low speed for about 30 seconds.
This distributes the leavening evenly and helps aerate the flour.
Step 3: Cut in the Butter Using the Reverse-Creaming Method
Add the softened butter in small pieces. Mix on low speed until the mixture resembles damp sand and no large lumps of butter remain.
This technique coats the flour with fat and limits gluten formation, helping produce a tender cake with a fine crumb.
Step 4: Add the Wet Ingredients
In a separate jug, whisk together the eggs, milk, oil, vanilla extract, vanilla bean paste, and optional vinegar.
With the mixer running on low speed, pour in about two-thirds of the liquid mixture. Increase to medium speed and beat for approximately 90 seconds, until the batter becomes light and fluffy.
Reduce the speed, add the remaining liquid, and mix just until combined. Scrape down the sides and bottom of the bowl to ensure everything is evenly incorporated.
Step 5: Fill the Pans
Divide the batter evenly among the three prepared pans. For consistent layers, weigh the batter as you divide it.
Tap each pan firmly on the counter to release large air bubbles, then smooth the tops with a spatula.
Step 6: Bake the Cake Layers
Bake for 28 to 32 minutes.
The cakes are ready when the tops spring back when gently touched and a toothpick inserted into the center comes out clean or with a few dry crumbs.
Avoid opening the oven door during the first 20 minutes, as this can interfere with the cakes’ rise.
Step 7: Cool the Cakes
Let the cakes cool in their pans for 10 minutes, then carefully turn them out onto a wire rack.
Allow them to cool completely. Wrap the layers in plastic wrap and refrigerate for about 30 minutes before assembling. Chilled cake layers are easier to handle, trim, and frost.
Step 8: Make the Vanilla Buttercream
Beat the softened butter on medium-high speed for about 5 minutes, until very pale and creamy.
Reduce the mixer speed to low and add the sifted powdered sugar one cup at a time. Add the heavy cream, vanilla extract, and salt.
Beat on high speed for approximately 3 minutes, until the buttercream is smooth and fluffy.
If the frosting is too stiff, add another teaspoon of cream. If it becomes too soft, refrigerate it for 15 minutes before using.
Step 9: Level and Fill the Cake Layers
If necessary, trim the tops of the cake layers with a serrated knife to create flat surfaces.
Place the first layer on a cake board or serving plate, securing it with a small dab of buttercream.
Spread approximately 1 cup of buttercream evenly over the first layer. Add the second layer and repeat. Place the third layer on top, with its flat bottom facing upward.
Step 10: Apply the Crumb Coat
Spread a thin layer of buttercream over the entire cake to trap loose crumbs.
Refrigerate the cake for about 20 minutes, or until the crumb coat feels firm. This helps create a cleaner final finish.
Step 11: Add the Final Coat and Sprinkles
Cover the cake with the remaining buttercream, smoothing the sides and top with an offset spatula or bench scraper.
Gently press rainbow sprinkles onto the sides of the cake, working over a tray to catch any that fall. Scatter additional sprinkles across the top.
Pipe decorative rosettes or swirls around the top edge and finish with birthday candles if desired.
Pro Tips for the Best Vanilla Cake
- Measure flour by weight: A cup of flour can vary significantly depending on how it is measured.
- Use room-temperature ingredients: Cold eggs and milk can cause the batter to mix unevenly.
- Avoid overmixing: Once the liquid ingredients are added, mix only as long as necessary.
- Check your oven temperature: An oven thermometer can help prevent domed, cracked, or dry cakes.
- Use bake-even strips: These can help produce flatter, more evenly baked layers.
- Chill before the final coat: A chilled cake is easier to frost neatly.
- Use a hot, dry knife: This helps create clean slices.
- Taste the buttercream: Adjust the vanilla and salt to suit your preference.
Try Our Next Recipe!
Looking for another delicious dessert? Try our Strawberry Cream Cake Recipe and enjoy another sweet homemade treat!
Common Mistakes and How to Fix Them
Dense or Gummy Cake
Likely cause: Overmixing or using cold ingredients.
Solution: Use room-temperature ingredients and mix only until combined.
Domed Center
Likely cause: The oven temperature is too high.
Solution: Check the oven temperature and consider using bake-even strips.
Dry Cake
Likely cause: Overbaking or adding too much flour.
Solution: Weigh the flour accurately and begin checking the cake a few minutes before the minimum baking time.
Sunken Middle
Likely cause: Underbaking or opening the oven door too early.
Solution: Bake until the center springs back gently and avoid opening the oven during the first 20 minutes.
Grainy Buttercream
Likely cause: Powdered sugar that has not been sifted properly.
Solution: Sift the sugar before adding it and beat the buttercream until smooth.
Buttercream That Is Too Sweet
Likely cause: Too much powdered sugar for your taste.
Solution: Add a small pinch of salt and a little cream, adjusting gradually.
Bubbles in the Frosting
Likely cause: Air trapped during mixing.
Solution: Mix on low speed briefly and smooth the frosting with a spatula before applying the final coat.
Substitutions and Variations
- No cake flour? For each cup of cake flour, measure 1 cup of all-purpose flour, remove 2 tablespoons, and replace them with 2 tablespoons of cornstarch. Sift together before using.
- Buttermilk version: Replace the milk with buttermilk and adjust the leavening to 1/2 teaspoon baking soda and 2 teaspoons baking powder.
- Almond vanilla cake: Add 1/2 teaspoon almond extract for a bakery-style flavor.
- Funfetti cake: Gently fold 1/2 cup of rainbow jimmies into the finished batter.
- Dairy-free cake: Use plant-based butter and oat milk.
- Egg-free cake: Use a commercial egg replacer, keeping in mind that the crumb may be slightly denser.
- Different frostings: Cream cheese frosting, whipped cream, or Swiss meringue buttercream also pair well with vanilla cake.
- Vanilla cupcakes: Divide the batter among cupcake liners and bake for approximately 18 to 22 minutes. This recipe makes about 24 cupcakes.
- Vanilla sheet cake: Use a greased 9 × 13-inch pan and bake for approximately 35 to 40 minutes, checking for doneness.
Make-Ahead, Storage, and Freezing
Make-Ahead
Bake the cake layers up to 2 days in advance. Let them cool completely, wrap them tightly, and keep them at room temperature in a cool environment.
Buttercream can be prepared up to 3 days ahead and refrigerated in an airtight container. Bring it to a workable consistency and re-whip before using.
Storage
A frosted buttercream cake can be stored at cool room temperature for up to 2 days, provided the conditions are suitable and the frosting ingredients allow it.
For longer storage, refrigerate the cake in an airtight container for up to 5 days. Let it sit at room temperature for about 30 minutes before serving for the best texture.
Freezing
Unfrosted cake layers can be frozen for up to 3 months. Wrap each layer in plastic wrap and then aluminum foil.
Frosted slices can be frozen for up to 1 month. Thaw them overnight in the refrigerator before serving.
Serving Suggestions
- Serve with cold milk, hot tea, or coffee.
- Add a scoop of strawberry or vanilla ice cream.
- Serve fresh berries on the side for a refreshing contrast.
- For parties, cut the cake into small, even portions.
- Warm a knife in hot water and wipe it dry between slices for neat cuts.
Vanilla Cake Decoration Ideas
- Rainbow sprinkle sides: Cover the sides with colorful sprinkles for a classic birthday-cake look.
- Pastel ombré: Divide the buttercream into portions and tint them in gradually changing shades.
- Piped shell border: Add a decorative border around the base and top edge.
- Fresh flowers: Use only food-safe, unsprayed flowers suitable for cake decoration.
- Number candles: Personalize the cake for milestone birthdays and special celebrations.
Nutrition Information
One slice, based on 14 servings, contains approximately:
- Calories: 540
- Fat: 28 g
- Carbohydrates: 68 g
- Protein: 5 g
Nutrition values are estimates and may vary depending on the ingredients and amount of frosting used. For a lighter serving, use a thinner layer of frosting or cut smaller slices.
Frequently Asked Questions
Can I Use Salted Butter?
Yes. If using salted butter, reduce the added salt in the cake batter to 1/2 teaspoon and omit the salt from the frosting.
Why Is My Cake Crumbly?
A crumbly cake is often caused by too much flour or overbaking. Weigh your ingredients carefully and check the cake for doneness before the maximum baking time.
How Do I Make All the Layers the Same Size?
Use a kitchen scale to divide the batter evenly among the prepared pans. This helps the layers bake at a similar rate and makes assembly easier.
Can I Bake This Cake in Two Pans?
Yes. You can divide the batter between two 9-inch round pans. The baking time may increase to approximately 30 to 35 minutes, so check the center before removing the cakes.
What Should I Do If My Buttercream Splits?
Try beating in a few tablespoons of smooth buttercream or gently warming the outside of the mixing bowl before beating again. Avoid overheating the frosting.
Can I Make This Cake a Day Ahead?
Absolutely. Assemble and frost the cake, then refrigerate it in an airtight container. Let it sit at room temperature briefly before serving.
How Do I Color Buttercream?
Use gel food coloring and add it a drop at a time until you reach your desired shade. Gel coloring is concentrated and usually adds less liquid than regular food coloring.
Final Thoughts
A great vanilla birthday cake is simple, but it is rarely casual. With proper technique, good vanilla, and a little patience, this recipe delivers tender layers, creamy buttercream, and a joyful finish that everyone will remember.
Bake it for a birthday, family gathering, or any special occasion, and it may soon become your signature celebration cake.
Try the recipe and let us know how your celebration went in the comments. You can also explore more delicious desserts in our Cakes collection.
Recipe Card Summary
- Prep Time: 35 minutes
- Bake Time: 30 minutes
- Assembly Time: 40 minutes
- Total Time: Approximately 2 hours 30 minutes, including cooling
- Servings: 14 slices
- Difficulty: Easy
- Storage: Refrigerate for up to 5 days
