

Table of Contents
Prep time: 35 minutes | Bake time: 30 minutes | Assembly: 35 minutes | Serves: 12
Introduction Red Velvet Cake
Red velvet cake is one of the most recognizable desserts in the world. Its deep ruby layers, snowy cream cheese frosting and impossibly soft texture make it a showstopper on any table, from Valentine’s Day to Christmas to a simple Sunday gathering.
But red velvet is more than a color. A great red velvet cake has a delicate cocoa flavor, a gentle tang from buttermilk and vinegar, and a tender, velvety crumb that melts in your mouth. The cream cheese frosting provides the perfect creamy, tangy counterpoint.
This guide covers everything: ingredients and their roles, careful step-by-step directions, frosting and assembly, troubleshooting, substitutions, storage, serving ideas and frequently asked questions. By the end, you will bake a red velvet cake that looks and tastes like it came from a professional bakery.
Why You Will Love This Red Velvet Cake
- True velvet texture. Oil, buttermilk and cake flour create a super soft crumb.
- Balanced flavor. A hint of cocoa, vanilla and tang rather than heavy chocolate.
- Brilliant color. Gel coloring delivers a vivid red without bitterness.
- Silky cream cheese frosting. Tangy, lightly sweet and easy to spread.
- Reliable. The recipe works with standard pantry ingredients.
- Perfect for occasions. Birthdays, holidays, anniversaries or gifts.
Ingredients and Why They Matter
For the Red Velvet Layers
- 2 1/2 cups (285 g) cake flour. Gives the lightest texture. All-purpose flour will make a slightly sturdier cake.
- 1 1/2 cups (300 g) granulated sugar.
- 1 tablespoon unsweetened cocoa powder. A small amount provides the classic subtle flavor.
- 1 teaspoon baking soda and 1 teaspoon fine salt.
- 1 1/2 cups (360 ml) vegetable oil. Keeps the cake moist for days.
- 1 cup (240 ml) buttermilk, at room temperature. Its acidity tenderizes the cake and reacts with baking soda.
- 2 large eggs, at room temperature.
- 2 tablespoons red gel food coloring. Gel is more concentrated than liquid dye, so you need less.
- 1 teaspoon white vinegar. Activates the baking soda for lift and brightens the color.
- 2 teaspoons vanilla extract.
For the Cream Cheese Frosting
- 16 oz (450 g) full-fat block cream cheese, cold.
- 1/2 cup (115 g) unsalted butter, softened.
- 4 cups (480 g) powdered sugar, sifted.
- 2 teaspoons vanilla extract.
- Pinch of salt.
For Decorating
- Reserved cake crumbs from trimming, for the signature red crumb topping.
- Optional white chocolate curls or fresh berries.
Equipment You Will Need
- Two 9-inch (23 cm) round cake pans
- Parchment paper
- Large bowls, whisk and rubber spatula
- Hand or stand mixer
- Serrated knife
- Offset spatula and cake turntable
- Wire cooling rack
Step-by-Step Instructions
Step 1: Prepare the Pans
Heat the oven to 350°F (175°C). Grease the pans, line them with parchment and grease again. Avoid dusting with flour, which can leave a pale film on the red cake.
Step 2: Sift the Dry Ingredients
Sift the flour, cocoa, baking soda and salt into a bowl. Sifting removes lumps and ensures the cocoa disperses evenly, preventing dark streaks.
Step 3: Whisk the Wet Ingredients
In a large bowl, whisk together the sugar and oil until combined. Add the eggs one at a time, then the buttermilk, food coloring, vinegar and vanilla. The mixture should be an even, vivid red.
Step 4: Combine
Add the dry ingredients to the wet in two additions, mixing on low until just combined. Scrape the bottom of the bowl and mix for 10 more seconds. Overmixing will toughen the cake.
Step 5: Bake
Divide the batter evenly between the pans. Bake for 28 to 32 minutes, until a toothpick comes out clean and the center springs back. Do not overbake, as red velvet dries out quickly.
Step 6: Cool
Cool in the pans for 10 minutes, then remove and cool completely on a rack. For easier handling, chill the layers in the fridge for 30 minutes before frosting.
Step 7: Make the Frosting
Beat the softened butter until creamy, about 2 minutes. Add the cold cream cheese and beat only until smooth, about 1 minute. Add the sifted powdered sugar gradually, then the vanilla and salt. Beat on low until combined. Do not overbeat, which will make the frosting loose. If it is too soft, chill for 20 minutes.
Step 8: Level and Crumb
Trim the domed tops of the cakes with a serrated knife. Crumble the trimmings finely and set aside for decoration.
Step 9: Fill and Stack
Place the first layer on a cake plate. Spread 1 1/4 cups of frosting evenly to the edges, then set the second layer on top, bottom side up for a flat surface.
Step 10: Frost and Decorate
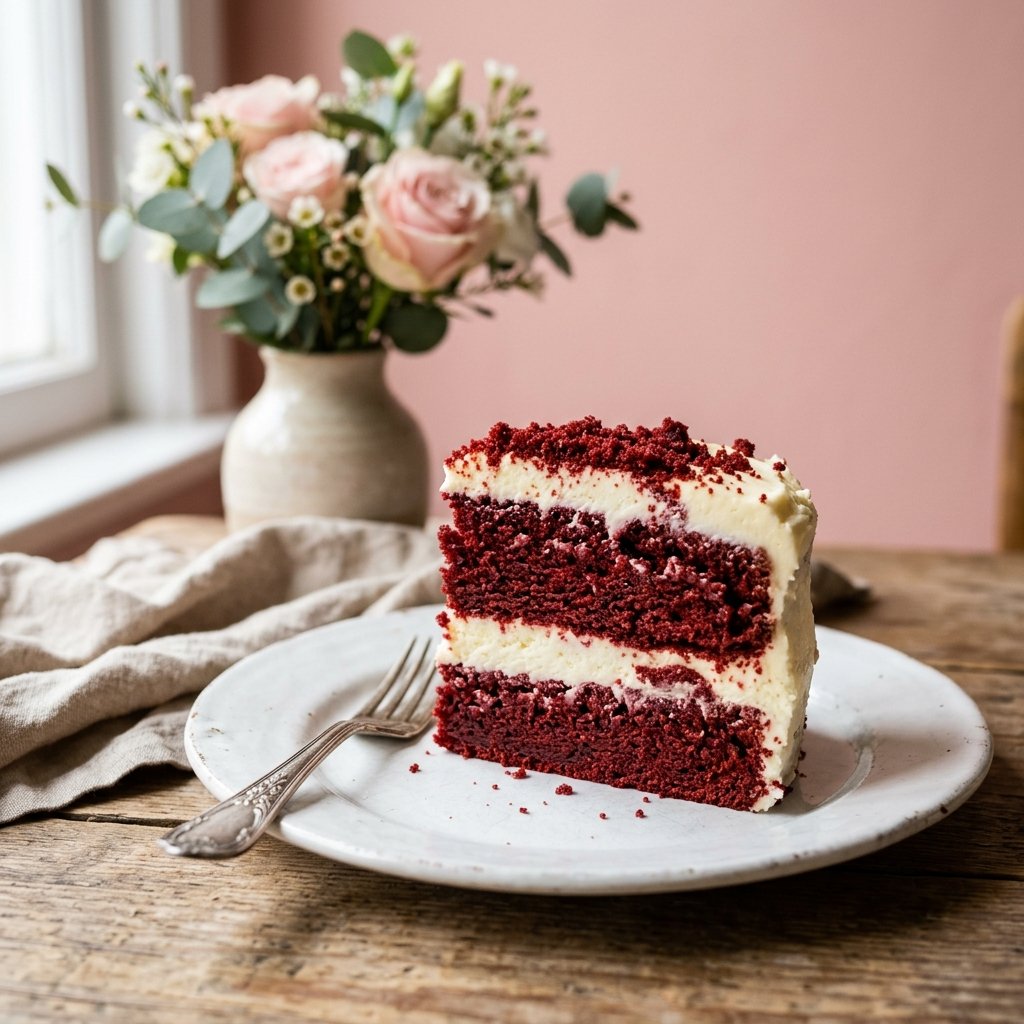
Apply a thin crumb coat, chill for 15 minutes, then cover the cake with the remaining frosting. Press the red crumbs onto the top and sides, or pile them on top as shown in the photo. Chill for 30 minutes before slicing for clean edges.
Pro Tips for the Best Red Velvet
- Use gel coloring. It gives bright color without a bitter, chemical taste.
- Do not skip the vinegar. It is essential for texture and color.
- Use cold cream cheese. Warm cream cheese makes the frosting runny.
- Use full-fat block cream cheese, not spreadable tubs.
- Weigh the batter so the layers are equal.
- Bake at the stated temperature. Too hot gives a dry, cracked cake.
- Chill before cutting for tidy slices.
- Sift the powdered sugar to avoid lumps in the frosting.
Common Mistakes and How to Fix Them
| Problem | Likely cause | Solution |
|---|---|---|
| Brownish color | Too little coloring or Dutch cocoa | Use more gel coloring and natural cocoa |
| Dry cake | Overbaking | Check 3 minutes early |
| Runny frosting | Warm cream cheese or overbeating | Chill and re-whip briefly |
| Lumpy frosting | Cold butter or unsifted sugar | Soften butter and sift sugar |
| Dense cake | Overmixing | Mix until just combined |
| Metallic taste | Too much liquid dye | Use gel coloring |
| Uneven layers | Unweighed batter | Use a scale |
Substitutions and Variations
- No buttermilk? Mix 1 cup milk with 1 tablespoon lemon juice and rest it for 10 minutes.
- No cake flour? Replace 2 tablespoons per cup of all-purpose flour with cornstarch.
- Natural coloring. Use beet powder, though the color will be less vivid and earthier.
- Cupcakes. Bake for 18 to 22 minutes to yield about 24.
- Mascarpone frosting. Swap half the cream cheese for mascarpone for a milder taste.
- White chocolate drizzle. Add elegance with a thin drizzle over the top.
- Gluten-free. Use a 1:1 gluten-free flour blend.
- Mini cakes. Cut rounds with a cookie cutter from a sheet cake.
- Sheet cake. Bake in a 9×13-inch pan for 35 to 40 minutes.
Make-Ahead, Storage and Freezing
Make ahead. The layers can be baked 2 days ahead and wrapped tightly. The frosting keeps 3 days in the fridge; beat briefly before using.
Storage. Because of the cream cheese frosting, store the cake covered in the refrigerator for up to 5 days. Let it stand at room temperature for 30 minutes before serving.
Freezing. Unfrosted layers freeze well for 3 months. Slices can be frozen individually for up to 1 month; thaw them in the fridge.
Serving Suggestions
- Serve cold or cool for the best frosting texture.
- Pair with coffee, tea or a glass of cold milk.
- Add fresh raspberries or strawberries on the plate.
- Dust the plate with cocoa powder for a polished look.
- Cut using a hot, dry knife for clean slices.
Decoration Ideas
- Classic red crumb coating.
- Heart-shaped cake for Valentine’s Day.
- Naked style with a thin layer of frosting to reveal the red layers.
- Piped swirls with a large star tip.
- White chocolate shavings over the top.
Nutrition Notes
One slice (1/12 of the cake) has about 610 calories, 38 g fat, 62 g carbohydrates and 5 g protein. Values are approximate and depend on portion size. Serving smaller slices is an easy way to enjoy it more lightly.
Frequently Asked Questions
Why is red velvet cake red? Traditionally from a reaction between cocoa and acidic ingredients, but today food coloring gives the vibrant color.
Is red velvet just chocolate cake? No. It contains much less cocoa and has a tangy, vanilla-forward flavor.
Can I use liquid food coloring? You can, but you will need much more, which may affect the flavor and batter consistency.
Can I make it without oil? Oil gives the best moisture, but you can use half oil and half melted butter.
Why is my cream cheese frosting runny? Warm ingredients or overbeating. Chill it and whisk gently.
Can I use a different pan size? Yes, three 8-inch pans will bake for 25 to 28 minutes.
How far ahead can I frost the cake? Up to 1 day before serving, kept refrigerated.
Try Our Next Recipe!
Looking for another delicious dessert? Try our Strawberry Cream Cake Recipe and enjoy another sweet homemade treat!
Final Thoughts
A well-made red velvet cake is a joy: soft, rich in color and balanced by a tangy frosting. With the right ingredients and simple techniques, you can create a stunning cake that is moist, flavorful and beautiful. Follow the tips above and you will have a recipe worth keeping forever.
If you try it, share your results in the comments and browse more recipes in our Cakes collection.
Recipe Card Summary
| Prep time | 35 minutes |
| Bake time | 30 minutes |
| Assembly | 35 minutes |
| Total time | About 2 hours 15 minutes including cooling |
| Servings | 12 slices |
| Difficulty | Easy to intermediate |
| Storage | Refrigerate up to 5 days |
