

Table of Contents
QUICK RECIPE OVERVIEW
- Prep Time: 40 minutes
- Bake Time: 32 minutes
- Assembly & Drip Time: 35 minutes
- Total Servings: 12 to 14 generous slices
- Difficulty Level: Intermediate
RECIPE INTRODUCTION
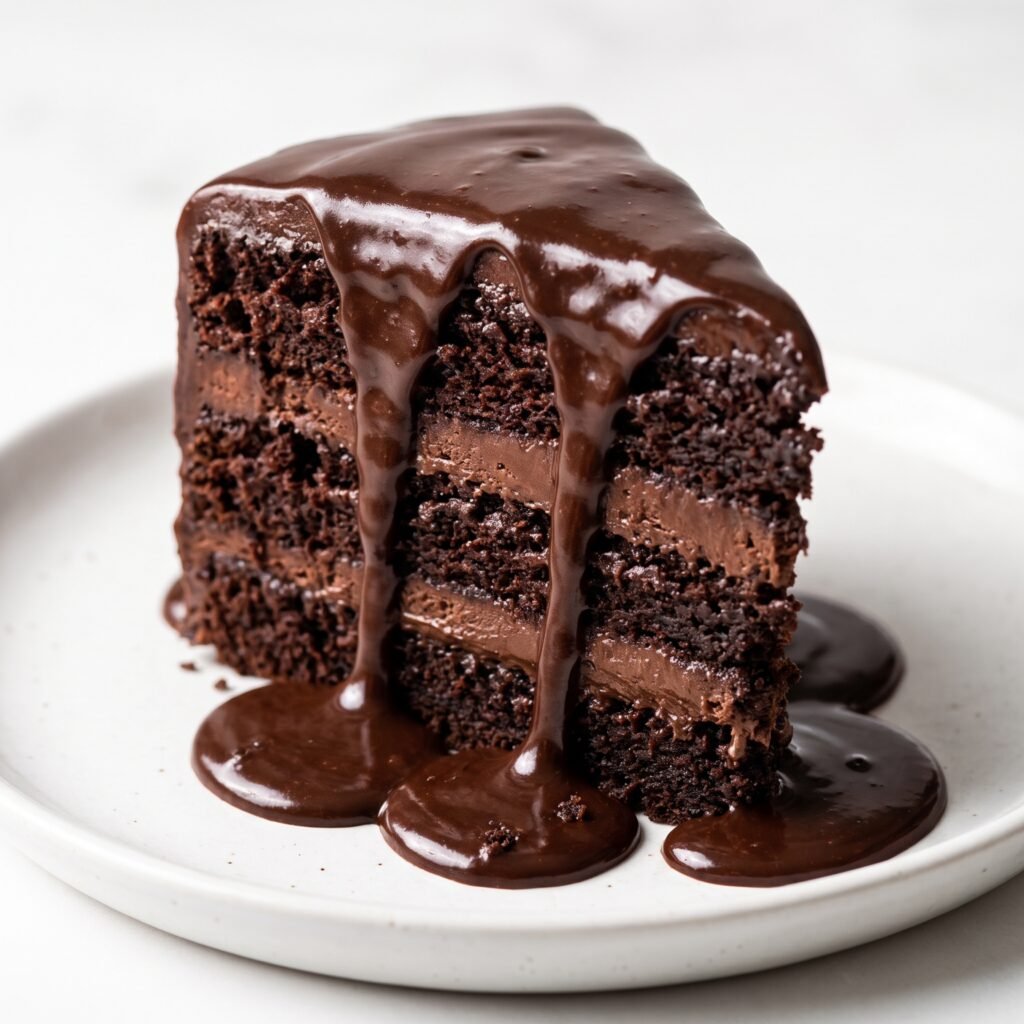
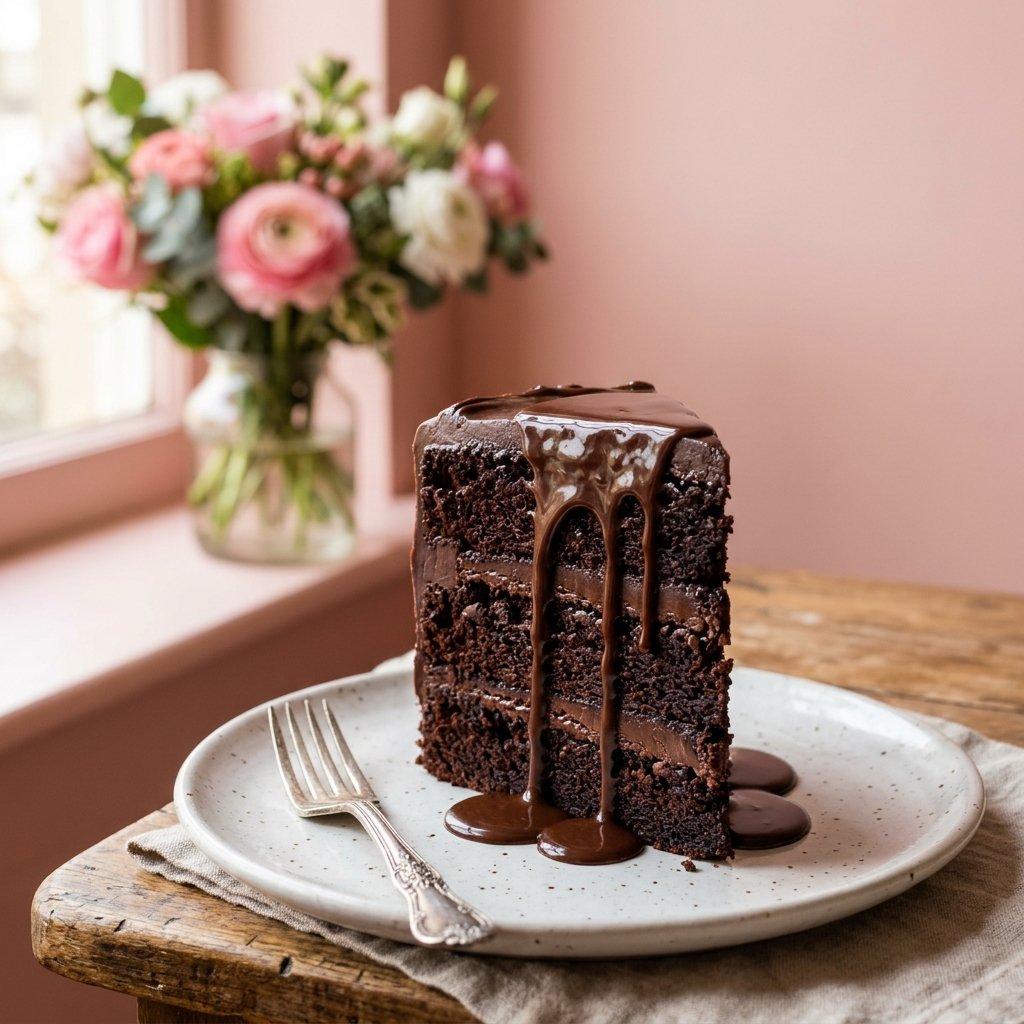
Look closely at a slice of this cake and you will immediately understand what true chocolate indulgence means. Three tall, tender layers of dark chocolate sponge are sandwiched with a velvety chocolate truffle buttercream, then completely smothered in a warm, glossy chocolate fudge sauce that cascades dramatically down the sides and pools generously on the plate.
This cake is not light, mild, or subtle; it is unapologetically rich, deeply chocolatey, and made specifically for serious chocolate enthusiasts. The warm fudge poured over the cool, velvety layers creates an irresistible temperature and texture contrast that makes every single bite feel like dining in a high-end French dessert parlor.
Whether you are celebrating a milestone birthday, hosting an intimate holiday dinner party, or simply satisfying an intense craving for chocolate, this comprehensive guide will give you all the tools, scientific kitchen secrets, and techniques to bake it flawlessly at home.
WHY THIS RECIPE WORKS
- Blooming the Cocoa Powder: We dissolve dark Dutch-process cocoa powder in hot freshly brewed coffee. The heat instantly activates the cocoa’s natural fats, eliminating bitter chalkiness and unlocking deep roasted notes.
- The Dual-Fat Sponge Technique: Combining melted butter (for authentic bakery flavor) with neutral vegetable oil (which remains 100% liquid at cold temperatures) ensures the crumb remains soft, tender, and springy even after days in the refrigerator.
- The Glossy Mirror Fudge Drip: A touch of light corn syrup (or honey) paired with heavy whipping cream and real dark chocolate guarantees a mirror-like gloss that sets smoothly without turning rubbery or hard.
- Balanced Sweetness: High-quality bittersweet chocolate and a precise dose of fine sea salt cut through the richness of the sugar, ensuring every forkful is deeply satisfying rather than cloying.
INGREDIENTS AND WHY EACH ONE MATTERS
[For the Dark Chocolate Cake Layers]
- 2 cups (250g) all-purpose flour: Provides sufficient gluten structure to support three tall cake layers while remaining light and tender.
- 2 cups (400g) granulated white sugar: Sweetens the crumb and binds moisture during baking, preventing dry edges.
- 3/4 cup (75g) unsweetened Dutch-process dark cocoa powder: Alkalized cocoa provides that signature mahogany-black color and smooth chocolate profile.
- 2 teaspoons baking powder & 1 1/2 teaspoons baking soda: The dual leavening system reacts with the acidic components to give an even, flat-topped rise without heavy doming.
- 1 teaspoon fine sea salt: Essential to balance sweetness and elevate the natural cocoa notes.
- 2 large eggs (at room temperature): Provide structure, lift, and rich emulsified fats.
- 1 cup (240ml) whole milk or buttermilk (room temperature): Adds tenderness to the crumb; buttermilk offers a subtle, pleasant tang.
- 1/2 cup (120ml) neutral vegetable oil: Locks in moisture so the cake remains soft for days.
- 2 teaspoons pure vanilla extract: Complements and deepens the dark chocolate notes.
- 1 cup (240ml) hot freshly brewed black coffee (or boiling water): Blooms the cocoa solids and thins the batter to create a melt-in-the-mouth texture.
[For the Silky Chocolate Truffle Buttercream]
- 8 oz (225g) dark chocolate (60% cacao), finely chopped: Gives genuine chocolate body to the filling.
- 1 cup (240ml) heavy whipping cream (minimum 35% fat): Creates a silky ganache base.
- 1 cup (225g) unsalted butter, softened to room temperature: Adds structure and velvety spreadability.
- 2 cups (240g) powdered sugar, sifted: Sweetens and stabilizes the frosting for easy piping.
- 1 teaspoon pure vanilla extract & pinch of salt: For rounded flavor balance.
[For the Glossy Pouring Fudge Sauce]
- 1 cup (175g) semi-sweet chocolate chips or chopped chocolate: Melts into a thick sauce.
- 1/2 cup (120ml) heavy whipping cream: Provides fluidity and rich mouthfeel.
- 2 tablespoons light corn syrup or honey: The secret to that mirror-like bakery gleam that stays shiny for hours.
- 1 tablespoon unsalted butter: Adds gloss and a silky finish.
- Pinch of flaky sea salt: Enhances the chocolate aroma.
EQUIPMENT YOU WILL NEED
- Three 8-inch (20 cm) round metal cake pans
- Parchment paper circles
- Large mixing bowls and a sturdy balloon whisk
- Handheld electric mixer or stand mixer (for the buttercream)
- Long serrated bread knife (for leveling cake tops)
- Offset spatula and a cake turntable (optional, but helpful)
- Heatproof glass bowls for melting chocolate
- Wire cooling racks
STEP-BY-STEP BAKING INSTRUCTIONS
STEP 1: PREHEAT AND PREP THE PANS
Preheat your oven to 350°F (175°C) and position the baking rack in the dead center. Lightly grease three 8-inch round cake pans with butter or baking spray. Place parchment paper circles on the bottom of each pan. Dust the pan walls with unsweetened cocoa powder instead of flour to avoid leaving pale white streaks on the dark cake crust.
STEP 2: WHISK THE DRY INGREDIENTS
In a large mixing bowl, sift together the all-purpose flour, granulated sugar, dark cocoa powder, baking powder, baking soda, and salt. Whisk vigorously for 45 seconds to break up any small cocoa clumps and ensure the leavening agents are thoroughly distributed throughout the flour.
STEP 3: ADD THE WET INGREDIENTS
Add the room-temperature eggs, milk (or buttermilk), vegetable oil, and vanilla extract directly into the dry mixture. Using a balloon whisk or an electric hand mixer on low speed, mix for 1 minute until completely smooth and thick. Scrape down the sides and bottom of the bowl with a silicone spatula.
STEP 4: BLOOM WITH HOT COFFEE
Slowly pour the hot coffee in a thin, steady stream into the batter while whisking gently. The batter will thin out considerably and turn dark, glossy, and fragrant. Do not worry about how runny it looks—this high-hydration batter is the secret to a super tender, melt-in-the-mouth texture.
STEP 5: BAKE THE SPONGES
Divide the batter evenly among the three prepared pans (about 430 grams of batter per pan for precision). Bake on the middle rack for 30 to 35 minutes. Test doneness by inserting a wooden skewer into the center—it should emerge clean or with a few moist crumbs attached.
STEP 6: COOL THOROUGHLY
Let the cake pans rest on a wire rack for 15 minutes. Run a thin offset spatula around the edges, carefully invert the cakes onto the rack, peel off the parchment paper, and let them cool completely to room temperature (about 1 hour). Wrap each layer in plastic wrap and chill in the refrigerator for 30 minutes before assembly. Cold layers are firm and do not crumble during frosting.
STEP 7: MAKE THE CHOCOLATE TRUFFLE BUTTERCREAM
Place the finely chopped chocolate in a heatproof bowl. In a small saucepan, bring the heavy cream just to a simmer over medium heat. Pour the hot cream over the chocolate and let sit undisturbed for 2 minutes. Whisk gently from the center outward until smooth and glossy. Let this ganache cool to room temperature. In a separate bowl, beat the softened butter for 2 minutes until creamy, then beat in the cooled ganache, sifted powdered sugar, vanilla, and salt until light, fluffy, and spreadable.
STEP 8: ASSEMBLE THE CAKE LAYERS
If the tops of the cakes are slightly domed, trim them level using a long serrated knife. Place the first layer on a cake board or serving platter. Spread about 1 cup of chocolate buttercream evenly across the top. Place the second layer on top, press gently, and spread another cup of buttercream. Top with the third cake layer placed upside down (so the flat pan bottom becomes the top surface).
STEP 9: CRUMB COAT AND CHILL
Spread a very thin layer of buttercream over the top and sides of the cake using an offset spatula to trap any loose crumbs. Place the cake into the refrigerator for 20 minutes to set firmly. Once chilled, apply the remaining buttercream, smoothing the sides with a bench scraper or creating rustic texture with the back of a spoon.
STEP 10: MAKE THE WARM FUDGE SAUCE
In a microwave-safe bowl, combine the chocolate chips, heavy cream, corn syrup, and butter. Microwave in 20-second bursts, stirring thoroughly between each burst, until completely melted, shiny, and smooth. Let the sauce rest on the counter for 5 to 7 minutes until lukewarm and pourable (it should coat the back of a spoon cleanly).
STEP 11: THE DRAMATIC SERVING POUR
Slice individual portions of the cake and place them onto vintage dessert plates. Generously spoon or pour the warm chocolate fudge sauce directly over the top of each slice, allowing it to cascade down the sides and pool in rich puddles around the base, exactly as shown in the picture. Serve immediately while the sauce is warm and glossy!
EXPERT BAKING TIPS FOR SUCCESS
- Temperature is everything: Pour the fudge sauce when it is lukewarm. If it is too hot, it will melt the cake filling; if it is too cold, it will not drape smoothly.
- Quality of cocoa: Dutch-process cocoa gives this cake that dark, bakery-style mahogany appearance and deep chocolate richness.
- Clean cuts: Use a long chef’s knife dipped in boiling water and wiped completely dry before making every slice.
- Chill the cake before slicing: A cold cake holds its shape perfectly when cut with a warm knife, giving you razor-sharp layer definition.
COMMON MISTAKES & TROUBLESHOOTING
- Problem: The cake layers domed significantly in the oven.
Cause: The oven temperature was too high, causing the outer edges to set before the center finished rising. Use an oven thermometer to verify 350°F (175°C). - Problem: The chocolate fudge sauce is too thick to pour.
Cause: It cooled down too much. Microwave it for 5 to 8 seconds and stir until warm and fluid again. - Problem: The buttercream feels grainy or stiff.
Cause: The powdered sugar was not sifted, or the butter was too cold. Let it warm slightly and beat for an extra 2 minutes.
STORAGE & REHEATING INSTRUCTIONS
- Refrigerator: Keep leftover frosted cake in an airtight cake keeper or covered with an inverted bowl for up to 5 days.
- Room Temperature: Bring chilled cake slices to room temperature for 20 minutes before serving for the softest crumb texture.
- Freezing: Unfrosted chocolate sponges freeze beautifully for up to 3 months. Wrap tightly in plastic wrap and aluminum foil.
- Reheating the Fudge Sauce: Store extra fudge sauce in a glass jar in the fridge for up to 2 weeks. Microwave for 15 seconds whenever you want to pour warm sauce over fresh slices.
Try Our Next Recipe!
Looking for another delicious dessert? Try our Strawberry Cream Cake Recipe and enjoy another sweet homemade treat!
FREQUENTLY ASKED QUESTIONS (FAQS)
Q: Can I taste the coffee in the baked cake?
A: Not at all. The coffee acts as a flavor amplifier for the cocoa beans. If you are baking for children or prefer to avoid coffee, substitute an equal amount of boiling water.
Q: Can I bake this recipe in two 9-inch pans instead of three 8-inch pans?
A: Yes! Bake in two 9-inch round pans at 350°F (175°C) for 32 to 36 minutes.
Q: Can I make the fudge sauce ahead of time?
A: Absolutely. Make it days in advance and keep it refrigerated. Gently warm it in the microwave or over a double boiler before drizzling over the cake.
Q: Why did my fudge sauce separate or look greasy?
A: The cream was overheated. To fix separated chocolate sauce, whisk in 1 teaspoon of warm milk vigorously until it comes together into a silky emulsion.
Q: Can I freeze the cake fully assembled?
A: Yes, you can freeze the frosted cake (without the warm fudge pour). Flash freeze for 1 hour until firm, wrap in plastic, and freeze for up to 1 month. Thaw overnight in the refrigerator.
