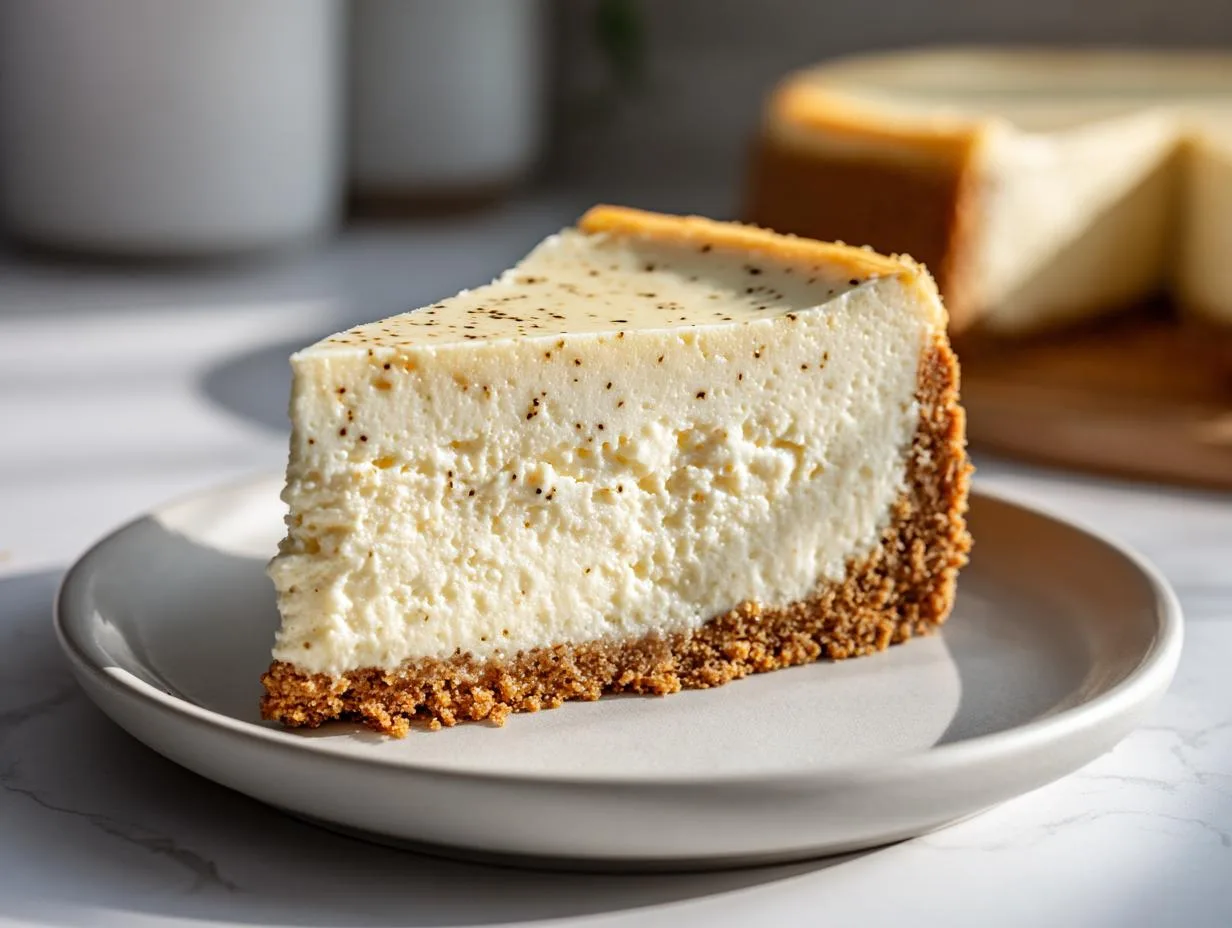
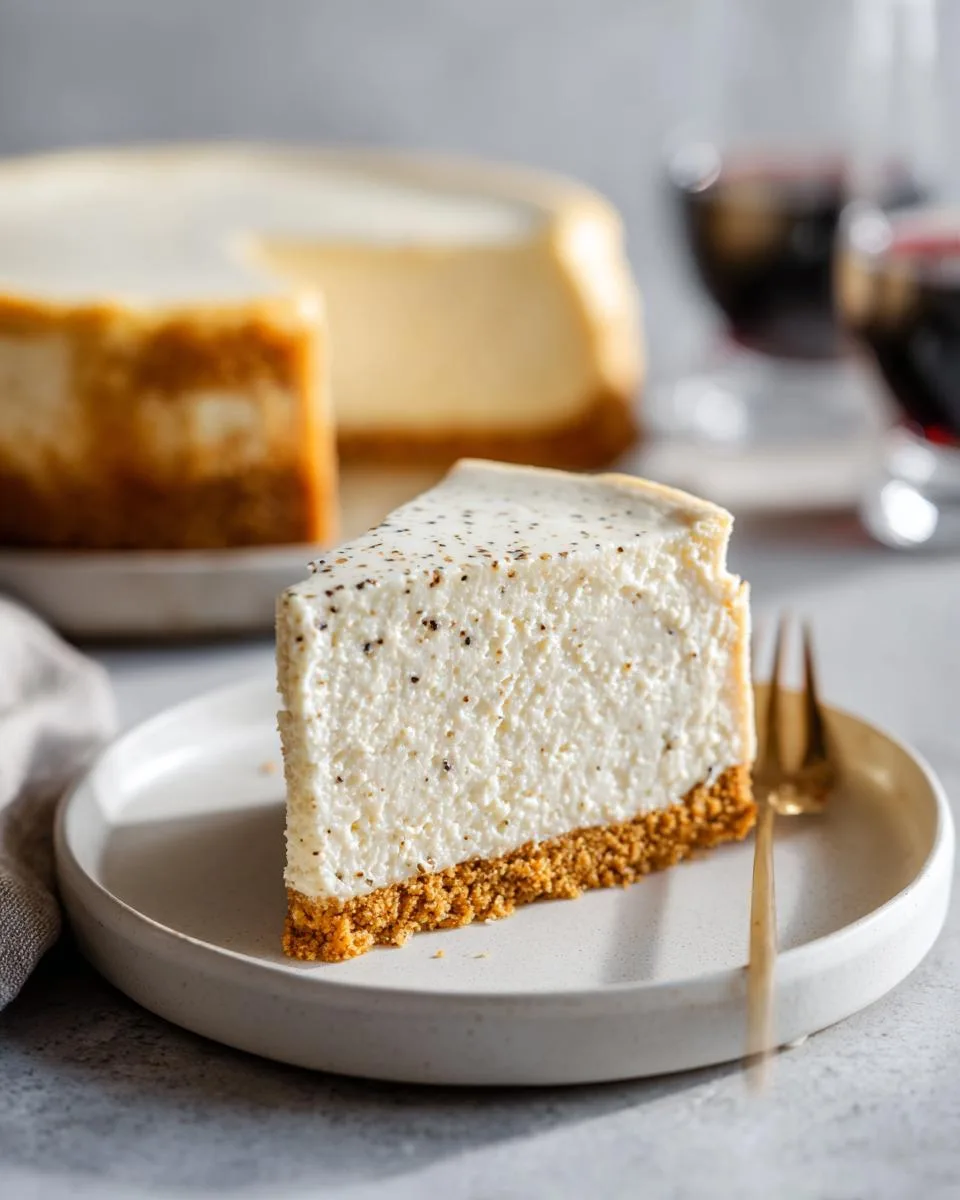
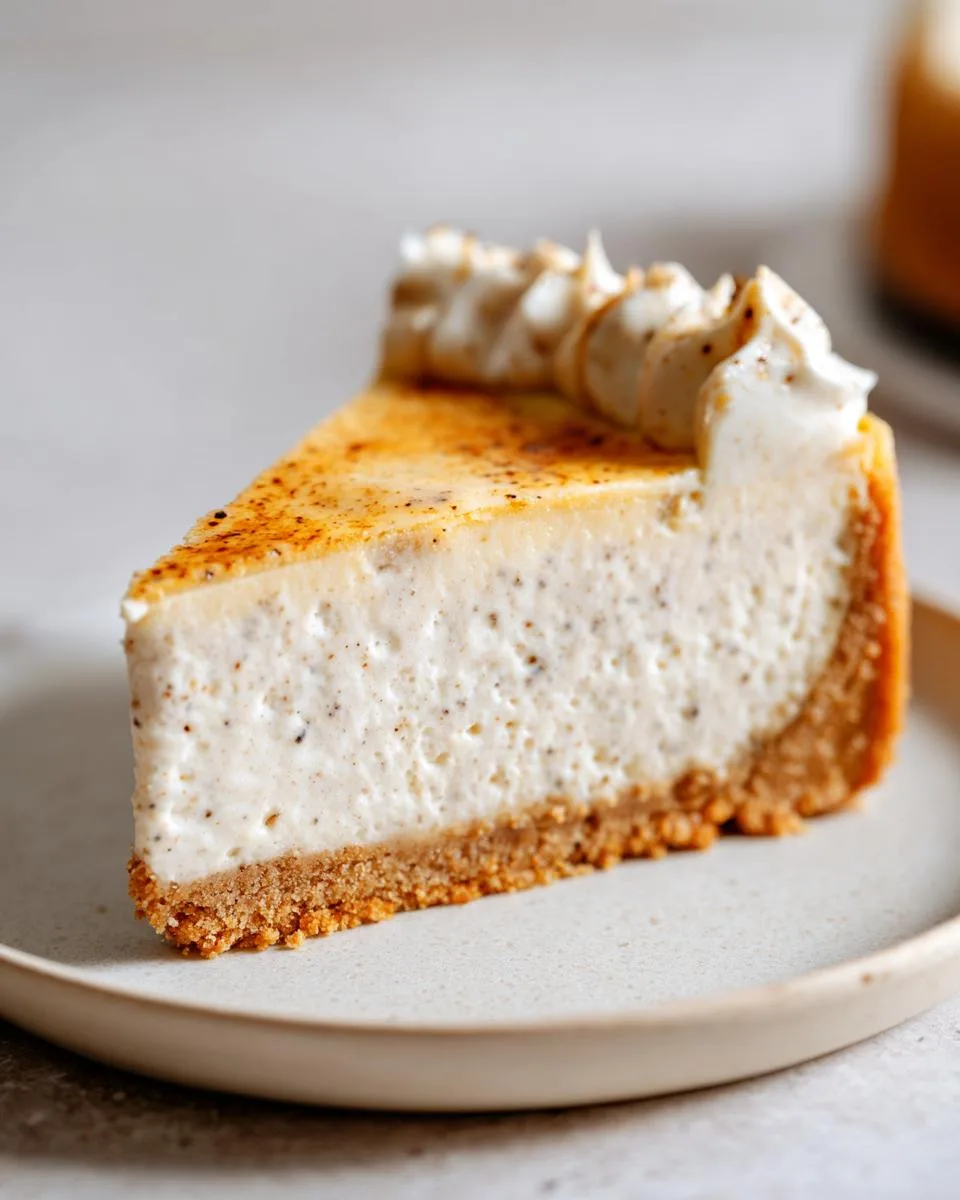
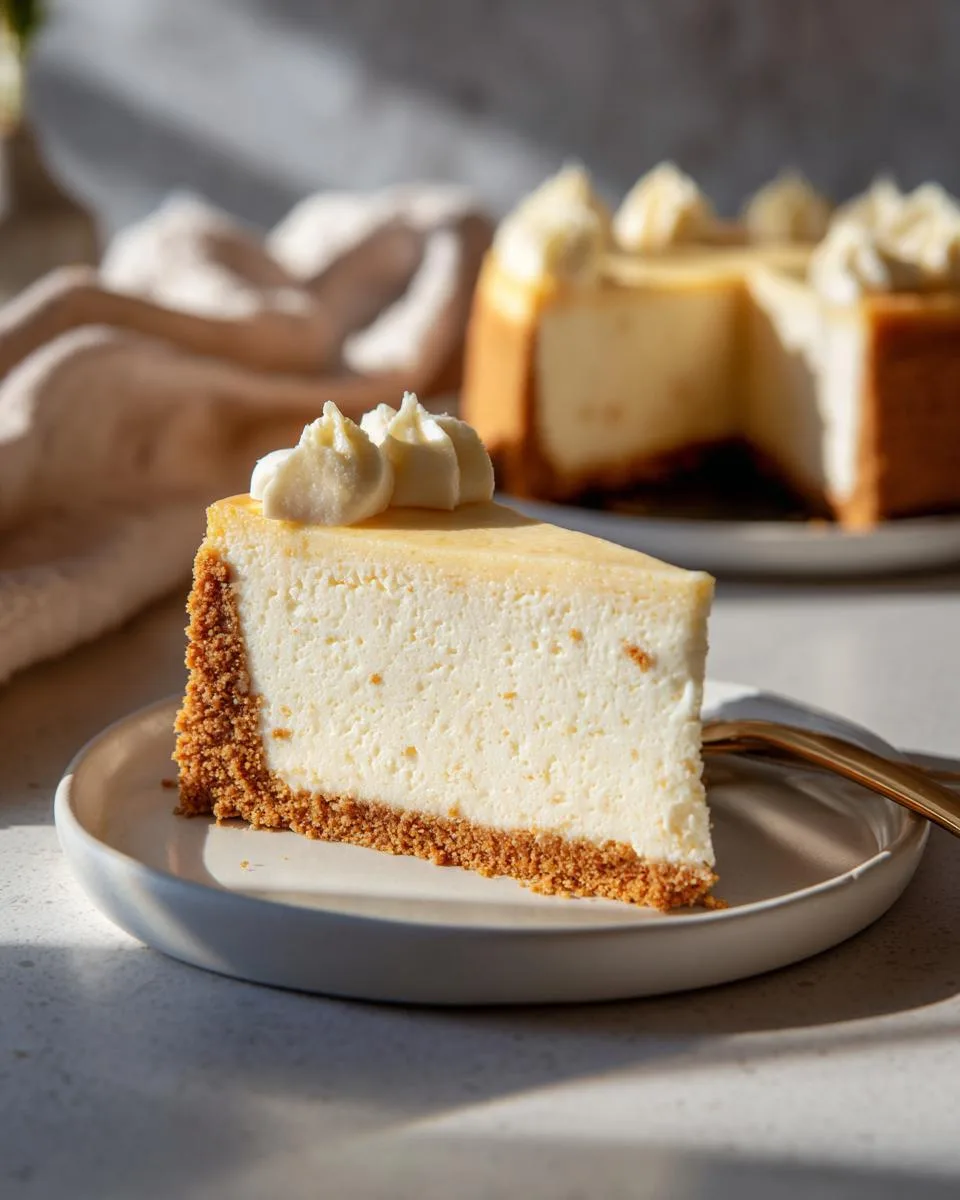
There’s something magical about slicing into a perfect vanilla bean cheesecake – that first glimpse of creamy filling flecked with real vanilla seeds gets me every time. I’ll never forget the first time I made this for my sister’s birthday – her eyes lit up when she tasted that rich, velvety texture with just the right balance of sweet and vanilla. Now it’s our family’s go-to celebration dessert. What makes this vanilla bean cheesecake special? It’s all about using real vanilla bean paste (none of that artificial stuff!) and taking your time to let the flavors develop. Trust me, once you try this version, you’ll never go back to boxed mixes. Check out more of my favorite dessert recipes if you’ve got a sweet tooth like me!
Why You’ll Love This Vanilla Bean Cheesecake
Oh honey, let me tell you why this vanilla bean cheesecake will become your new obsession. First off, that creamy texture – it’s like velvet on your tongue! The vanilla bean paste gives it such an incredible depth of flavor that’ll make you swoon. And the crust? That buttery graham cracker base is the perfect crunchy contrast to the smooth filling. Here’s what makes it so special:
- Creamy dreamy texture – So smooth it practically melts in your mouth
- Real vanilla flavor – Those beautiful little specks of vanilla bean make all the difference
- Easy prep – No water bath needed (hallelujah!)
- That crust though – Just sweet enough with a satisfying crunch
- Impressive yet simple – Looks fancy but comes together with basic ingredients
Seriously, this cheesecake is foolproof and always gets rave reviews. It’s the kind of dessert that makes people think you spent hours in the kitchen, when really it’s just a matter of mixing, baking, and letting it chill. My secret? I always make it the day before – the flavor gets even better overnight!
Ingredients for Vanilla Bean Cheesecake
Alright, let’s gather our goodies! I’ll walk you through everything you’ll need for this heavenly vanilla bean cheesecake. The ingredients are simple but oh-so-important – quality really matters here. I’ve broken it down into the crust and filling because that’s how my grandma taught me to organize my baking prep. Trust me, having everything measured and ready before you start makes the whole process so much smoother (and less chaotic in my tiny kitchen!).
For the Crust
This buttery graham cracker crust is the perfect foundation for our creamy cheesecake. Here’s what you’ll need:
- 1.5 cups graham cracker crumbs – I like to crush mine fresh for extra texture
- ¼ cup granulated sugar – Just enough sweetness to balance the tangy filling
- 6 tbsp unsalted butter, melted – The glue that holds our crust together
Pro tip: If you’re feeling fancy, you can swap half the graham crackers for vanilla wafers – it adds such a nice flavor!
For the Filling
Now for the star of the show – that luscious vanilla bean filling. Make sure your cream cheese is properly softened (I leave mine out overnight) for the smoothest texture:
- 24 oz cream cheese, softened – Full-fat only, please! This is dessert, not diet food
- 1 cup granulated sugar – Sweetens without overpowering the vanilla
- 1 tbsp vanilla bean paste – Those beautiful little specks make all the difference
- 3 large eggs, room temperature – Helps create that perfect dense-yet-creamy texture
- ¾ cup sour cream – The secret to that irresistible tang and velvety mouthfeel
See? Nothing too crazy – just good, honest ingredients that come together to make something magical. Now let’s get mixing!
How to Make Vanilla Bean Cheesecake
Okay friends, let’s dive into making this dreamy vanilla bean cheesecake! I’ll walk you through each step like I’m right there in the kitchen with you. The key is taking your time – rushing a cheesecake is like trying to hurry a good nap, it just doesn’t work. Follow these steps and you’ll have the creamiest, most velvety dessert that’ll make you feel like a baking pro!
Preparing the Crust
First things first – that buttery graham cracker base! In a medium bowl, mix your crumbs and sugar until they’re best friends. Then drizzle in the melted butter while stirring – you want it to look like wet sand. Dump it all into your greased springform pan and press it down firmly with the back of a measuring cup. I go up the sides about an inch for extra crunch. Pop it in the oven at 325°F for 10 minutes, then let it cool completely. This little bake gives the crust that perfect toasty flavor.
Making the Filling
Now for the good stuff! Beat your softened cream cheese in a stand mixer (or with a hand mixer) until it’s completely smooth – no lumps allowed! Scrape down the sides a few times to be thorough. Add the sugar and vanilla bean paste, mixing until just combined. Oh, that vanilla speckled batter already looks gorgeous! Add eggs one at a time, mixing after each until incorporated but not overmixed. Finally, gently fold in the sour cream until the batter is silky smooth. Pro tip: resist the urge to overmix here – we want creamy, not tough!

Baking and Chilling
Pour that luscious filling over your cooled crust and smooth the top. Bake for 50-60 minutes until the edges are set but the center still jiggles slightly. Here’s the important part – turn off the oven, crack the door, and let it cool inside for an hour. This prevents cracks! Then transfer to the fridge for at least 4 hours (overnight is even better). I know it’s hard to wait, but trust me, that chilling time makes all the difference in texture. Your patience will be rewarded with the creamiest slice of heaven!
Tips for the Perfect Vanilla Bean Cheesecake
Listen up, buttercup – I’ve made enough cheesecakes to know exactly what makes them fail or shine! First rule: room temp ingredients are non-negotiable. Cold cream cheese = lumpy filling, and nobody wants that. When mixing, go easy – overbeating introduces too much air and leads to cracks. My trick? Stop the mixer the moment everything’s combined. Oh! And always run a knife around the edge after baking – it prevents that dreaded “cheesecake cliff” when you remove the pan. Last pro tip? Resist cutting into it too soon! That 4-hour chill time is what gives you those clean, Instagram-worthy slices.
Serving and Storing Vanilla Bean Cheesecake
Oh, the fun part – serving this beauty! I love topping slices with fresh berries (raspberries are my fave) and a dollop of whipped cream – that tart fruit cuts through the richness perfectly. For special occasions, I’ll drizzle some salted caramel or chocolate sauce too. Leftovers? Ha! Like there ever are any… but if you’re disciplined, wrap slices tightly in plastic and they’ll keep in the fridge for up to 5 days. The flavor actually gets better by day two!
Nutritional Information for Vanilla Bean Cheesecake
Now, I’m no nutritionist, but here’s the deal – this is dessert, not health food! Nutritional values can vary based on your specific ingredients and brands. A typical slice has about 380 calories, but let’s be real – it’s worth every single one of those creamy, vanilla-speckled bites!
Frequently Asked Questions
What’s the difference between vanilla extract and vanilla bean paste in cheesecake?
Oh honey, vanilla bean paste is the real MVP here! While extract gives flavor, the paste has those gorgeous little vanilla bean specks that make your cheesecake look and taste extra special. The flavor’s richer too – like vanilla extract’s fancy cousin. I always splurge on the good paste for this recipe, but in a pinch, you can use 2 teaspoons of extract instead of 1 tablespoon paste.
Why did my cheesecake crack in the middle?
Don’t panic – we’ve all been there! Cracks usually happen from overmixing (too much air) or cooling too fast. That’s why I always let mine cool gradually in the turned-off oven. If it does crack? Just cover it with berries or whipped cream – no one will know! The taste is still amazing, I promise.
Can I freeze vanilla bean cheesecake?
Absolutely! Wrap individual slices tightly in plastic wrap, then foil, and they’ll keep for up to 2 months. Thaw overnight in the fridge when cravings strike. Pro tip: freeze some slices before your next party – future you will be so grateful when unexpected guests show up!
How do I know when the cheesecake is done baking?
Look for set edges with a slight jiggle in the center – like jello that’s almost set. The center will firm up as it chills. And resist the toothpick test! Unlike cakes, we don’t want it to come out completely clean. About 50-60 minutes at 325°F is usually perfect in my oven.

Vanilla Bean Cheesecake
Ingredients
Equipment
Method
- Preheat the oven to 325°F (160°C). Grease a 9-inch springform pan.
- Mix graham cracker crumbs, sugar, and melted butter. Press firmly into the bottom of the pan.
- Bake the crust for 10 minutes. Remove and let cool.
- Beat cream cheese until smooth. Add sugar and vanilla bean paste, mixing well.
- Add eggs one at a time, mixing after each addition. Stir in sour cream.
- Pour filling over the crust. Bake for 50-60 minutes until the center is set.
- Turn off the oven and let the cheesecake cool inside for 1 hour. Chill for at least 4 hours before serving.
Nutrition
Notes
Tried this recipe?
Let us know how it was!For more amazing recipes, be sure to check out our other sections to explore a variety of ideas that will enrich your cooking experience. Each section offers its own unique flavors to ensure a delightful culinary journey:
Easy and Quick Recipes: A collection of dishes that guarantee delicious meals with minimal effort and time.
Healthy Recipes: Discover healthy and delicious options that fit your lifestyle.
Desserts: A diverse selection of sweets that will add a special touch of sweetness to your table.
Lunch Recipes: Tasty lunch ideas that you can easily prepare to delight your family.
Dinner Recipes: Delicious and easy-to-make recipes that will make your dinner a memorable occasion.