There’s something magical about baking Valentine’s cookies that just makes my heart skip a beat. Maybe it’s the way the kitchen fills with the sweet scent of vanilla as I roll out the dough, or how my kids’ faces light up when they see those perfect little hearts fresh from the oven. These aren’t just cookies – they’re edible love notes, simple yet so special. I’ve been making this exact recipe every February since my first Valentine’s Day with my husband (who still swears they’re better than any store-bought chocolates). Whether you’re surprising your sweetheart or hosting a galentine’s dessert party, these treats spread joy with every buttery, heart-shaped bite.
Why You’ll Love These Valentine’s Cookies
Oh my gosh, let me count the ways I adore these heart-shaped delights! First off, they’re ridiculously simple to whip up – we’re talking 20 minutes of prep tops, and that includes chasing my toddler away from eating all the sprinkles. The dough comes together like a dream, and you can customize the decorations to match your mood or occasion. Pink icing and glitter today, elegant red drizzle tomorrow!
But here’s my favorite part – these cookies make the sweetest handmade gifts. Just last year, my neighbor teared up when I surprised her with a box tied with red ribbon. Kids go absolutely wild for them too (though fair warning – you might want to double the batch if little hands are involved). And trust me, nobody can resist that perfect buttery texture combined with the sweet vanilla glaze. They’re like edible hugs!
Best of all? This recipe is so forgiving. Mess up the hearts? Those become “rustic” cookies. Don’t have food coloring? A simple powdered sugar dusting looks gorgeous. That’s what I call baking without stress – just pure Valentine’s Day joy.
Ingredients for Valentine’s Cookies
Okay, let’s talk ingredients – because trust me, these little details make all the difference in your Valentine’s cookies! I’ve learned the hard way that using cold butter straight from the fridge leads to sad, crumbly dough, and skimping on vanilla extract just breaks my heart. Here’s exactly what you’ll need, divided into two simple groups:
For the Cookies
- 1 cup unsalted butter – softened (leave it out for 30 minutes or give it a 10-second microwave zap if you’re impatient like me)
- 1 cup granulated sugar – regular white sugar works perfectly here
- 1 large egg – straight from the fridge is fine, but room temp blends better
- 1 tsp vanilla extract – the real stuff, please! Imitation vanilla makes me weep
- 3 cups all-purpose flour – spoon it into the measuring cup, don’t scoop!
- 1/2 tsp salt – just a pinch to balance the sweetness
For Decoration
- 1 cup powdered sugar – sift it if you want super smooth icing
- 2 tbsp milk – any kind works, I often use almond milk
- 1/2 tsp vanilla extract – yes, more vanilla! It makes the icing sing
- Food coloring – optional but oh-so-fun (pink and red are my Valentine’s staples)
- Sprinkles – optional, but let’s be real – sprinkles equal joy
See? Nothing fancy or hard-to-find here. Just simple, quality ingredients that come together to create magic. Pro tip from my many cookie disasters: measure everything before you start mixing. There’s nothing worse than realizing you’re out of vanilla when your dough is half-made!
How to Make Valentine’s Cookies
Alright, let’s get those heart-shaped beauties in the oven! I promise this process is as joyful as eating the cookies themselves (though my kids might argue that point). Here’s exactly how I make my famous Valentine’s cookies, step by cozy step:
- Preheat your oven to 350°F (175°C) – trust me, starting with a properly heated oven makes all the difference. Line your baking sheets with parchment paper while you’re at it – no sticking and easy cleanup!
- In your mixing bowl, cream together the softened butter and sugar until the mixture turns light and fluffy. I use my trusty wooden spoon for about 2 minutes (it’s my arm workout for the day), but a mixer works too if you’re short on time.
- Beat in the egg and vanilla extract – watch as everything comes together beautifully! The vanilla scent at this point is heavenly.
- Now, gradually mix in the flour and salt. I add about 1 cup at a time to prevent flour explosions (learned that the messy way). The dough should pull together nicely – not too sticky, not too dry.
- Time to roll! Sprinkle some flour on your counter and roll the dough to about 1/4-inch thickness. Pro tip: place wax paper on top while rolling for perfectly smooth cookies without sticking to the rolling pin.
- Now for the fun part – cut out heart shapes with your cookie cutter! Place them about 1 inch apart on your prepared baking sheets. Leftover dough? Just ball it up and roll again.
- Bake for 8-10 minutes until the edges get that perfect light golden hue. They’ll look slightly underdone in the center – that’s okay! They firm up as they cool.
- Let the cookies rest on the baking sheet for 2 minutes before transferring to wire racks to cool completely. Resist tasting now – the decorations will slide right off warm cookies!
- For the icing, whisk together powdered sugar, milk, and vanilla until smooth. Want pink? Add a few drops of food coloring and stir like crazy. Now the real artistry begins!
- Decorate to your heart’s content! I use a piping bag (or a ziplock with the corner snipped) for neat edges, then go wild with sprinkles while the icing’s still wet. So satisfying!
Tips for Perfect Valentine’s Cookies
After more heart cookies than I can count, here are my absolute can’t-live-without tips:
- Chill sticky dough for 30 minutes before rolling if it’s too soft (hot kitchen problems). It makes cutting those perfect hearts so much easier!
- For cookies that don’t spread, make sure your dough isn’t too warm when baking. If in doubt, pop the cutout cookies in the fridge for 10 minutes before baking.
- Your dough should feel like playdough – holds its shape but isn’t crumbly. Too dry? Add a teaspoon of milk. Too wet? A sprinkle more flour.
- Decorating secret: let the base layer of icing dry for 15 minutes before adding designs on top. And always make extra icing – you’ll want to dunk an extra cookie or two!
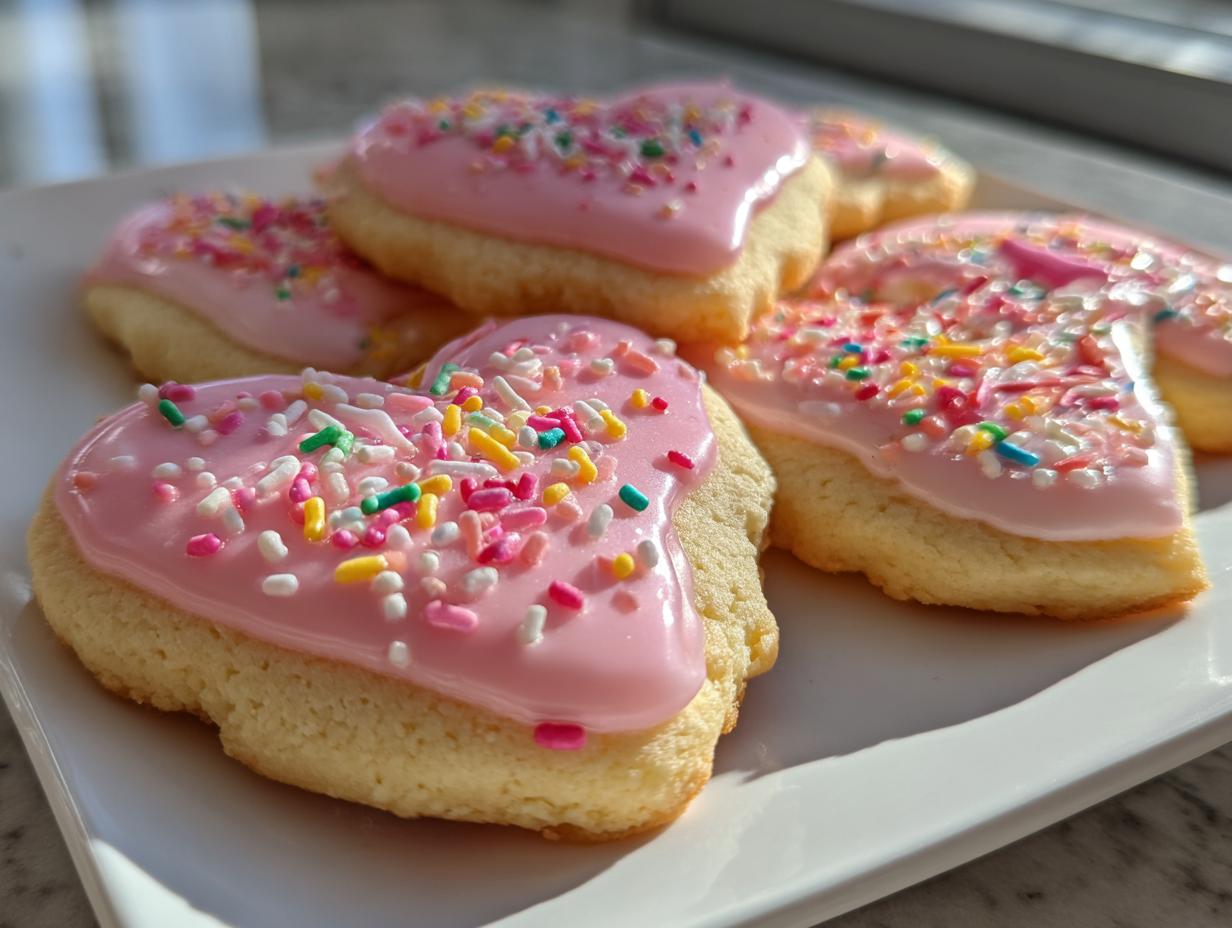
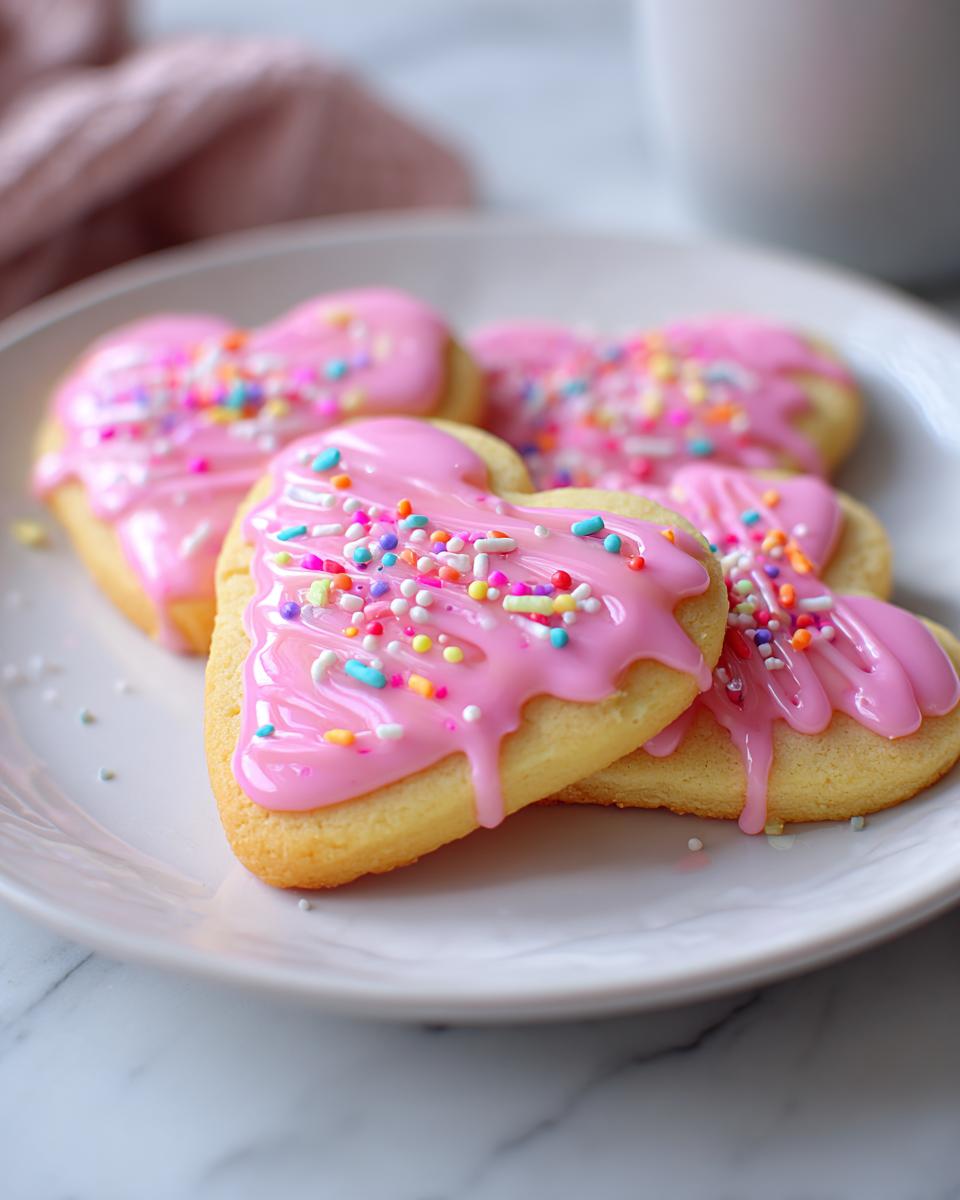
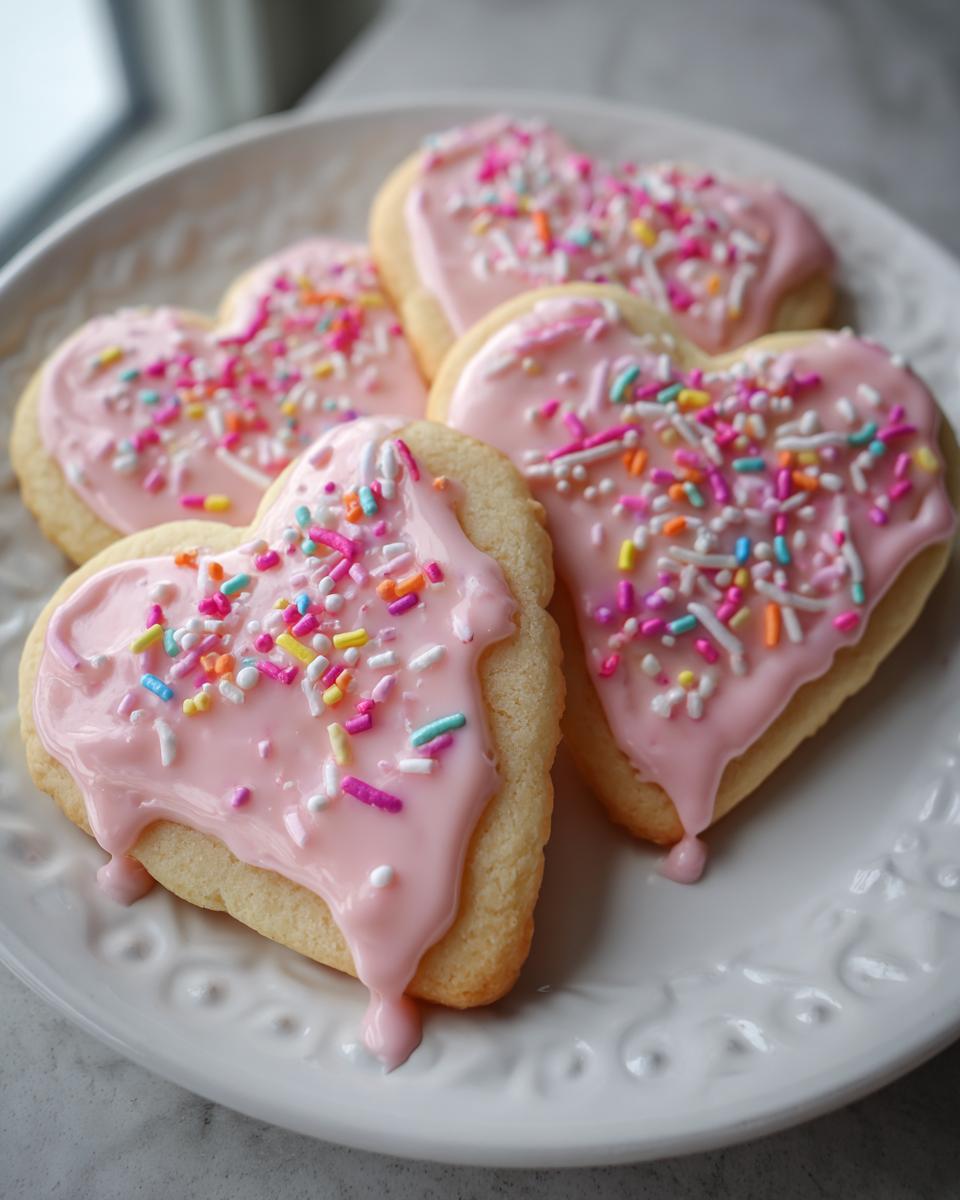
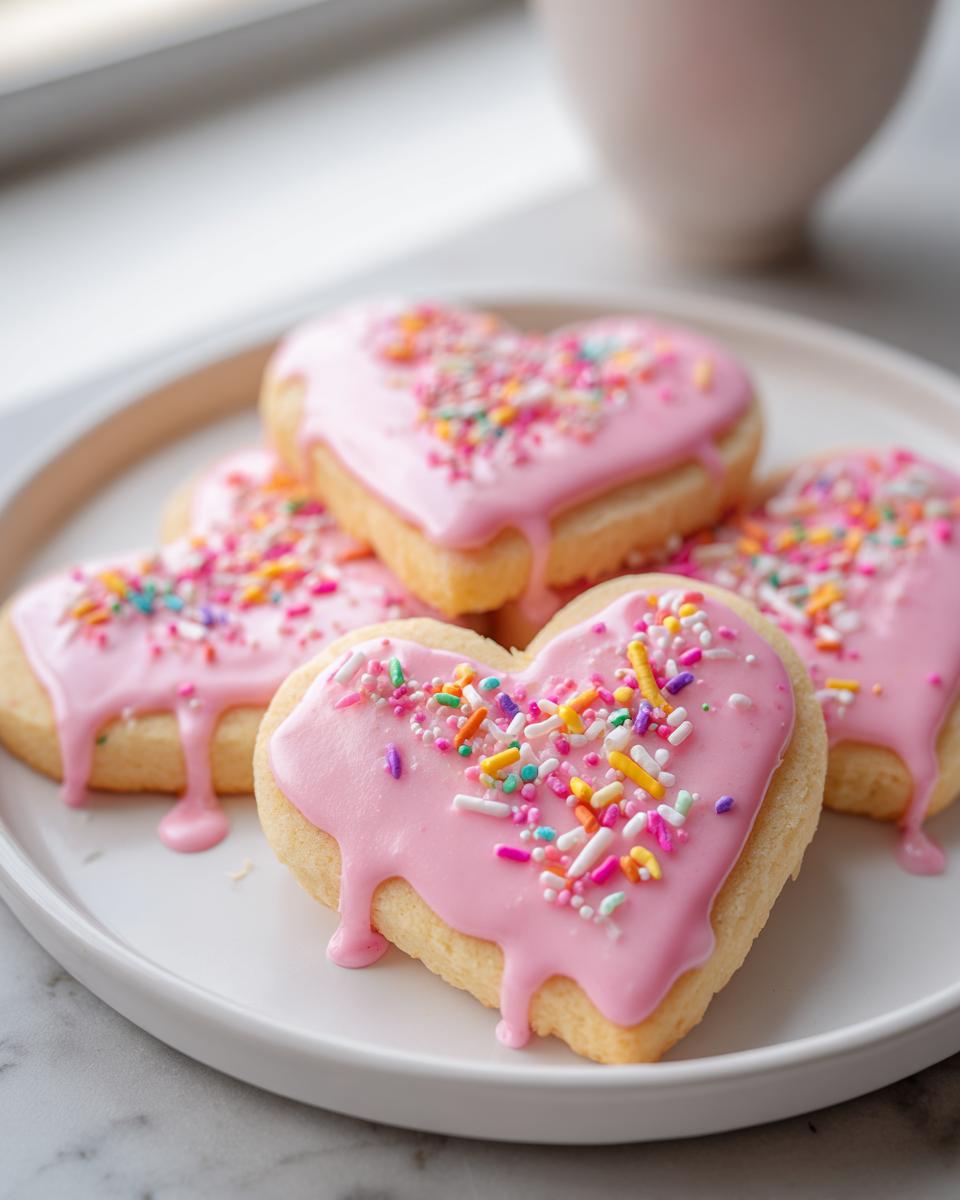
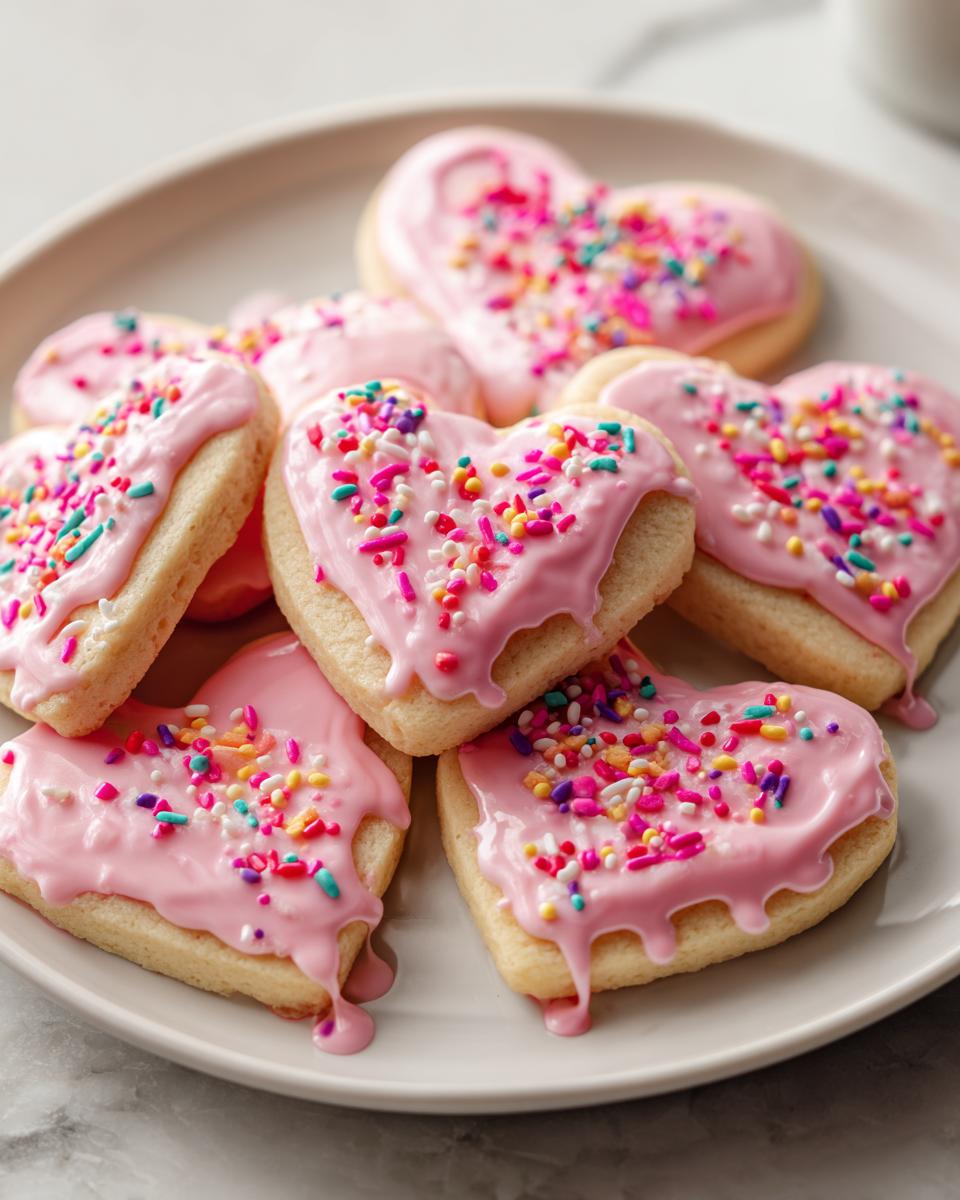
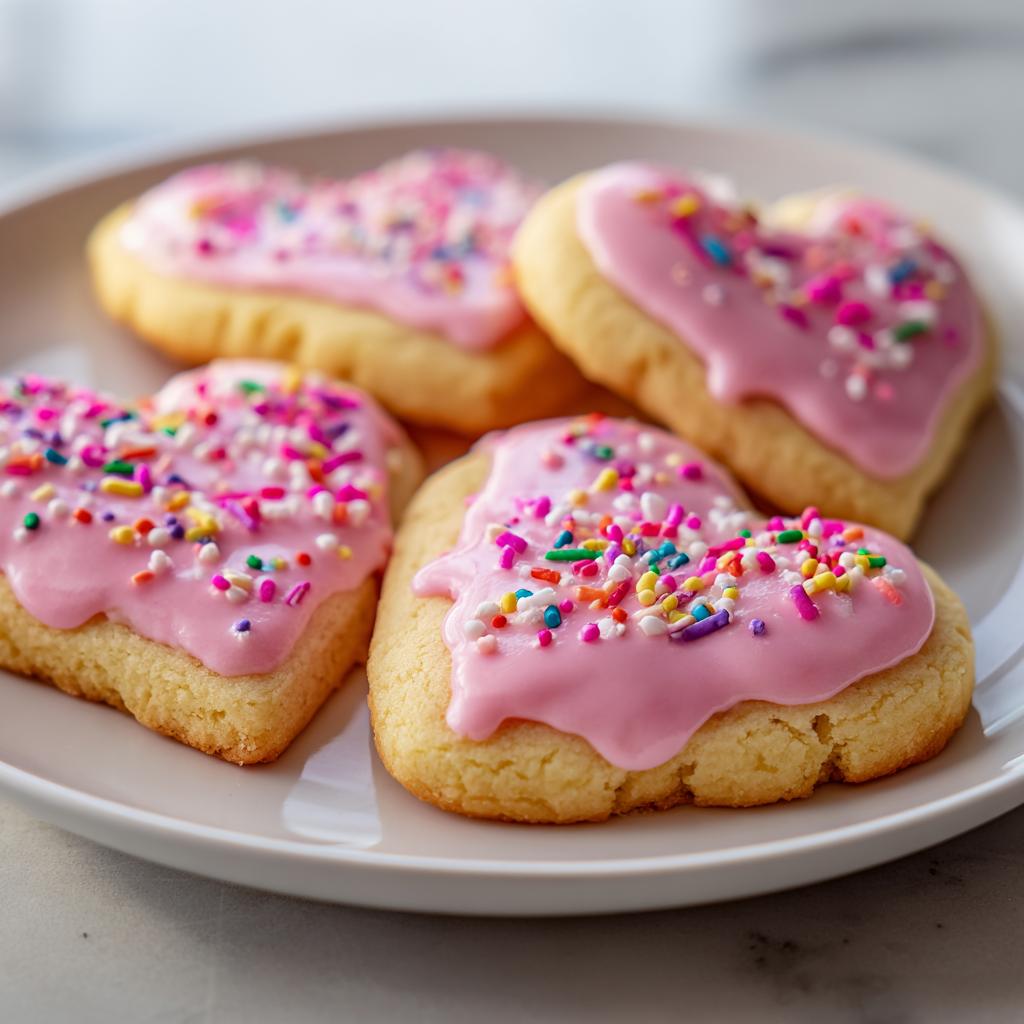
Decorating Ideas for Valentine’s Cookies
Oh, decorating these heart cookies is where the real magic happens! I still remember the year my then-4-year-old declared we needed “rainbow Valentine’s cookies” and proceeded to use every color in the food dye kit. They looked like a unicorn sneezed on them, but her proud smile made them the prettiest cookies ever. Here’s how I decorate now (with slightly more restraint):
Start with a simple glaze – just powdered sugar, milk, and vanilla whisked smooth. Divide it into bowls and tint with food coloring. Pink and red are classics, but don’t be afraid to try lavender or pale yellow for something different. Use a piping bag (or a ziplock with the corner snipped) to outline your hearts first, then flood the centers. While the icing’s still wet, shower them with sprinkles – red sugar crystals, tiny hearts, or even edible glitter for extra sparkle!
Want to get fancy? Pipe little messages like “XOXO” or initials once the base layer dries. Last year, I did a batch with “Galentine’s” in gold for my girlfriends – they went nuts over them! Or try the marbling technique: dot different colored icings together and swirl gently with a toothpick. Every cookie becomes a unique edible masterpiece.
My husband’s favorite? The “strawberry” cookies where I mix a drop of red food coloring with the vanilla icing (but not too much – you want that soft pink) and sprinkle with crushed freeze-dried strawberries. The tartness balances the sweetness perfectly. Whatever you choose, remember – there are no rules when it comes to spreading cookie love!
Storing and Freezing Valentine’s Cookies
Let’s talk cookie preservation – because let’s face it, these sweethearts deserve to last! My trick? Always stash them in an airtight container – I use my grandma’s old cookie tin, but any sealed container works. They’ll stay fresh and delicious for up to 5 days at room temp (if they last that long!). Just layer them between sheets of parchment paper to prevent icing smudges – learned that after my “pink polka dot disaster” of 2019!
Want to get ahead? You can freeze both the dough and baked cookies. For dough, I roll it out, cut my hearts, then freeze them flat on a baking sheet before transferring to freezer bags. When Valentine’s Day sneaks up on me (every year!), I just pop the frozen shapes directly in the oven – no thawing needed! Baked cookies? Freeze them undecorated first, then add icing after thawing overnight at room temp.
Important thawing note: if you freeze decorated cookies, expect some icing condensation – they’ll still taste amazing but might lose that perfect glossy finish. Still, having heart-shaped joy ready in the freezer? That’s love you can taste, even on busy days!
Valentine’s Cookies Nutritional Information
Now, I’m no nutritionist (just a cookie enthusiast!), but here’s what you should know about these sweethearts. The nutritional values are rough estimates and can change based on your specific ingredients – like whether you use organic butter or go wild with the sprinkles. These are definitely a “sometimes treat,” but isn’t that what makes Valentine’s Day special? Just remember – love has zero calories, and that’s what these cookies are really made of!
Frequently Asked Questions About Valentine’s Cookies
After years of baking these Valentine’s cookies for friends and family, I’ve heard every question under the sun! Here are the answers to the ones that pop up most often – straight from my flour-dusted recipe book to you:
Can I use margarine instead of butter?
Oh honey, I get this one a lot! While margarine will work in a pinch, your cookies won’t have that rich, buttery goodness. I tested this once when I ran out of butter mid-recipe – the cookies spread more and lacked that melt-in-your-mouth quality. If you must substitute, go for a high-fat margarine and maybe chill the dough longer before baking. But trust me, real butter makes all the difference – it’s worth the splurge for Valentine’s Day!
How can I make these cookies gluten-free?
Good news for our gluten-free friends! Simply swap the all-purpose flour with your favorite 1:1 gluten-free flour blend. I’ve had great results with the one I recommend here. The texture comes out slightly more delicate, so handle the dough gently. And if the dough feels too sticky? Add a tablespoon more GF flour – it tends to absorb moisture differently. Nobody will guess they’re gluten-free when they taste these tender hearts!
Can I freeze decorated cookies?
Oh, the great freezer debate! You can freeze them, but here’s my honest take: the decorations won’t look quite as pretty after thawing. The icing might get slightly sticky from condensation. If you must freeze decorated cookies, place them in a single layer in an airtight container with parchment between layers. They’ll still taste amazing – just maybe not quite as Insta-worthy. My trick? Freeze the plain baked cookies, then decorate them fresh when you’re ready to serve or gift them.
How do I prevent my cookies from spreading too much?
Spreadeagled heart cookies break my heart every time! The fix is simple: make sure your butter is softened, not melted, and chill the dough if your kitchen’s warm. Also, don’t roll the dough too thin – that 1/4-inch thickness really matters. If all else fails, try adding an extra tablespoon of flour. And always use a cool baking sheet – never place dough on a warm one fresh from the oven. These little tweaks keep those heart shapes picture-perfect!
Can kids help decorate these Valentine’s cookies?
Could they? I insist they should! These are the perfect first baking project. Just set up a “decorating station” with bowls of different colored icings and sprinkles – I put down a plastic tablecloth first because things get messy (in the best way). Use squeeze bottles for younger kids and let them go wild with the sprinkles. Their creations might not be bakery-perfect, but the joy on their faces? That’s the real Valentine’s magic. Pro tip: make extra icing – it’s amazing how much “disappears” during the decorating process!
Ingredients
Equipment
Method
- Preheat oven to 350°F (175°C). Line baking sheets with parchment paper.
- In a mixing bowl, cream together butter and sugar until smooth.
- Beat in egg and vanilla extract.
- Gradually mix in flour and salt until dough forms.
- Roll out dough on a floured surface to 1/4-inch thickness.
- Cut out heart shapes with cookie cutter and place on baking sheets.
- Bake for 8-10 minutes until edges are lightly golden.
- Cool cookies on wire racks.
- For icing, whisk powdered sugar, milk, and vanilla until smooth. Add food coloring if desired.
- Decorate cooled cookies with icing and sprinkles.
Nutrition
Notes
Tried this recipe?
Let us know how it was!For more amazing recipes, be sure to check out our other sections to explore a variety of ideas that will enrich your cooking experience. Each section offers its own unique flavors to ensure a delightful culinary journey:
Easy and Quick Recipes: A collection of dishes that guarantee delicious meals with minimal effort and time.
Healthy Recipes: Discover healthy and delicious options that fit your lifestyle.
Desserts: A diverse selection of sweets that will add a special touch of sweetness to your table.
Lunch Recipes: Tasty lunch ideas that you can easily prepare to delight your family.
Dinner Recipes: Delicious and easy-to-make recipes that will make your dinner a memorable occasion.