There’s something magical about springtime and chocolate, don’t you think? As soon as the first flowers start blooming, I find myself craving these simple spring chocolate treats that have become my go-to for every seasonal celebration. They’re so easy to throw together, yet always impress – whether it’s for Easter brunch with the cousins or just because we spotted the first daffodils in the garden. Last year, I made a huge batch for our neighborhood spring picnic, and let me tell you, they disappeared faster than the kids could hunt for Easter eggs! That’s the beauty of these little gems – they’re foolproof, delicious, and scream “spring is here” with every chocolaty bite.
What I love most about this recipe is how forgiving it is. I might’ve (ahem) slightly burned a batch once when distracted by my toddler’s “help,” but you’d never know – they still tasted amazing! The combo of rich dark chocolate with bright spring toppings makes these treats special enough for parties but simple enough for everyday cravings. You can check out more of my favorite dessert recipes if you’re looking for other sweet inspirations. Trust me, once you try these spring chocolate delights, they’ll become your seasonal tradition too!
Why You’ll Love These Spring Chocolate Treats
Oh my goodness, where do I even start with why these little chocolate delights are absolutely perfect? First off – they’re ridiculously easy to make. I’m talking melt, pour, sprinkle, chill – that’s it! They’ve saved me more times than I can count when unexpected guests show up or when my kids suddenly need treats for school (five minutes before we leave, of course).
Here’s what makes them so special:
- Faster than spring flowers bloom: From start to finish in under 30 minutes!
- Customizable like your spring wardrobe: Use whatever toppings make you happy – I adore pistachios and dried cranberries for that pop of color
- Perfect balance of rich and fresh: The dark chocolate base with bright spring toppings is just *chef’s kiss*
- No-bake wonder: Who wants to turn on the oven when the weather’s finally nice?
Seriously, these treats are so versatile they work for fancy tea parties or casual park picnics. I’ve even packed them in little cellophane bags with ribbons as hostess gifts – always a hit!
Ingredients for Spring Chocolate Treats
Okay, let’s talk ingredients! One of the best things about these spring chocolate treats is how few ingredients you actually need – I bet you have most of them in your pantry right now. I like to divide everything into two simple categories because, let’s be honest, who has time for complicated? Here’s what you’ll need to create your own little batch of chocolatey spring happiness:
For the Chocolate Base
- 1 cup dark chocolate chips – I always go for the good stuff here, preferably 60-70% cacao for that perfect balance of richness without being too bitter
- 1 tbsp coconut oil – This is my secret weapon for that silky-smooth melt every single time, plus it adds the slightest hint of tropical flavor
For the Toppings
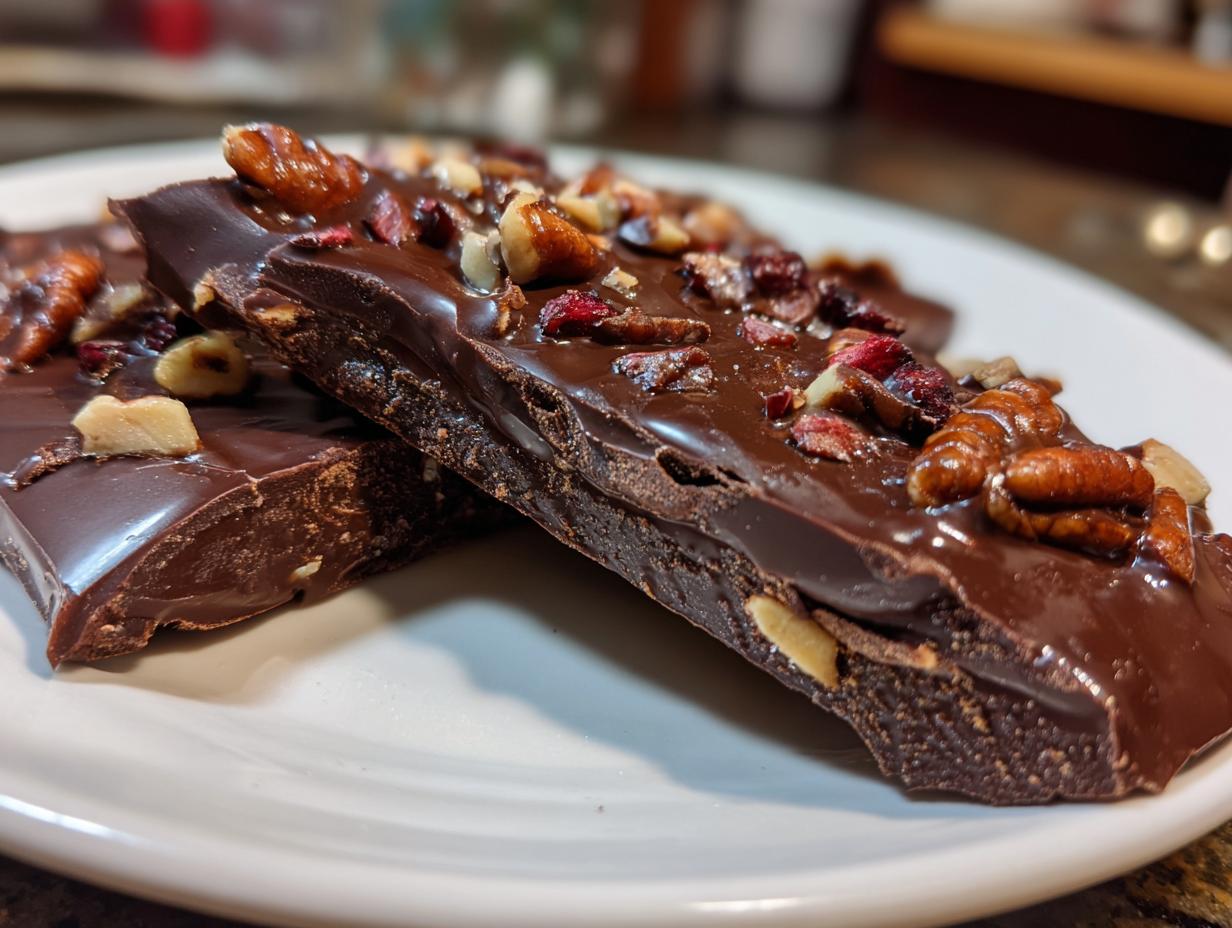
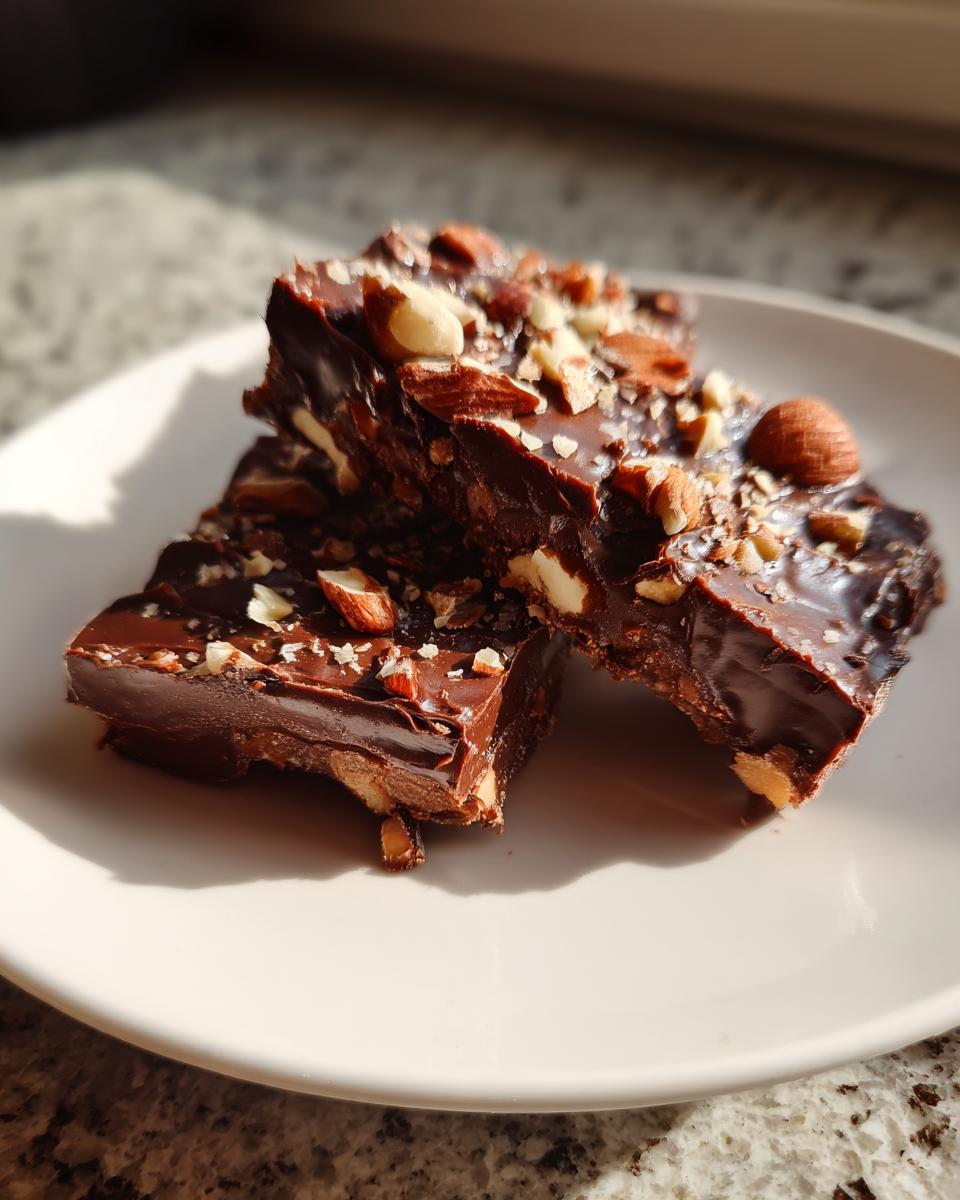
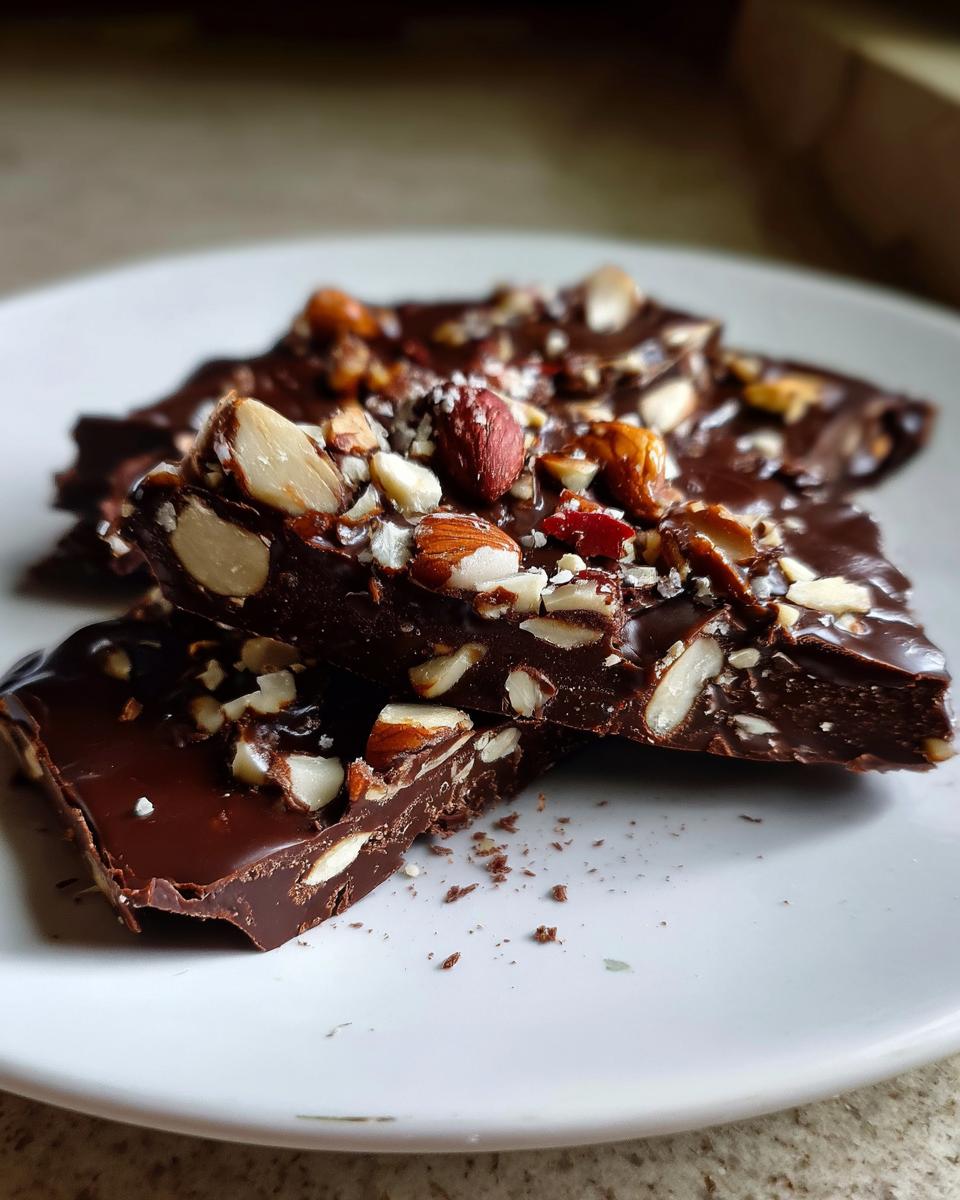
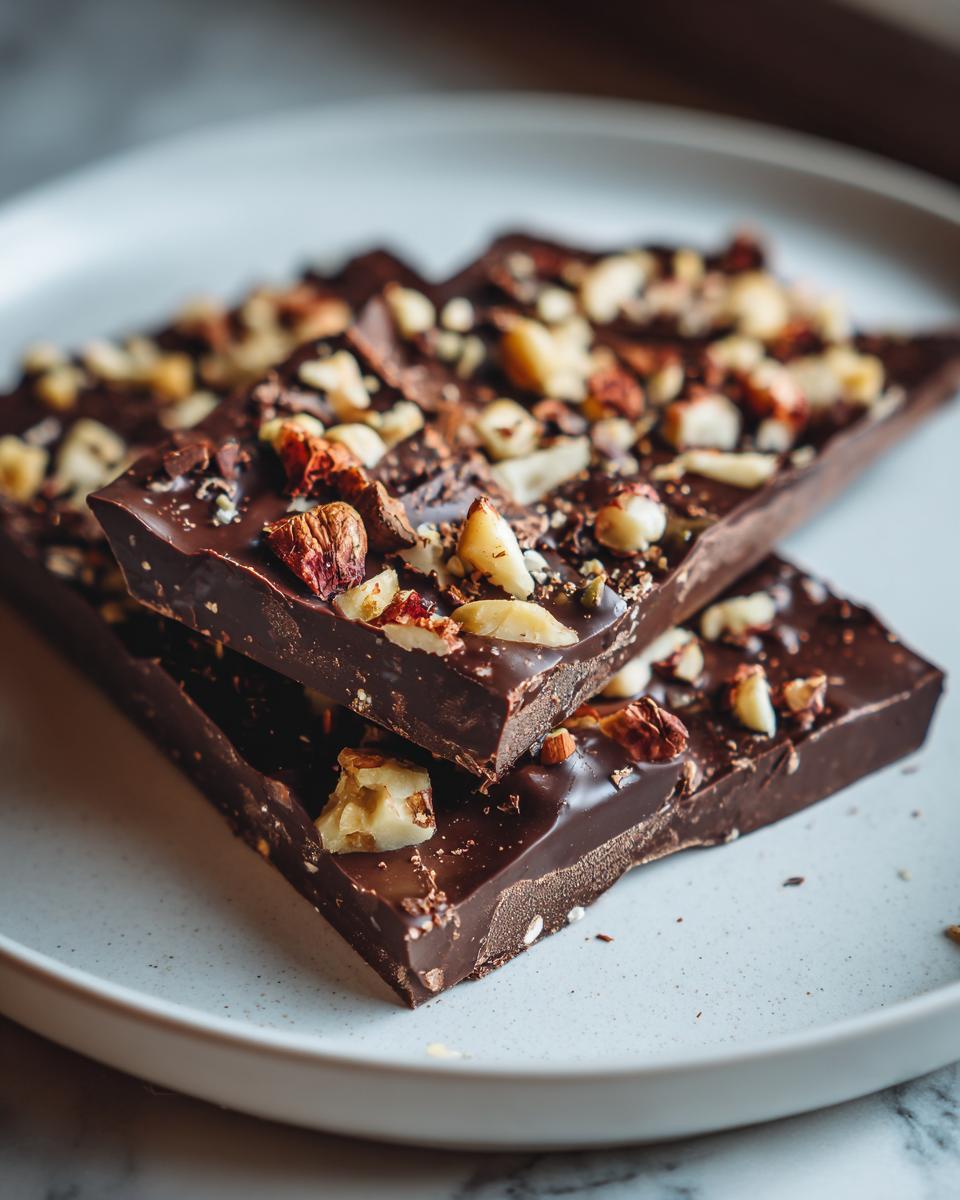
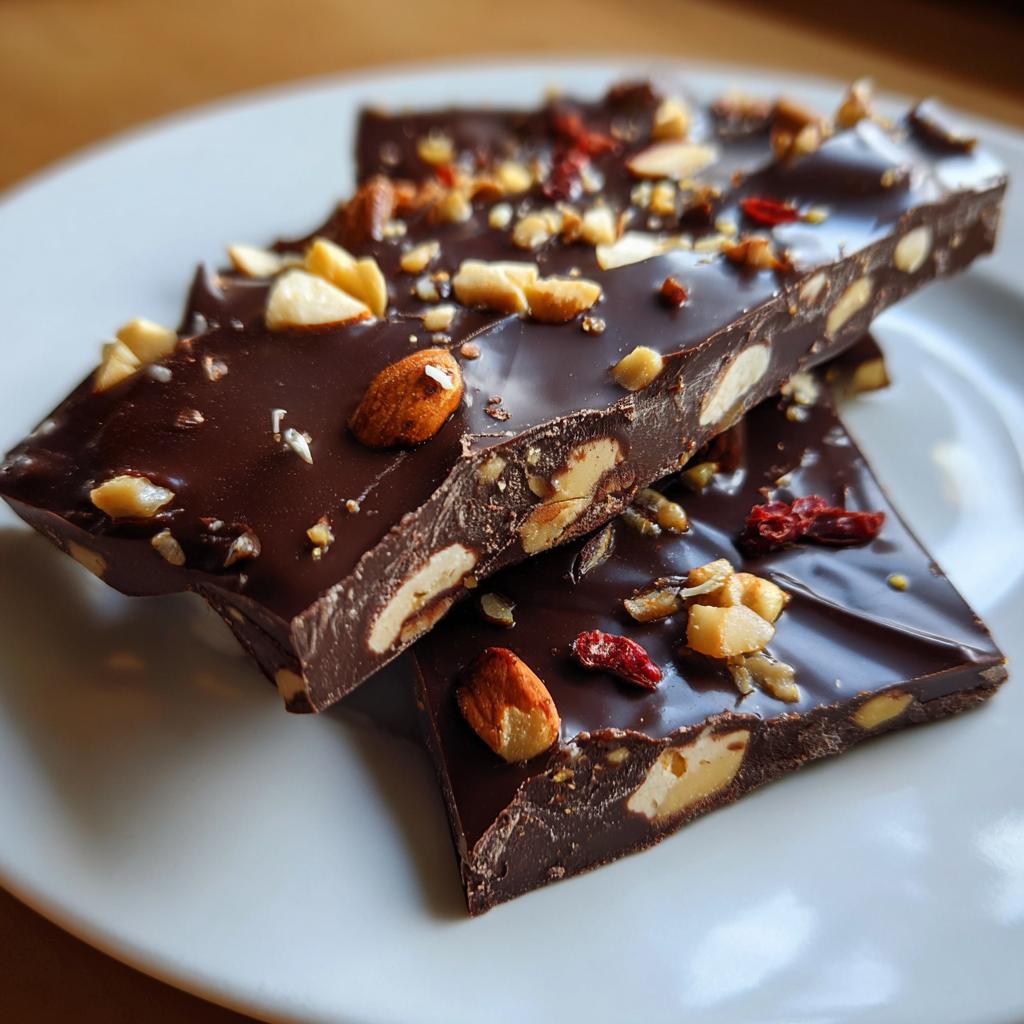
- 1/4 cup chopped nuts (optional but recommended) – Pistachios are my spring favorite with their vibrant green color, but almonds or hazelnuts work great too
- 1/4 cup dried fruit (optional) – I go wild here with whatever looks springy – dried cranberries, chopped apricots, or even candied orange peel if I’m feeling fancy
See? Told you it was simple! The measurements are flexible too – no need to stress if your “cup” of chocolate chips is slightly heaped. That’s the beauty of these treats – they’re forgiving and adaptable, just like spring weather!
How to Make Spring Chocolate Treats
Alright, let’s get to the fun part – making these irresistible spring chocolate treats! I promise it’s as easy as counting to three. Honestly, the hardest part is waiting for them to chill before eating (though I won’t judge if you sneak a bite early).
First, grab your microwave-safe bowl – I use one of my grandma’s old Pyrex bowls because it makes me feel like she’s in the kitchen with me. Toss in your chocolate chips and coconut oil. Now, here’s my golden rule for melting chocolate: microwave in short bursts. Pop it in for 30 seconds, stir, then another 30 seconds. You’ll be amazed how quickly those chocolate chips go from pebbles to pure velvet perfection. Just be careful not to scorch it – burnt chocolate is the saddest smell in the world!
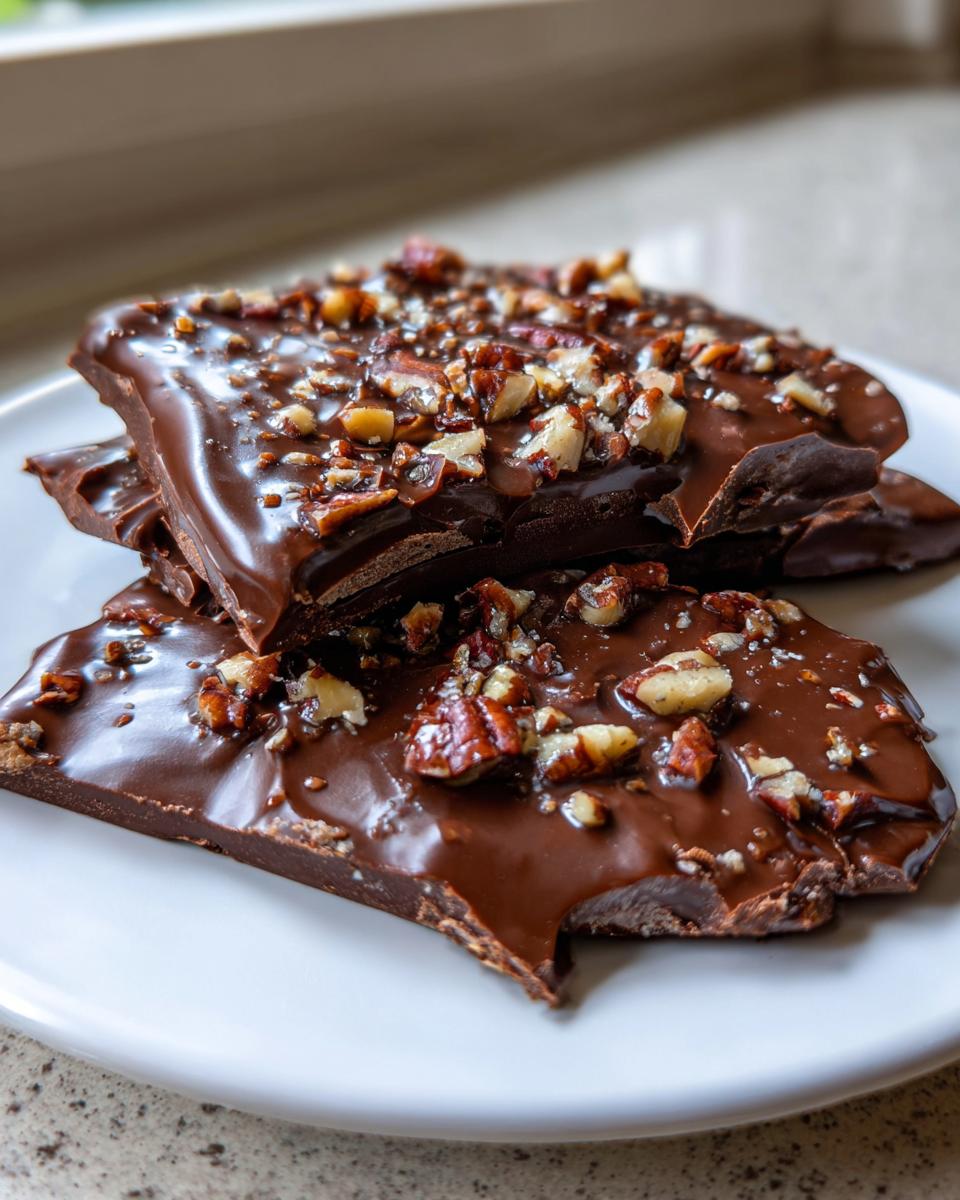
Next, line your baking tray with parchment paper. Trust me, this step means you won’t be crying later when your masterpiece won’t come off. Pour that gorgeous melted chocolate onto the tray and use a spatula to spread it evenly. I aim for about 1/4 inch thickness – thick enough to be satisfying but thin enough to break easily later.
Here’s where the real fun begins! Sprinkle your toppings however your heart desires. Sometimes I go for pretty patterns, other times my kids go wild with “abstract” designs (read: chocolate mostly covered in sprinkles). The beauty is – there’s no wrong way! If you’re using healthier chocolate options like I sometimes do, the toppings really make them pop.
Finally, the hardest part – patience! Slide your tray into the fridge and set a timer for at least one hour. I know, I know, the wait is torture. But resist temptation! The chocolate needs this time to properly set up so you’ll get those perfect clean breaks when cutting. If you’re really pressed for time, 30 minutes in the freezer will do in a pinch.
When they’re ready, use a sharp knife to cut them into whatever size pieces make you happy – I love bite-sized squares for parties or big chunky shards when I’m feeling indulgent. The crisp snap when breaking them apart is pure springtime joy!
Tips for Perfect Spring Chocolate Treats
Want to make sure your spring chocolate treats come out absolutely perfect every single time? I’ve learned a few tricks over the years (often the hard way!) that I’m excited to share with you. First things first – splurge on the good chocolate. The difference between bargain chips and quality dark chocolate is like night and day, and you’ll taste it in every bite. My rule? If you wouldn’t eat it straight from the bag, don’t melt it!
When spreading your melted chocolate, work quickly but gently. A slightly warm offset spatula is my secret weapon for getting that perfect smooth finish. Warming it under hot water for a few seconds prevents the chocolate from dragging. And if you’re going for thin, crisp treats, tilt your baking tray slightly to help the chocolate spread evenly – just like you’re making crepes!
For toppings, think outside the box. Besides nuts and dried fruit (which are always fabulous), I love using freeze-dried raspberries for a pop of pink, edible flowers from my garden in spring, or even finely grated citrus zest. Last Easter, I crushed some pastel-colored Jordan almonds for a festive touch. The key is to press toppings lightly into the chocolate so they stick when hardened. Oh! And always sprinkle toppings right after spreading – that melted chocolate window closes fast!
Variations for Spring Chocolate Treats
Oh,יסneal possibilities with these spring chocolate treats are endless! Let me share some of my favorite twists that have become family favorites. Sometimes I’ll use white chocolate instead of dark – it镜头 like a blank canvas for vibrant spring colors. My kids go wild when I toss in pastel sprinkles or crushed freeze-dried strawberries on top. For something more elegant, edible flowers from my garden make them look straight out of a fancy patisserie!
Here are some other delicious variations I’ve tried:
- Milk chocolate base with toasted coconut – tastes like vacation in every bite
- Spiced dark chocolate – just a pinch of cinnamon or cardamom in the melted chocolate makes it magical
- Berry bliss version – fresh spring berries pressed into semi-set chocolate (best eaten same day)
- Pretzel crunch – salty-sweet perfection with crushed pretzel pieces
The beauty is you can’tشوح wrong – let whatever inspires you in the season or男士 pantry guide your creations. Spring is all aboutḿ experiments and fresh starts, after all!
Storage and Serving Suggestions for Spring Chocolate Treats
Now, let’s talk about keeping these spring chocolate treats fresh and fabulous! I always store mine in an airtight container in the fridge – that way they stay crisp and delicious for up to a week (though let’s be honest, they never last that long in my house). If you’re making them ahead for a party, just layer them between sheets of parchment paper so they don’t stick together.
For serving, I love arranging them on a pretty spring platter – pastel-colored dishes make the chocolate really pop! They’re perfect for Easter brunches or Mother’s Day teas. One of my favorite tricks is packaging them in little clear boxes tied with ribbon – instant edible gifts that look way fancier than they are to make. Last year I tucked them into mini mason jars with fresh flowers for my book club – total showstopper!
Pro tip: If your kitchen runs warm, keep them chilled until just before serving. That way they stay perfectly crisp while still being easy to bite into. Trust me, nothing ruins the magic faster than melty chocolate fingers!
Nutritional Information for Spring Chocolate Treats
Now, I’m no nutritionist, but I can tell you these spring chocolate treats are definitely an “everything in moderation” kind of delight! Since we all use different brands and optional toppings, the exact nutritional info will vary. My general rule? Dark chocolate packs antioxidants, nuts add protein, and dried fruit brings natural sweetness – but let’s be real, we’re here for the joy, not the calorie count!
If you’re watching specific dietary needs, just remember: the coconut oil adds healthy fats, and using quality dark chocolate means less sugar than milk chocolate versions. But honestly? Sometimes spring calls for a little chocolatey celebration – no calculator required!
Frequently Asked Questions About Spring Chocolate Treats
I get so many questions about these spring chocolate treats – they’re clearly as popular with you all as they are in my kitchen! Here are the answers to the ones I hear most often:
Can I use milk chocolate instead of dark chocolate?
Absolutely! While I adore the rich depth of dark chocolate, milk chocolate works beautifully too – just be aware it’s sweeter and melts a bit differently. White chocolate is another fun option, especially when you want those spring colors to really pop!
How long do these chocolate treats last?
Stored properly in an airtight container in the fridge, they’ll stay crisp and delicious for about a week. Though in my experience, they rarely last more than two days before someone (usually me) sneaks the last piece!
Can I freeze these spring chocolate treats?
You sure can! Just wrap them well in parchment paper before freezing to prevent moisture. They’ll keep for about a month frozen – perfect for when you need a quick springtime chocolate fix. Thaw in the fridge for an hour before serving.
What if my chocolate seizes while melting?
Oh no! Been there. If your chocolate gets grainy, add another teaspoon of coconut oil and stir gently over low heat. This usually saves it! And remember – microwave in short bursts next time to avoid overheating.
Can I make these nut-free for allergies?
Of course! Skip the nuts and try seeds like pumpkin or sunflower instead. Or go wild with crushed pretzels, cereal, or just extra dried fruit. The recipe is super flexible – make it work for you!
Spring Chocolate Treats
Ingredients
Equipment
Method
- Melt the chocolate chips and coconut oil in a microwave-safe bowl, stirring every 30 seconds until smooth.
- Pour the melted chocolate onto a lined baking tray and spread evenly.
- Sprinkle the chopped nuts and dried fruit over the chocolate.
- Refrigerate for at least 1 hour before cutting into pieces.
Notes
Tried this recipe?
Let us know how it was!For more amazing recipes, be sure to check out our other sections to explore a variety of ideas that will enrich your cooking experience. Each section offers its own unique flavors to ensure a delightful culinary journey:
Easy and Quick Recipes: A collection of dishes that guarantee delicious meals with minimal effort and time.
Healthy Recipes: Discover healthy and delicious options that fit your lifestyle.
Desserts: A diverse selection of sweets that will add a special touch of sweetness to your table.
Lunch Recipes: Tasty lunch ideas that you can easily prepare to delight your family.
Dinner Recipes: Delicious and easy-to-make recipes that will make your dinner a memorable occasion.