Oh, pumpkin pie bars – where do I even begin? These little squares of autumn magic have saved me more times than I can count when I need a last-minute dessert that still feels special. I first fell in love with them years ago when my oven decided to quit right before Thanksgiving (typical, right?). Instead of panicking, I whipped up a batch of these no-fuss bars, and guess what? Everyone raved about them more than the traditional pie! Now they’re my go-to for everything from cozy family dinners to holiday dessert spreads. The best part? You get all that spiced pumpkin goodness with half the stress of pie crust drama.
Why You’ll Love These Pumpkin Pie Bars
Let me tell you why these pumpkin pie bars have become my autumn obsession – and why you’ll adore them too:
- No pie crust stress: That oat crust comes together in minutes – just mix, press, and bake. No rolling pin disasters here!
- All the flavor, half the work: You get that classic spiced pumpkin taste without the fuss of blind-baking or worrying about soggy bottoms.
- Perfect for sharing: They travel like a dream to potlucks and bake sales (unlike wobbly pie slices).
- Make-ahead magic: The flavor actually gets better after a day in the fridge – perfect for stress-free holiday prep.
- Crowd-pleaser: Even my “I don’t like pumpkin pie” uncle goes back for seconds of these!
Trust me, once you try these bars, you might never go back to traditional pie. They’re that good.
Ingredients for Pumpkin Pie Bars
Okay, let’s talk ingredients! What I love about these pumpkin pie bars is how simple the ingredient list is – no fancy stuff here, just good old pantry staples that come together in the most magical way. I’ve broken it down into crust and filling so you can prep everything without missing a beat. Pro tip: measure everything before you start mixing – it makes the whole process so much smoother!
For the Crust
The crust is where the magic starts – that buttery, oat-y base that holds everything together. Here’s what you’ll need:
- 1 cup all-purpose flour (spooned and leveled, please – no packing!)
- 1/2 cup rolled oats – the old-fashioned kind, not instant
- 1/2 cup brown sugar – light or dark works, but I prefer dark for that molasses kick
- 1/2 cup butter, melted – and yes, it must be real butter. I’ve tried substitutes and they just don’t give that same rich flavor
For the Filling
Now for the star of the show – that luscious pumpkin filling that’ll make your kitchen smell like autumn heaven:
- 1 can (15 oz) pumpkin puree – not pumpkin pie mix! Look for 100% pure pumpkin
- 1 can (12 oz) evaporated milk – this gives the filling that perfect creamy texture
- 3/4 cup granulated sugar – just the right amount of sweetness
- 2 large eggs – at room temperature if you can remember to take them out
- 1 tsp ground cinnamon, 1/2 tsp ground ginger, and 1/4 tsp ground cloves – this spice combo is everything
- 1/2 tsp salt – don’t skip this! It balances all the flavors beautifully
How to Make Pumpkin Pie Bars
Alright, let’s get baking! I promise these pumpkin pie bars are way easier than they look. The secret is taking it step by step – first the crust, then the filling, and finally that magical bake that brings it all together. I’ve made these so many times I could probably do it in my sleep, but I’ll walk you through each part carefully so yours turn out perfect on the first try!
Preparing the Crust
First things first – preheat that oven to 350°F (175°C) and grab your 9×13-inch pan. I like to give mine a quick spray with baking spray or rub it with butter – just enough so our bars don’t stick. Now, in a medium bowl, mix together the flour, oats, and brown sugar. Here’s my little trick: use your fingers to break up any brown sugar lumps before adding the melted butter. Stir until everything looks like wet sand – you’ll know it’s right when you can squeeze a handful and it holds its shape. Dump this into your prepared pan and press it down firmly with your fingers or the back of a measuring cup. Bake this for exactly 15 minutes – it should look lightly golden around the edges when it’s ready.
Making the Filling
While the crust is baking, let’s whip up that dreamy pumpkin filling. Grab a big bowl and whisk together the pumpkin puree, evaporated milk, sugar, eggs, cinnamon, ginger, cloves, and salt. Don’t be shy with that whisk – you want everything completely smooth with no streaks of egg white showing. I usually give it about 30 good stirs to make sure all those spices are evenly distributed. When your crust comes out of the oven (it’ll be hot, so use oven mitts!), let it cool just for a minute or two before slowly pouring the filling over the top. Tip: pour from one corner and let it spread naturally to avoid disturbing the crust too much.
Baking and Cooling
Pop those beauties back in the oven for 45 minutes. The filling should look set around the edges but still have a slight jiggle in the center – that’s perfect! Here’s the hardest part: resist the urge to cut into them right away. Let them cool completely on a wire rack, about 2 hours. I know, I know – the waiting is torture, but trust me, this gives the filling time to firm up so you get clean slices. Pro tip: for extra neat bars, chill them in the fridge for an hour before cutting.
Tips for Perfect Pumpkin Pie Bars
After making these pumpkin pie bars more times than I can count (seriously, my family requests them weekly in fall!), I’ve picked up some foolproof tricks to guarantee perfect results every time:
- Press that crust like you mean it! Use the bottom of a measuring cup to really compact it – this prevents crumbling when you cut the bars.
- Room temp eggs are key for smooth filling. No time to wait? Just pop cold eggs in warm water for 5 minutes.
- The jiggle test never lies – your bars are done when the edges are set but the center still wobbles slightly like firm Jell-O.
- Chill before cutting – I know it’s hard to wait, but 30 minutes in the fridge gives you those Instagram-worthy clean slices.
- Spice it your way – I sometimes add a pinch of cardamom or allspice for extra warmth when I’m feeling fancy!
Remember, even if they’re not perfect, they’ll still taste amazing – that’s the beauty of pumpkin pie bars!
Serving and Storing Pumpkin Pie Bars
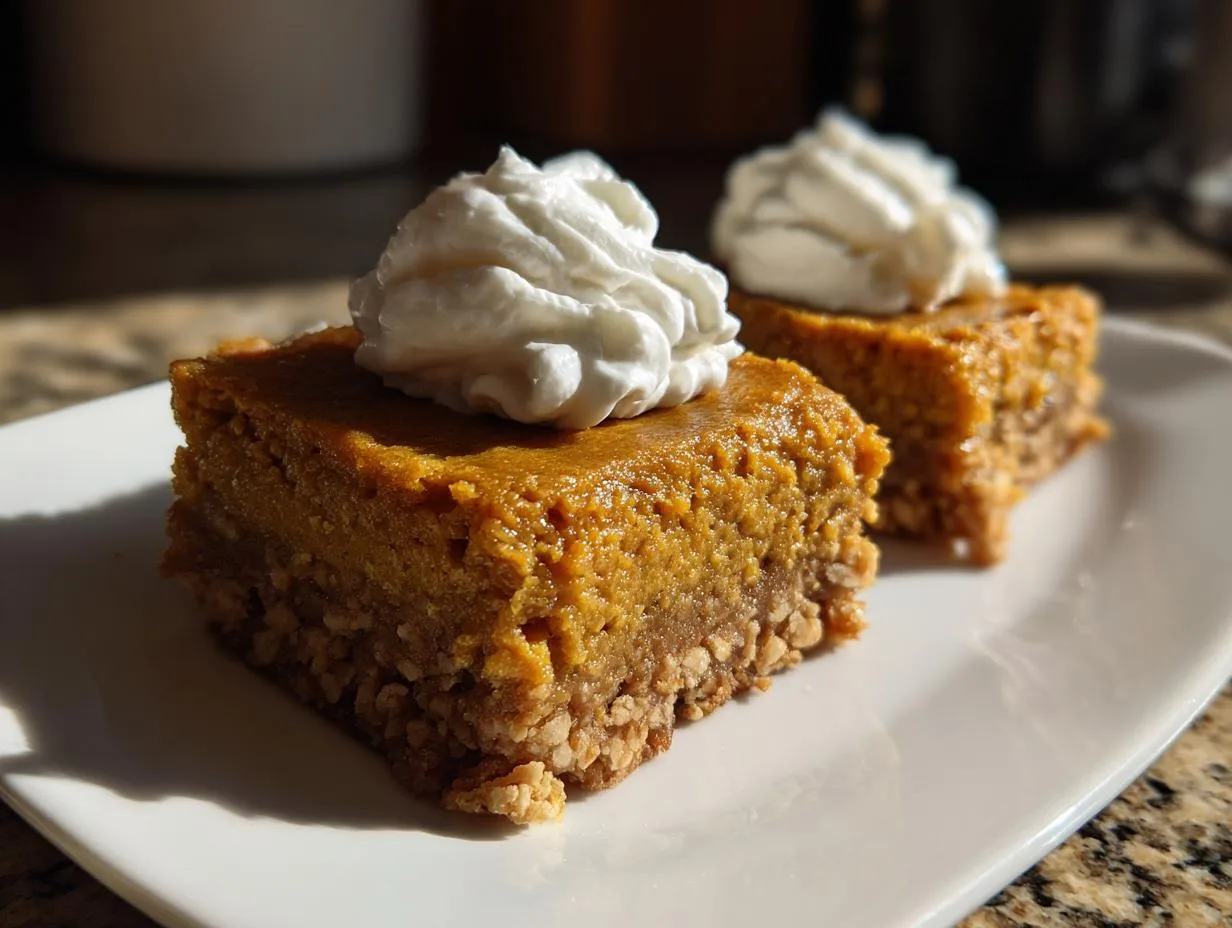
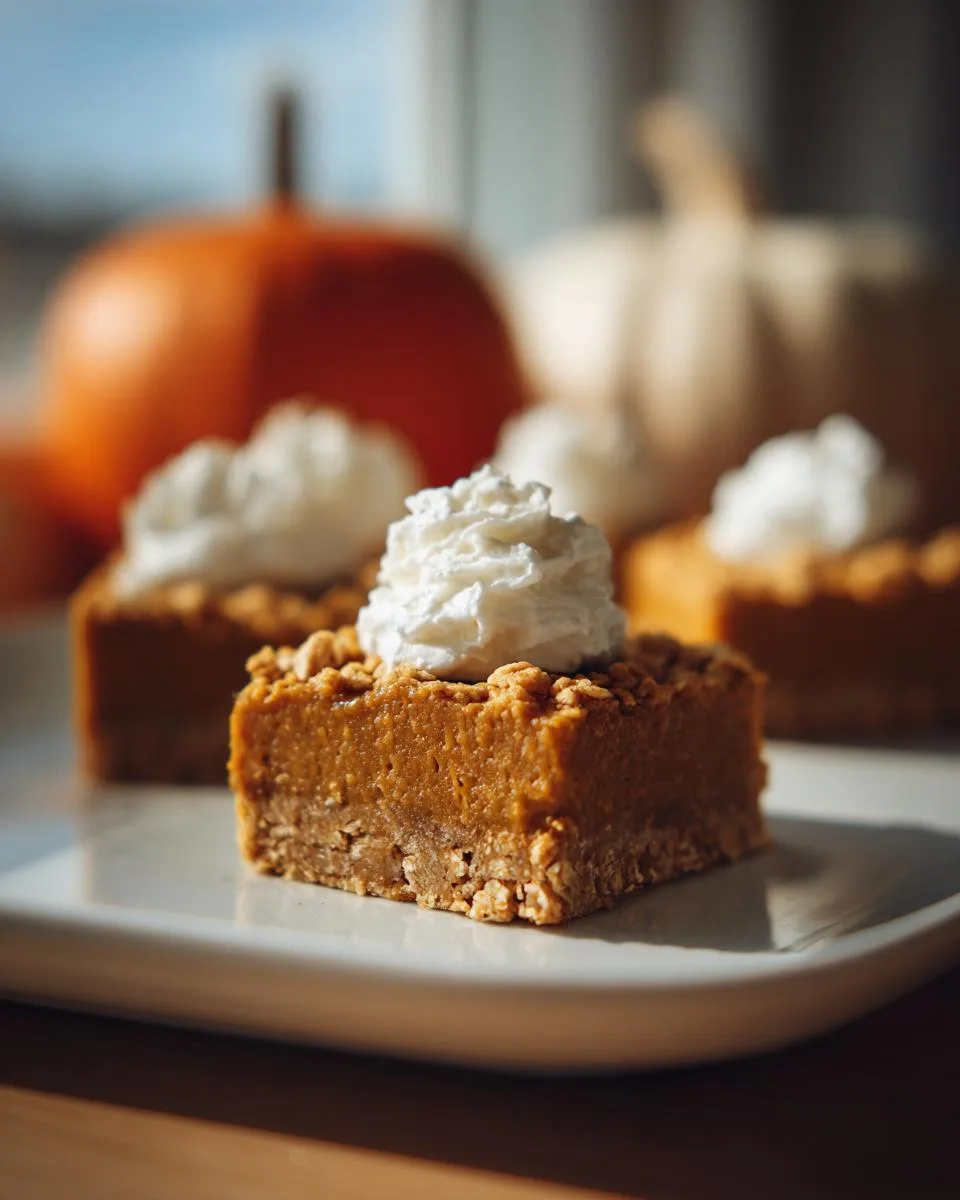
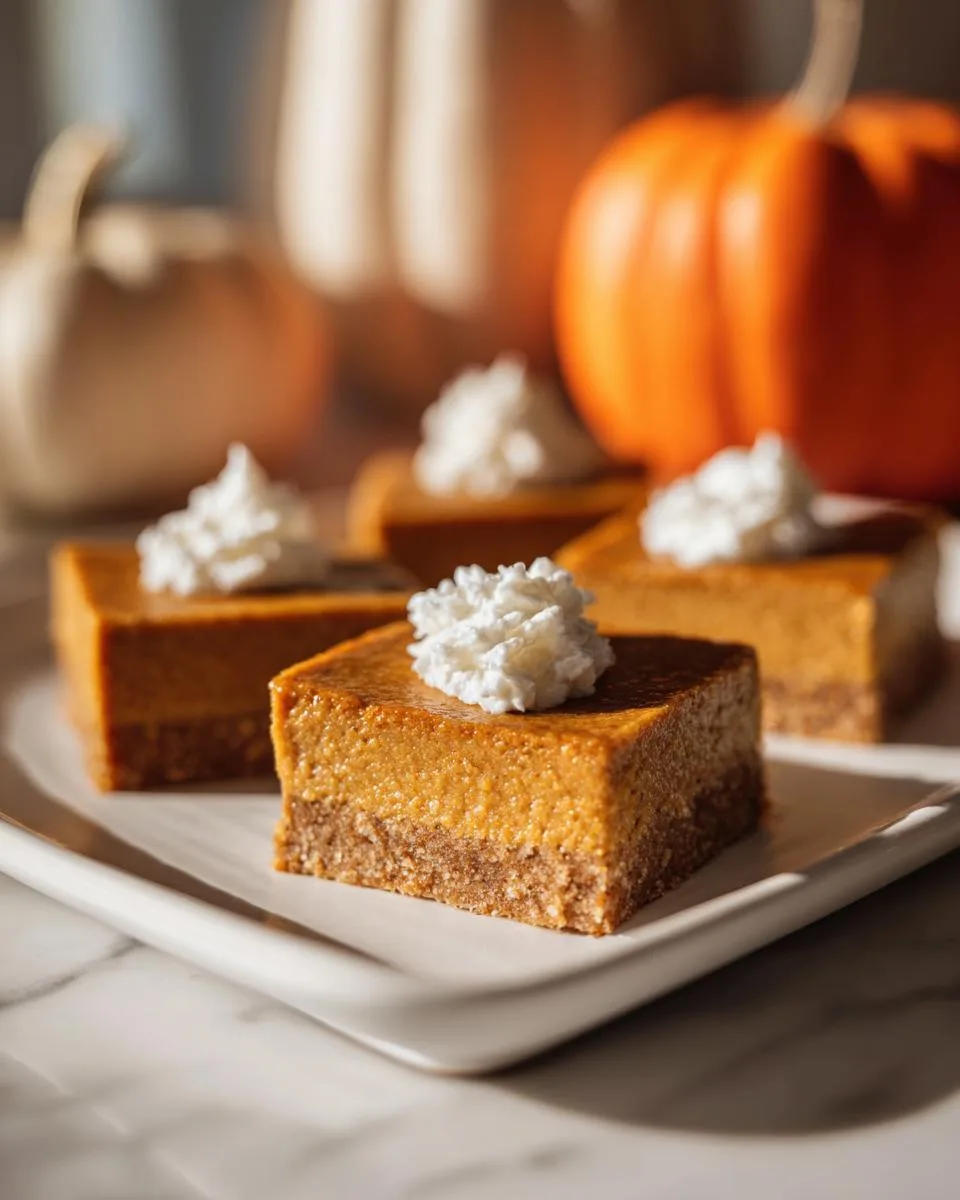
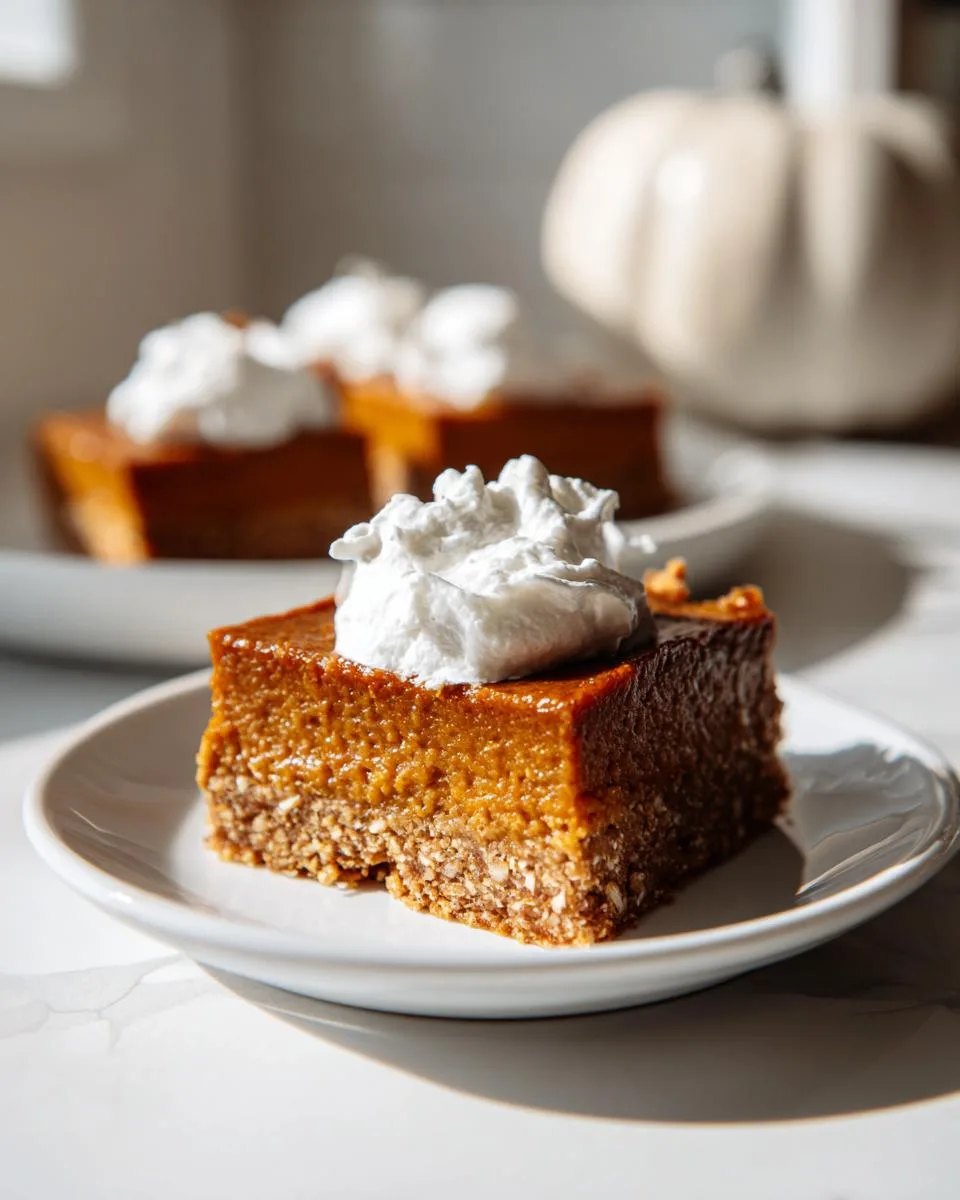
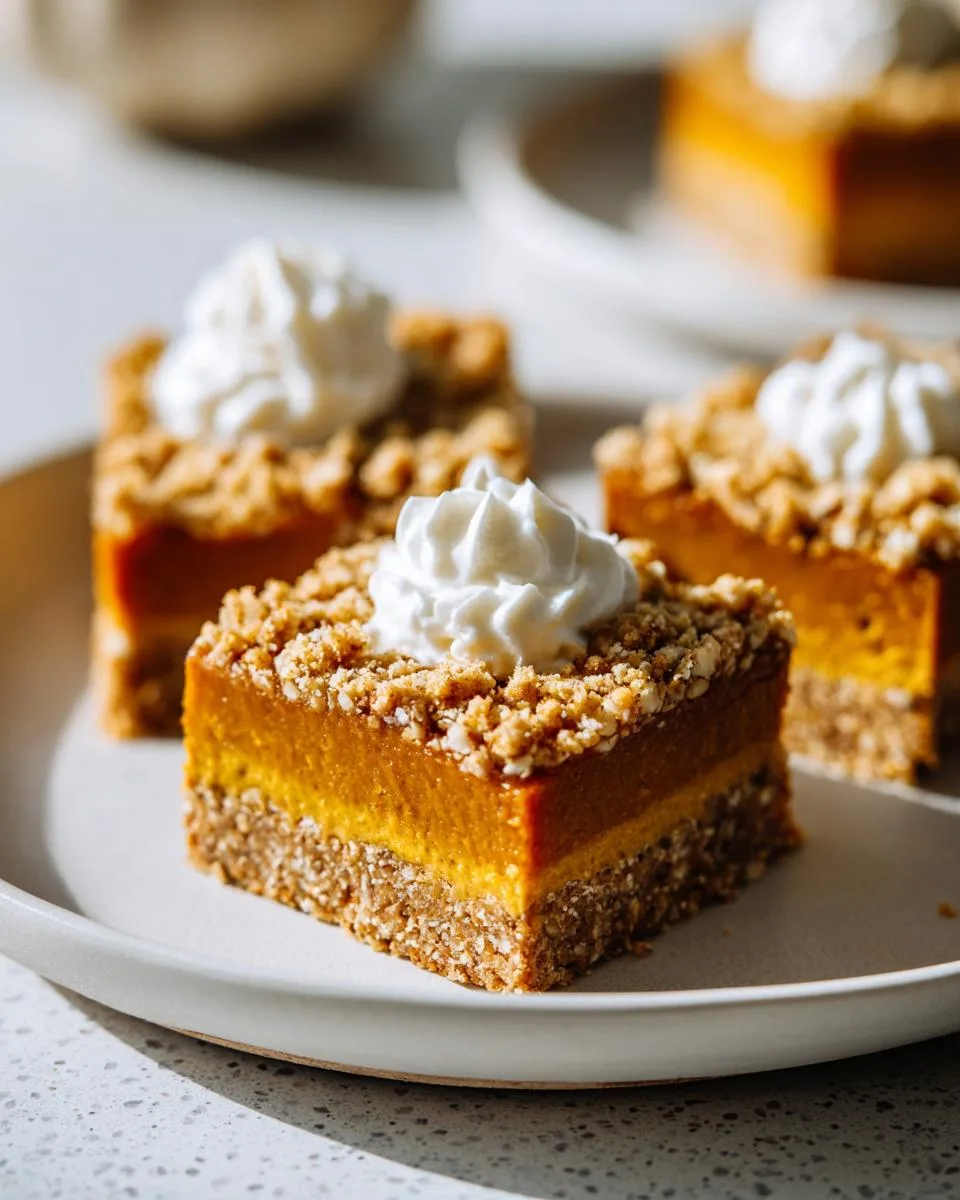
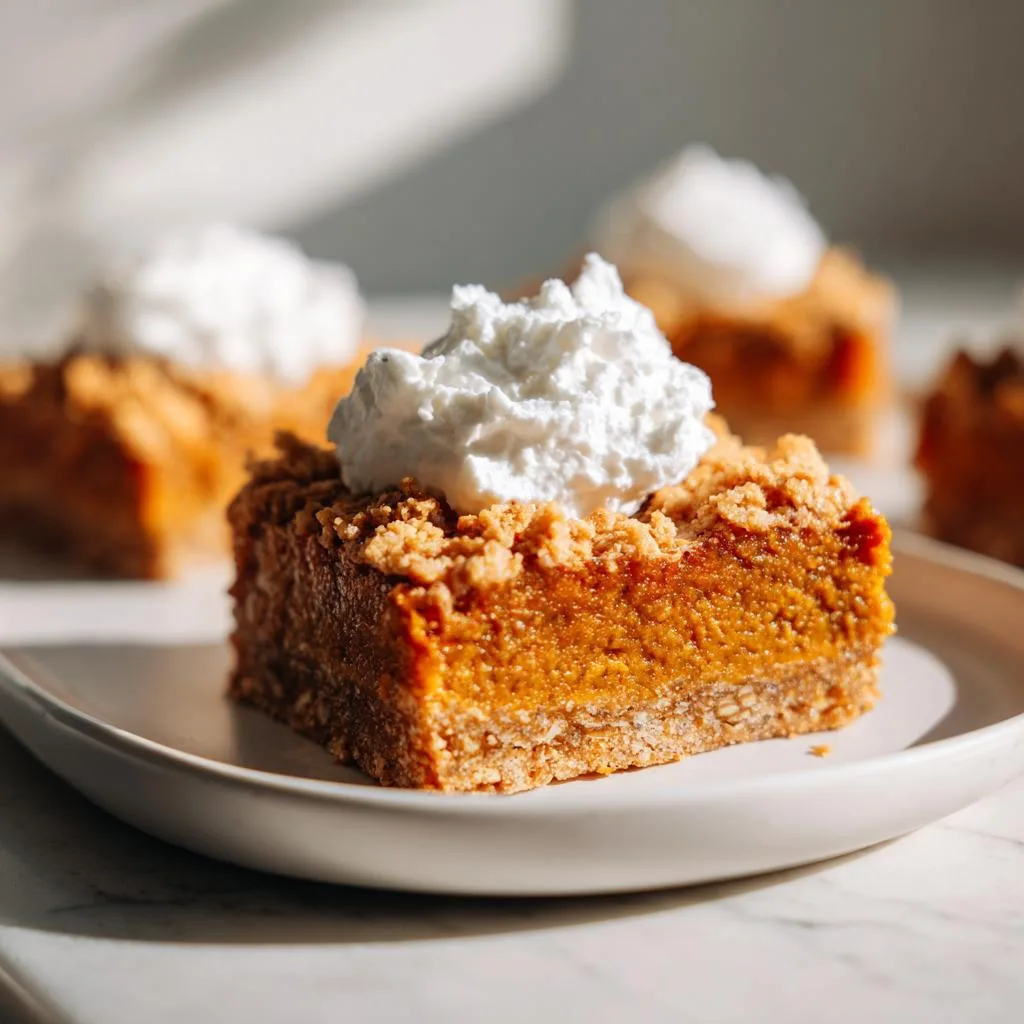
Now for the best part – eating these beauties! I love serving pumpkin pie bars slightly chilled with a dollop of fresh whipped cream and a sprinkle of cinnamon. For special occasions, I’ll drizzle them with caramel sauce or top with toasted pecans – it takes them to the next level! Leftovers (if you’re lucky enough to have any) keep perfectly in the fridge for up to 3 days. Just cover the pan tightly with plastic wrap or transfer slices to an airtight container. They actually taste even better the next day as the flavors meld together!
Nutritional Information for Pumpkin Pie Bars
Now, I’m no nutritionist, but I can tell you these pumpkin pie bars pack all the cozy goodness of autumn in every bite! Keep in mind these numbers are just estimates – your actual counts might vary depending on your specific ingredients. The pumpkin gives you a nice vitamin A boost, and those spices? They’re basically health food in my book! As with any treat, enjoy them in moderation… or don’t – I won’t judge if you sneak an extra square!
For more amazing recipes, be sure to check out our other sections to explore a variety of ideas that will enrich your cooking experience. Each section offers its own unique flavors to ensure a delightful culinary journey:
Easy and Quick Recipes: A collection of dishes that guarantee delicious meals with minimal effort and time.
Healthy Recipes: Discover healthy and delicious options that fit your lifestyle.
Desserts: A diverse selection of sweets that will add a special touch of sweetness to your table.
Lunch Recipes: Tasty lunch ideas that you can easily prepare to delight your family.
Dinner Recipes: Delicious and easy-to-make recipes that will make your dinner a memorable occasion.
Frequently Asked Questions About Pumpkin Pie Bars
I get so many questions about these pumpkin pie bars – and I love chatting about them! Here are the answers to the ones I hear most often from friends and readers:
Can I use fresh pumpkin instead of canned?
You totally can, but here’s my honest take – canned pumpkin gives more consistent results. Fresh pumpkin varies in moisture content, so you might need to drain it or adjust baking time. If you’re set on fresh, roast and puree sugar pumpkins (not carving pumpkins!) until very thick. But for stress-free baking, I always keep a few cans of pure pumpkin in my pantry – they’re my secret weapon for quick pumpkin desserts!
What can I substitute for evaporated milk?
In a pinch, you can use half-and-half or whole milk, but the texture won’t be quite as creamy. My favorite swap is mixing 1 cup heavy cream with 1/4 cup milk – it mimics evaporated milk’s richness. Coconut milk works too for a dairy-free version, though it’ll add a subtle coconut flavor.
How do I know when the bars are done baking?
Watch for these signs: the edges should look set, and the center should jiggle just slightly when you gently shake the pan – like firm Jell-O. A toothpick near (but not in) the center should come out mostly clean. Remember, they’ll continue setting as they cool!
Can I freeze pumpkin pie bars?
Absolutely! Freeze them uncovered first until firm (about 2 hours), then wrap tightly in plastic and foil. They’ll keep for up to 3 months. Thaw overnight in the fridge – the texture stays perfect. I always stash a few for last-minute guests!
Pumpkin Pie Bars
Ingredients
Equipment
Method
- Preheat your oven to 350°F (175°C). Grease a 9×13-inch baking pan.
- In a bowl, mix flour, oats, brown sugar, and melted butter for the crust. Press the mixture into the prepared pan.
- Bake the crust for 15 minutes. Remove from the oven and let it cool slightly.
- In another bowl, whisk together pumpkin puree, evaporated milk, sugar, eggs, cinnamon, ginger, cloves, and salt for the filling.
- Pour the filling over the crust. Bake for 45 minutes or until the filling is set.
- Let the bars cool completely before cutting into squares.