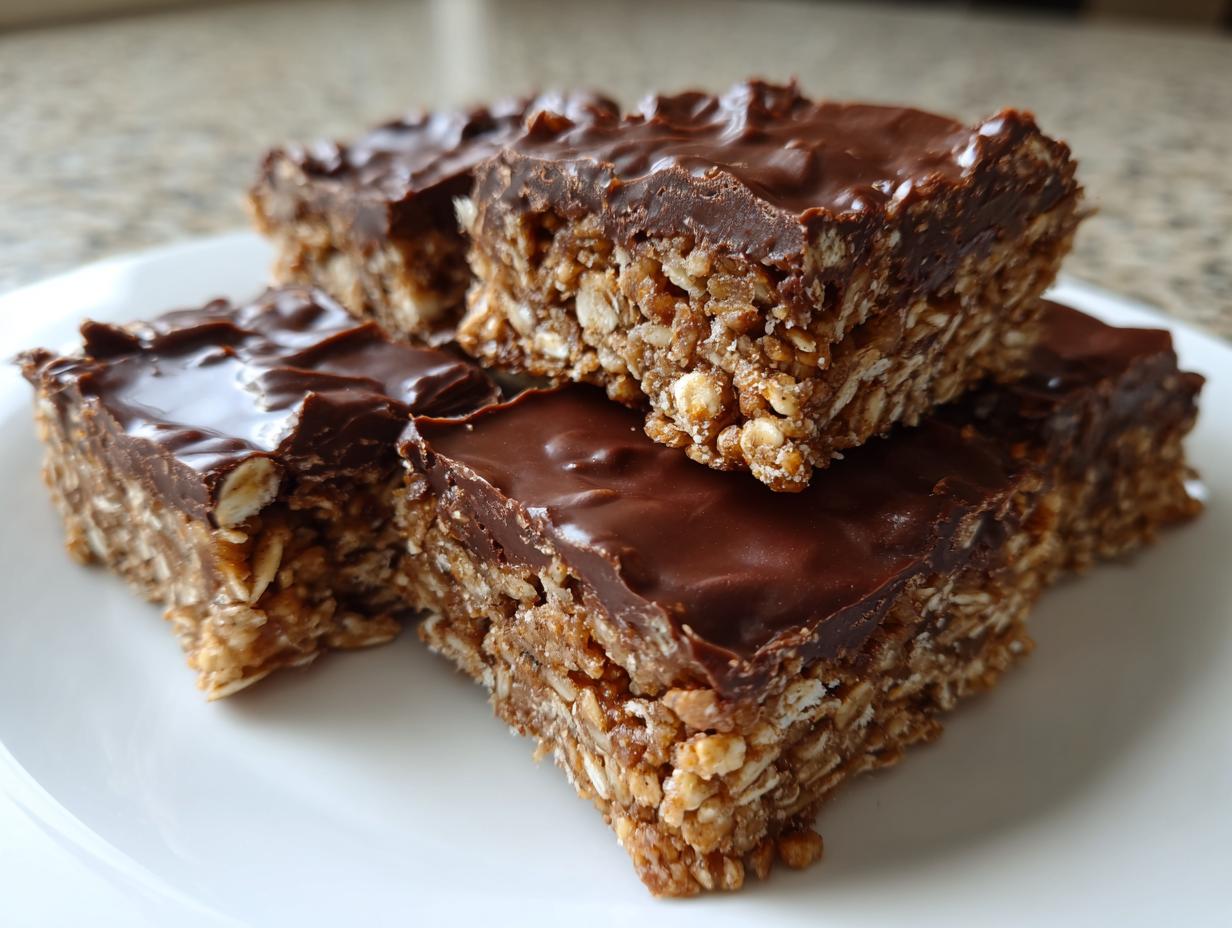
You know those days when you’re craving something sweet but the thought of turning on the oven makes you want to cry? That’s when I turn to my favorite no bake dessert recipes, especially these chocolate oat bars. They’ve saved me more times than I can count – when the kids suddenly announce they “need” a snack for school the next morning, or when my book club shows up unexpectedly (you’d think I’d learn by now to have backup treats). The first time I made these, my nephew called them “grown-up cookie dough bars,” and honestly? That’s the perfect description. In just 15 minutes of active time, you’ve got a fudgy, chewy treat that satisfies every chocolate craving without heating up your kitchen. Honestly, I should probably make double batches – they disappear faster than you can say “where’s the last one?”

Why You’ll Love These No Bake Chocolate Oat Bars
Oh my word, these bars are a lifesaver! Let me count the ways you’ll adore them:
- Whipping them up is a breeze – no waiting for butter to soften, no worrying about overmixing. Just stir, press, and chill. Done!
- Zero oven time means you’re staying cool (literally) while still getting that homemade dessert fix. A total game-changer in summer.
- Totally kid-approved – my littles love helping press the oat layer into the pan. Bonus: no raw egg worries when tiny fingers sneak tastes.
- Endlessly adaptable – swap peanut butter for almond butter, toss in some dried cranberries, or sprinkle sea salt on that chocolate topping. Make it yours!
- Better than store-bought with simple, wholesome ingredients you can actually pronounce. No mystery additives here, just real-food goodness.
Honestly? I keep the ingredients stocked at all times because you never know when a chocolate emergency might strike!
Ingredients for No Bake Chocolate Oat Bars
Let me tell you a secret – the magic of these bars comes from simple pantry staples you probably already have. I can’t count how many times I’ve whipped these up just using whatever was sitting in my cupboard! The ingredient list is short and sweet, just like the finished bars. Here’s everything you’ll need:
For the Base
- 1 cup rolled oats – these are the heart and soul of our bars, giving them that perfect chewy texture
- 1/2 cup peanut butter (I use creamy, but crunchy works if you want extra texture!)
- 1/4 cup honey – makes everything hold together with a subtle sweetness
- 1/4 cup melted coconut oil – helps everything set up beautifully in the fridge
- 1 tsp vanilla extract – pure, please! The imitation stuff just doesn’t compare
For the Topping
- 1/2 cup dark chocolate chips (milk chocolate works too if you’ve got a serious sweet tooth)
- 1 tbsp coconut oil – this little bit helps the chocolate melt into that dreamy, pourable consistency
I love how these ingredients work together – each one plays an important role in creating those perfect no bake bars. And here’s the best part: if you’re missing something, there’s almost always an easy swap (but that’s a story for the variations section!).
How to Make No Bake Chocolate Oat Bars
Okay, let’s get to the fun part – making these ridiculously easy chocolate oat bars! I’ve made this recipe so many times I could probably do it in my sleep, but don’t worry – I’ll walk you through each step like I’m right there in your kitchen with you. The best part? You’ll only dirty two bowls and a pan. Cleanup is almost as quick as making them!
Prepping Your Pan
First things first – grab that 8×8 inch pan and line it with parchment paper. Trust me, this step is non-negotiable unless you want to be scraping oat bits off your pan later. Leave some overhang on the sides – it’ll make lifting the whole slab out later a breeze. If you’re out of parchment (been there!), you can grease the pan really well, but parchment is definitely the way to go.
Mixing the Base
Now for the oat mixture – it’s seriously foolproof. Just dump all your base ingredients (oats, peanut butter, honey, melted coconut oil, and vanilla) into a mixing bowl. I like to use a sturdy spatula for this – the kind with a bit of flex to really get everything incorporated. Mix until you’ve got a uniform, slightly sticky dough that holds together when you press it. If it seems too dry, add another teaspoon of honey or peanut butter. Too wet? A sprinkle more oats will fix you right up.
Pressing It All Together
Here’s where you’ll want to put some muscle into it – transfer your oat mixture to the prepared pan and press it down firmly with your hands or the back of a measuring cup. I mean really pack it in there! This ensures your bars won’t crumble when you cut them later. Aim for an even layer about 1/2 inch thick. Pro tip: lightly wet your fingers or the measuring cup to prevent sticking while you press.
Melting the Chocolate Magic
Now for my favorite part – the chocolate topping! Combine your chocolate chips and coconut oil in a microwave-safe bowl. Heat in 30-second bursts, stirring between each one, until smooth and glossy. Watch it closely – chocolate burns faster than you’d think! If you’re fancy, you can use a double boiler, but honestly, the microwave works just fine for this. Pour that luscious chocolate over your oat base and tilt the pan gently to spread it evenly. If you’re feeling extra, sprinkle some sea salt or chopped nuts on top before it sets.
The Hardest Part – Waiting!
Pop your pan in the fridge for at least an hour to set up. I know, I know – waiting is torture when your kitchen smells this good! But trust me, it’s worth it for clean cuts. When you’re ready, use the parchment overhang to lift the whole slab onto a cutting board. Run a sharp knife under hot water, dry it, and slice into bars. The warm knife makes cleaner cuts through that chocolate layer. Store them in the fridge (if they last that long – mine never do!) and enjoy your perfect no bake dessert creation!
Tips for Perfect No Bake Dessert Recipes
You’d think making no bake treats would be foolproof, but I’ve learned some hard lessons through trial and error (mostly errors!). Here are my battle-tested secrets for perfect bars every time:
Press That Base Like You Mean It!
When I first made these, I gently patted the oat mixture in the pan – big mistake! The bars crumbled like sandcastles at high tide. Now I press with all my might using the bottom of a measuring cup. If it feels like too much pressure, you’re probably doing it right. The base should be compact enough to leave fingernail marks when you poke it.
Parchment Paper is Your Best Friend
One fateful day, I thought “Eh, how stuck can they really get?” Cue twenty minutes of chiseling chocolate-covered oats out with a butter knife. Always use parchment with overhang – it’s not just for easy removal, it helps lift the whole slab for clean, crumb-free cuts. No parchment? Aluminum foil with a light coconut oil coating works in a pinch.
Storage Savvy
These bars taste best when chilled – the chocolate gets that perfect snap and the oats stay chewy. I keep mine in an airtight container between sheets of wax paper (so they don’t stick together) for up to a week. For longer storage, freeze them individually wrapped – they thaw in minutes and make the best emergency snack stash!
My biggest tip? Make a double batch. The first time I did this, my husband hid half in the veggie drawer (nice try, honey). Now I label everything clearly – not that it stops my kids from “investigating” what’s in the fridge!
Variations for No Bake Chocolate Oat Bars
One of my favorite things about these bars is how easily you can mix them up! Once you’ve mastered the basic recipe, it’s time to get creative. Here are some of my go-to twists that always get rave reviews:
Nut Butter Swaps
Not a peanut butter fan? No problem! Almond butter gives these bars an elegant, slightly floral note that’s divine. Cashew butter makes them extra creamy, while sunflower seed butter keeps them nut-free for school lunches. My neighbor swears by tahini for a grown-up, savory-sweet version – just add an extra drizzle of honey to balance it out.
Mix-In Magic
Toss in a handful of chopped toasted nuts (pecans are my weakness) or seeds for crunch. Dried cranberries or cherries add a tart pop against the sweet chocolate. For special occasions, I’ll stir mini marshmallows into the oat layer – they make the bars taste like s’mores! My kids love when I sprinkle crushed pretzels on top of the chocolate for that salty-sweet combo.
Chocolate Choices
While dark chocolate is my usual pick, milk chocolate makes these extra kid-friendly. White chocolate with a sprinkle of freeze-dried strawberries looks fancy for parties. For a real showstopper, melt peanut butter chips with the chocolate topping – it’s like a peanut butter cup in bar form!
The possibilities are endless – that’s why I always say this recipe is more of a guideline than a strict rulebook. Have fun experimenting!
Storage and Serving Suggestions
Okay, let’s talk about keeping these beauties fresh and all the fun ways to enjoy them! First things first – these bars absolutely must live in the fridge. The chocolate topping gets melty at room temperature (learned that the hard way when I left them on the counter during a summer BBQ – oops!). They’ll stay perfect in an airtight container for about a week – if they last that long in your house!
Now for the fun part – serving ideas! My absolute favorite way is with my morning coffee – the chocolate melts just enough to make each bite heavenly. They’re also fantastic as lunchbox surprises (wrap individually in wax paper so they don’t stick together). For parties, I cut them into tiny squares and serve on a pretty platter – they look so fancy but took zero effort. And here’s my secret: slightly chilled with a scoop of vanilla ice cream? Pure magic!
Nutritional Information
Okay, let’s talk numbers – but don’t worry, I promise not to bore you with a chemistry lecture! Each of these dreamy chocolate oat bars comes in at about 180 calories, with 12g of good fats (mostly from that heart-healthy coconut oil and peanut butter). You’re getting 4g of protein and 15g of carbs per serving, plus 2g of fiber to keep you satisfied. Not too shabby for something that tastes this indulgent!
Now, here’s my little disclaimer – these numbers can wiggle a bit depending on your exact ingredients. Different brands of peanut butter or chocolate chips might change things slightly. But honestly? When something tastes this good, I don’t stress over every decimal point. It’s all about balance, right?
Frequently Asked Questions
Can I use quick oats instead of rolled oats?
You sure can! Quick oats will work in a pinch, but the texture won’t be quite as chewy. I’ve used them when I ran out of rolled oats – just reduce the amount slightly since they absorb liquid differently. The bars might be a bit denser, but still totally delicious. If you’re using quick oats, press the mixture extra firmly to help it hold together.
How long do these no bake chocolate oat bars last?
In the fridge, they’ll stay perfect for about a week – if you can resist eating them all before then! I store mine in an airtight container with parchment between layers. They actually get better after a day as the flavors meld together. Just be sure to keep them chilled – that chocolate topping gets melty at room temperature (learned that lesson the hard way!).
Can I freeze these bars?
Absolutely! Freezing is my secret trick for always having healthy chocolate treats on hand. Wrap them individually in wax paper, then pop them in a freezer bag. They’ll keep for up to 3 months. Thaw at room temperature for about 10 minutes or just eat them slightly frozen (so good on hot summer days!). My kids love finding these in their lunchboxes – by lunchtime, they’re perfectly thawed.
What can I use instead of peanut butter?
Any nut or seed butter works beautifully! Almond butter is my favorite swap – it gives these bars an elegant flavor. For nut-free versions, sunflower seed butter or tahini (with extra honey) are great options. Just make sure whatever you use is nice and drippy – the oils help bind everything together. One warning: if using sunflower seed butter, know it can turn greenish when mixed with baking soda (harmless but surprising!).
Why is my chocolate topping cracking when I cut the bars?
Ah, the dreaded chocolate crack! This usually happens if the chocolate layer gets too cold too fast. Here’s my trick: let the pan sit at room temperature for 5 minutes before cutting. Also, run your knife under hot water and dry it between cuts – the warm blade glides right through. If all else fails, don’t stress – cracked chocolate tastes just as good!
No Bake Chocolate Oat Bars
Ingredients
Equipment
Method
- Line an 8×8 inch baking pan with parchment paper.
- In a mixing bowl, combine rolled oats, peanut butter, honey, melted coconut oil, and vanilla extract. Mix until well combined.
- Press the mixture firmly into the prepared pan.
- In a small bowl, melt dark chocolate chips and coconut oil together. Stir until smooth.
- Pour the melted chocolate over the oat base and spread evenly.
- Refrigerate for at least 1 hour or until set. Cut into bars before serving.
Nutrition
Notes
Tried this recipe?
Let us know how it was!For more amazing recipes, be sure to check out our other sections to explore a variety of ideas that will enrich your cooking experience. Each section offers its own unique flavors to ensure a delightful culinary journey:
Easy and Quick Recipes: A collection of dishes that guarantee delicious meals with minimal effort and time.
Healthy Recipes: Discover healthy and delicious options that fit your lifestyle.
Desserts: A diverse selection of sweets that will add a special touch of sweetness to your table.
Lunch Recipes: Tasty lunch ideas that you can easily prepare to delight your family.
Dinner Recipes: Delicious and easy-to-make recipes that will make your dinner a memorable occasion.