
Table of Contents
Table of Contents
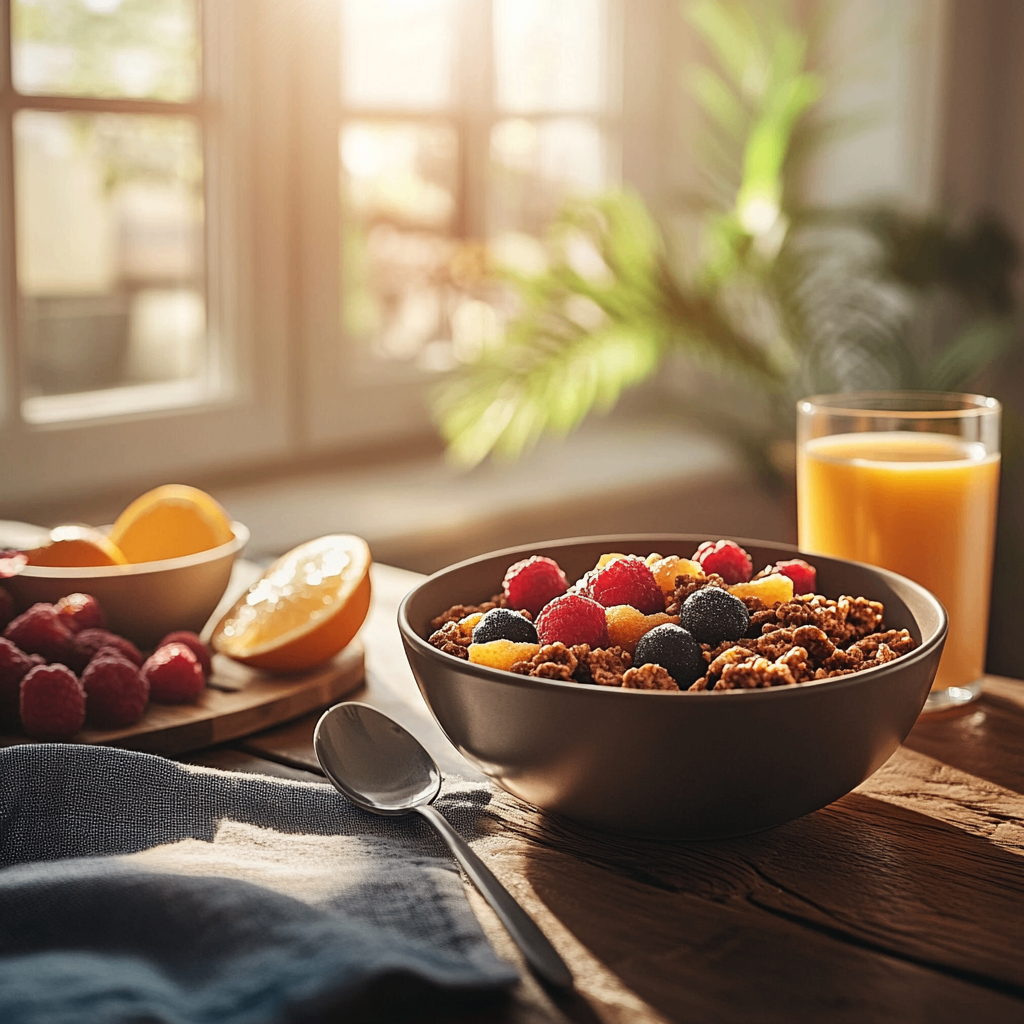
Learn how to make delicious homemade chocolate cereal that rivals Cocoa Cheerios! This easy recipe uses simple ingredients and creates perfectly crunchy, cocoa-flavored O-shaped cereal rings that kids and adults will love.
Are you tired of spending money on expensive chocolate cereals that are loaded with artificial ingredients and preservatives? What if I told you that you could create your own homemade chocolate cereal that tastes even better than the store-bought versions? Today, I’m sharing my tried-and-tested recipe for making chocolate cereal O’s that will remind you of your favorite childhood breakfast, but with wholesome ingredients you can actually pronounce.
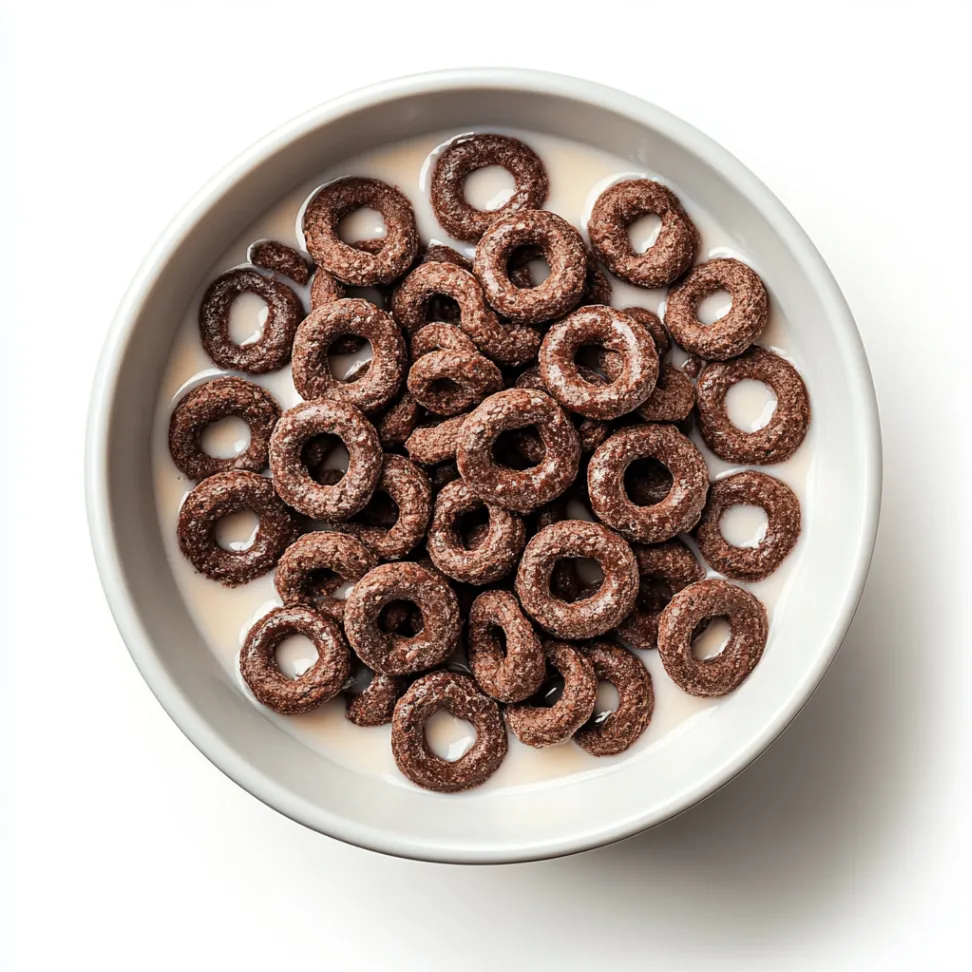
This homemade chocolate cereal recipe has been a game-changer in my kitchen. Not only does it satisfy those morning chocolate Cereal cravings, but it also gives me complete control over the ingredients my family consumes. The best part? These little chocolate rings stay perfectly crunchy in milk and deliver that nostalgic cocoa flavor we all remember from Saturday morning cartoons.
Whether you’re looking to reduce processed foods in your diet, save money on grocery bills, or simply want to try your hand at making cereal from scratch, this recipe will become your new breakfast obsession. Let’s dive into creating the most delicious homemade chocolate cereal you’ve ever tasted!
Ingredients
Tried this recipe?
Let us know how it was!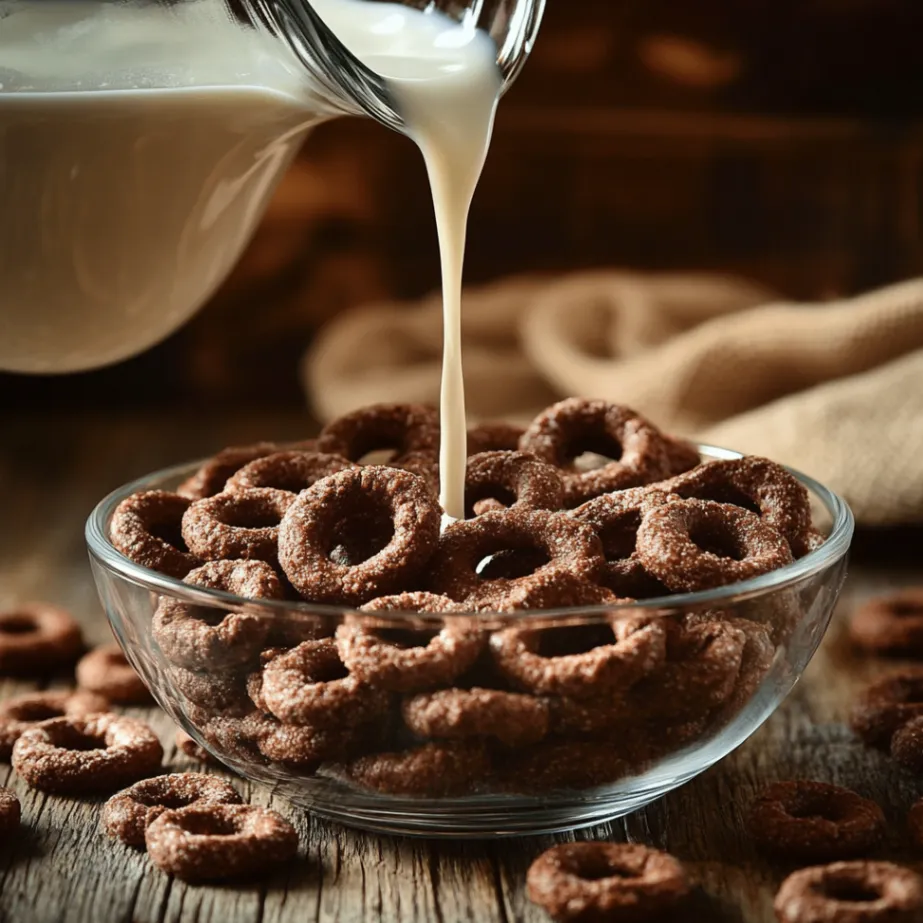
Why Make Homemade Chocolate Cereal?
Health Benefits Over Store-Bought Options
Commercial chocolate cereals often contain high amounts of refined sugar, artificial colors, and preservatives that can negatively impact your health. When you make chocolate cereal at home, you control every ingredient that goes into your bowl. You can reduce the sugar content, use natural cocoa powder instead of artificial chocolate Cereal flavoring, and avoid unnecessary additives.
Homemade chocolate cereal also allows you to incorporate whole grain flours, which provide more fiber and nutrients than the highly processed grains found in many commercial cereals. This means you’re starting your day with a breakfast that actually nourishes your body while satisfying your chocolate Cereal cravings.
Cost-Effective Solution
Making your own chocolate cereal can save you significant money over time. A single batch of this homemade version costs approximately 60% less than purchasing equivalent amounts of name-brand chocolate cereal. Plus, you’ll have the satisfaction of knowing exactly what went into making your breakfast.
Customization Options
The beauty of homemade chocolate cereal lies in its versatility. You can adjust the sweetness level, experiment with different cocoa intensities, or even add extra flavors like vanilla or cinnamon. Want to make it extra nutritious? Add protein powder or incorporate seeds for additional texture and health benefits.
Essential Ingredients for Perfect Chocolate Cereal
Primary Ingredients
Whole Wheat Flour (2 cups): The foundation of our cereal, providing structure and nutrition. Whole wheat flour adds fiber and creates the perfect texture for our chocolate O’s. You can substitute with all-purpose flour if preferred, but whole wheat offers superior nutritional value.
Unsweetened Cocoa Powder (1/3 cup): This is where the magic happens! Use high-quality unsweetened cocoa powder for the richest chocolate fCereal lavor. Dutch-processed cocoa works beautifully and creates a deeper, more complex chocolate taste.
Brown Sugar (1/4 cup): Provides the perfect amount of sweetness while adding a subtle molasses flavor that complements the chocolate Cereal. Brown sugar also helps create the ideal texture and color for our cereal rings.
Honey (2 tablespoons): Natural sweetener that helps bind the ingredients and adds a lovely golden color to the final product. Honey also contributes to the cereal’s crunchiness once baked.
Coconut Oil (2 tablespoons, melted): Creates the perfect texture and helps achieve that satisfying crunch. Coconut oil also adds a subtle tropical note that enhances the overall flavor profile.
Vanilla Extract (1 teaspoon): Enhances the chocolate Cereal flavor and adds depth to the overall taste. Pure vanilla extract works best for the most authentic flavor.
Salt (1/2 teaspoon): Essential for balancing the sweetness and enhancing all the other flavors. Don’t skip this ingredient – it makes a significant difference in the final taste.
Baking Powder (1/2 teaspoon): Helps create the light, airy texture that makes these cereal rings perfect for floating in milk.
Optional Enhancement Ingredients
Cinnamon (1/4 teaspoon): Adds warmth and complexity to the chocolate flavor. This is especially delicious if you enjoy Mexican hot chocolate Cereal flavors.
Protein Powder (2 tablespoons): Transform your cereal into a protein-packed breakfast by adding unflavored or vanilla protein powder. Reduce the flour by 2 tablespoons if using this addition.
Mini Chocolate Chips (2 tablespoons): For extra chocolate indulgence, fold in mini chocolate chips just before shaping. These will create delightful pockets of melted chocolate in the finished cereal.
Step-by-Step Preparation Method
Step 1: Prepare Your Workspace and Oven
Preheat your oven to 300°F (150°C). This lower temperature ensures that the cereal rings cook evenly without burning. Line two large baking sheets with parchment paper or silicone baking mats. Having your workspace organized before you begin mixing will make the process much smoother.
Step 2: Mix the Dry Ingredients
In a large mixing bowl, whisk together the whole wheat flour, unsweetened cocoa powder, brown sugar, salt, and baking powder. Make sure to break up any lumps in the cocoa powder by pressing them against the side of the bowl with your whisk. This step is crucial for achieving a uniform chocolate color throughout your cereal.
Take a moment to smell the mixture – the combination of cocoa and brown sugar should already smell like chocolate Cereal heaven! If you’re using optional ingredients like cinnamon or protein powder, add them to this dry mixture.
Step 3: Combine the Wet Ingredients
In a separate bowl, whisk together the melted coconut oil, honey, and vanilla extract. The coconut oil should be melted but not hot, as extremely hot oil can cook the other ingredients prematurely. If your coconut oil has solidified, gently warm it in the microwave for 15-20 seconds.
Step 4: Create the Dough
Make a well in the center of your dry ingredients and pour in the wet ingredient mixture. Using a wooden spoon or your hands, mix everything together until a cohesive dough forms. The dough should hold together when pressed but not be overly sticky. If it feels too dry, add water one teaspoon at a time until the right consistency is achieved.
Step 5: Roll and Shape the Cereal
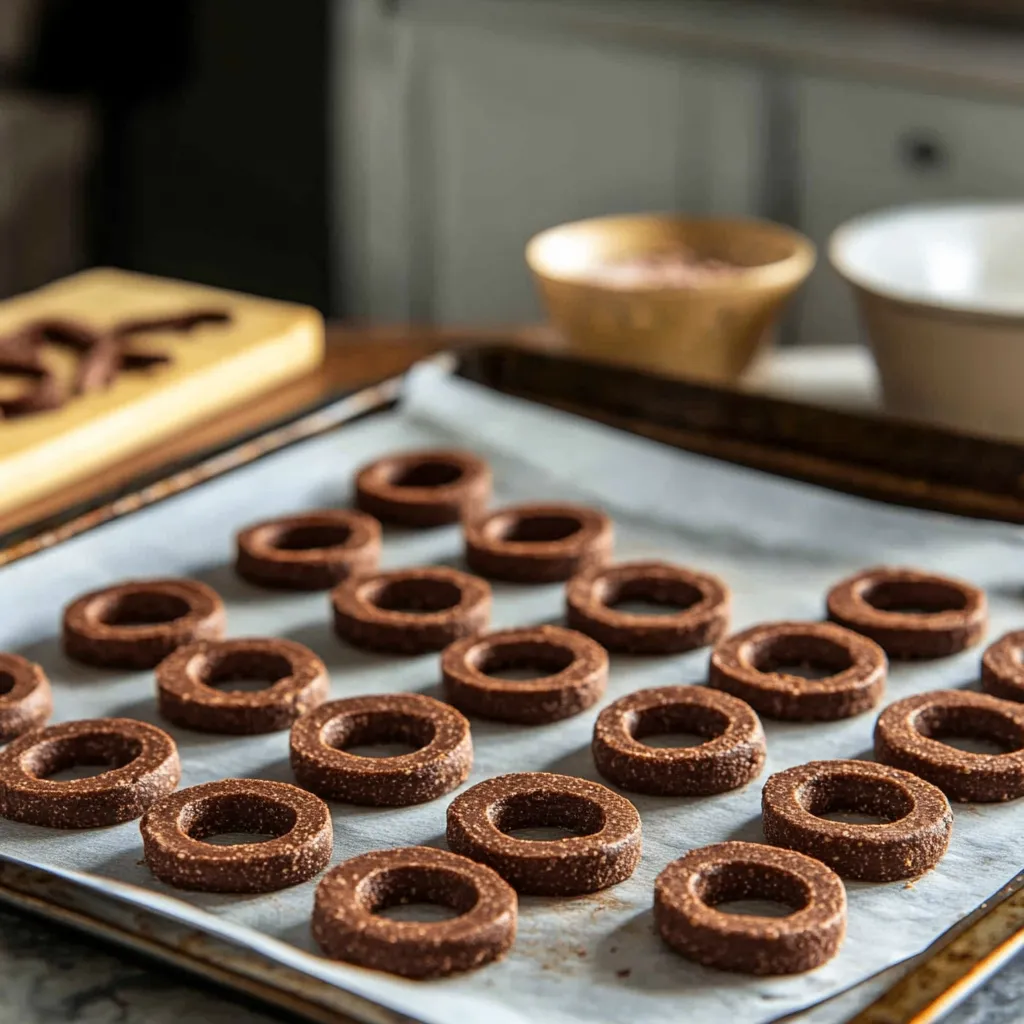
This is where the fun begins! Divide the dough into small portions – about the size of a marble. Roll each piece between your palms to create a smooth ball, then gently flatten it into a disk about 1/4 inch thick. Using a small round cutter (about 3/4 inch diameter) or the back of a piping tip, cut out the outer circle. Then use a smaller cutter (about 1/4 inch) to create the center hole, forming the classic O shape.
If you don’t have small round cutters, you can use the ends of different-sized straws or even roll the dough into ropes and form circles by hand. The key is to make them roughly uniform in size so they bake evenly.
Step 6: Arrange and Bake
Place the shaped cereal pieces on your prepared baking sheets, ensuring they don’t touch each other. They need space to expand slightly during baking. Bake for 25-30 minutes, rotating the pans halfway through to ensure even browning.
The cereal is done when it feels firm to the touch and has developed a slightly darker color. They should not be soft or squishy – this indicates they need more time in the oven.
Step 7: Cool and Crisp
Allow the cereal to cool completely on the baking sheets. This cooling process is essential for achieving the perfect crunch. As they cool, the cereal rings will become crispy and develop that satisfying texture that holds up beautifully in milk.
Once completely cool, store in an airtight container for up to two weeks. Though honestly, they probably won’t last that long once your family discovers how delicious they are!
Professional Cooking Tips for Perfect Results
Temperature Control is Key
Maintaining the correct oven temperature is crucial for success. If your oven runs hot, reduce the temperature to 275°F and extend the baking time slightly. Conversely, if your oven runs cool, you may need to increase to 325°F. Every oven is different, so pay attention to how your cereal looks and feels rather than strictly following the timer.
Achieving Uniform Size
For the most professional-looking results, aim for consistency in size. Use a small kitchen scale to portion out equal amounts of dough for each cereal ring. This ensures even baking and a more appealing final product.
Preventing Burning
Cocoa powder can burn easily, which is why we use a lower temperature and longer baking time. If you notice the edges starting to look too dark, cover the baking sheets with aluminum foil for the remaining baking time.
Testing for Doneness
The best way to test if your chocolate cereal is done is the touch test. Gently press the center of one piece – it should feel firm and not give under pressure. If it still feels soft, continue baking for 3-5 minute intervals until the right texture is achieved.
Enhancing Crunchiness
For extra crunch, turn off the oven after baking and leave the cereal inside with the door slightly open for an additional 10 minutes. This gentle drying process helps remove any remaining moisture and creates an even crispier texture.
Creative Variations and Flavor Combinations
Double Chocolate Delight
For chocolate lovers who want even more intensity, add 2 tablespoons of mini chocolate chips to the dough before shaping. The chips will melt slightly during baking, creating pockets of gooey chocolate within the crunchy cereal rings.
Mocha Morning Blend
Add 1 teaspoon of instant coffee powder to the dry ingredients for a subtle coffee flavor that complements the chocolate beautifully. This adult-friendly version is perfect for those who want their cereal to pack a caffeinated punch.
Spiced Chocolate Fiesta
Incorporate 1/4 teaspoon each of cinnamon and chili powder for a Mexican hot chocolate-inspired cereal. The slight heat from the chili powder creates an exciting contrast to the sweet chocolate flavor.
Protein-Packed Power
Substitute 1/4 cup of the flour with your favorite protein powder to create a high-protein breakfast option. Vanilla or unflavored protein powder works best to avoid overwhelming the chocolate taste.
Nutty Chocolate Crunch
Add 2 tablespoons of finely chopped toasted nuts (almonds, pecans, or hazelnuts work wonderfully) for extra texture and healthy fats. Toast the nuts beforehand to enhance their flavor and prevent them from becoming soggy.
Storage and Serving Suggestions
Proper Storage Techniques
Store your homemade chocolate cereal in an airtight container at room temperature for optimal freshness. Glass jars with tight-fitting lids work exceptionally well, as they prevent moisture from making the cereal soggy. Properly stored cereal will maintain its crunch for up to two weeks.
For longer storage, you can freeze the cereal for up to three months. Use freezer-safe containers and allow the cereal to come to room temperature before serving to restore its crispiness.
Serving Ideas Beyond the Bowl
While this chocolate cereal is perfect with cold milk, don’t limit yourself to traditional serving methods. Try these creative ideas:
Trail Mix Addition: Combine with nuts and dried fruit for a chocolatey trail mix that’s perfect for hiking or snacking.
Ice Cream Topping: Sprinkle over vanilla ice cream for a fun twist on dessert that adds satisfying crunch.
Yogurt Parfait: Layer with Greek yogurt and fresh berries for a protein-rich breakfast or snack.
Baking Ingredient: Crush slightly and use as a coating for cake pops or mix into cookie dough for added texture.
Nutritional Benefits and Considerations
Healthier Alternative Analysis
Compared to commercial chocolate cereals, this homemade version offers several nutritional advantages. By using whole wheat flour, you’re adding fiber that helps with digestion and provides sustained energy. The natural cocoa powder provides antioxidants, including flavonoids that support heart health.
The controlled sugar content means you’re not starting your day with a sugar crash waiting to happen. Instead, the combination of complex carbohydrates from whole wheat and the healthy fats from coconut oil provides steady energy release throughout the morning.
Dietary Adaptations
This recipe can easily be adapted for various dietary needs. For gluten-free versions, substitute the whole wheat flour with a gluten-free flour blend. Ensure your blend contains xanthan gum for the best texture results.
For vegan adaptation, the honey can be replaced with maple syrup or agave nectar in equal amounts. The coconut oil is already plant-based, making this an easy recipe to veganize.
Those following low-sugar diets can reduce the brown sugar to 2 tablespoons and increase the vanilla extract slightly to maintain flavor complexity. The natural sweetness from the honey will still provide pleasant sweetness without overdoing the sugar content.
Troubleshooting Common Issues
Problem: Cereal Pieces Are Too Soft
Solution: This usually indicates underbaking. Return to the oven for 5-10 additional minutes, checking every few minutes until they reach the desired firmness. Remember, they should feel completely firm to the touch when done.
Problem: Cereal Burns or Tastes Bitter
Solution: Your oven temperature is likely too high. Reduce by 25°F and extend the baking time. If already burned, unfortunately, there’s no saving this batch, but you’ll know for next time.
Problem: Dough is Too Sticky to Shape
Solution: Add flour one tablespoon at a time until the dough is manageable. Alternatively, lightly flour your hands and work surface to prevent sticking.
Problem: Cereal Pieces Fall Apart
Solution: The dough may be too dry. Add water one teaspoon at a time until the dough holds together properly. Also, ensure you’re not rolling the pieces too thin, as they need some thickness to maintain structural integrity.
Problem: Uneven Baking
Solution: Make sure all pieces are roughly the same size and thickness. Rotate your baking sheets halfway through baking, and consider using an oven thermometer to verify your oven’s accuracy.
Cost Analysis: Homemade vs Store-Bought
Financial Benefits Breakdown
Let’s break down the real savings of making chocolate cereal at home. A typical box of name-brand chocolate cereal costs between $4-6 and contains about 12 ounces of cereal. This homemade recipe produces approximately 16 ounces of cereal at a cost of roughly $2.50 in ingredients.
Over the course of a year, if your family consumes one box of cereal per week, you could save over $150 by making it yourself. That’s significant savings that could go toward other healthy food choices or family activities.
Quality Value Proposition
Beyond the monetary savings, consider the quality improvements you’re getting. No artificial preservatives, colors, or flavors. No mysterious ingredient lists with unpronounceable chemicals. Just simple, wholesome ingredients that you can feel good about serving to your family.
The satisfaction of creating something delicious from scratch is invaluable. There’s something deeply rewarding about seeing your family enjoy food that you made with your own hands, especially when it tastes better than the store-bought version.
Advanced Techniques for Cereal Perfection
Professional Shaping Methods
For those who want to take their cereal-making to the next level, consider investing in small cookie cutters specifically designed for miniature shapes. Professional bakers often use sets that include various sizes of round cutters, making the O-shaping process much faster and more uniform.
Another professional technique is using a small offset spatula to transfer the shaped pieces to the baking sheet. This prevents distortion and ensures each piece maintains its perfect round shape.
Flavor Infusion Techniques
To create more complex flavors, consider blooming your cocoa powder. Mix the cocoa with a small amount of hot water (about 2 tablespoons) before adding it to the dry ingredients. This technique, borrowed from professional chocolate making, intensifies the chocolate Cereal flavor and creates a richer, more complex taste profile.
Texture Enhancement Methods
For an even crunchier final product, try double-baking. After the initial baking time, turn off the oven and let the cereal cool inside with the door ajar. This gentle dehydration process removes every bit of moisture, creating an incredibly satisfying crunch that holds up beautifully in milk.
Seasonal Adaptations and Holiday Versions
Autumn Spice Chocolate Cereal
As cooler weather approaches, adapt this recipe with warm autumn spices. Add 1/4 teaspoon each of cinnamon, nutmeg, and a pinch of cardamom to create a spiced chocolate cereal that’s perfect for fall mornings. The warm spices complement the chocolate beautifully and create a cozy breakfast experience.
Holiday Peppermint Chocolate
During the winter holidays, add 1/4 teaspoon of peppermint extract along with the vanilla for a festive twist. You can even add a few drops of natural red food coloring to create a fun holiday appearance. Crush a few candy canes and sprinkle them on top before baking for extra holiday spirit.
Summer Berry Chocolate
In warmer months, consider adding freeze-dried strawberry or raspberry powder (about 1 tablespoon) to create a fruity chocolate Cereal combination. The tangy fruit flavors provide a refreshing contrast to the rich chocolate and make for a lighter summer breakfast option.
Frequently Asked Questions
How long does homemade chocolate cereal stay fresh?
When stored properly in an airtight container at room temperature, homemade chocolate cereal maintains its crunch and flavor for up to two weeks. For maximum freshness, use glass containers with tight-fitting lids and keep away from heat and humidity. If the cereal starts to lose its crunch, you can refresh it by placing it in a 250°F oven for 5-10 minutes, then cooling completely before storing again.
Can I make this recipe gluten-free?
Absolutely! Replace the whole wheat flour with your favorite gluten-free flour blend in equal amounts. Look for blends that contain xanthan gum, as this helps provide the binding properties that gluten typically offers. Popular options include King Arthur Gluten-Free Flour or Bob’s Red Mill 1-to-1 Baking Flour. The texture may be slightly different, but the flavor will be just as delicious.
Is it possible to make this cereal sugar-free?
Yes, you can create a sugar-free version by substituting the brown sugar with natural sugar alternatives. Erythritol works particularly well and can be used in a 1:1 ratio. You might also try monk fruit sweetener or stevia, though you’ll need less (start with 1-2 tablespoons and adjust to taste). Keep in mind that the texture and browning may be slightly different without traditional sugar.
Why doesn’t my cereal stay crunchy in milk?
If your cereal becomes soggy quickly in milk, it likely needs more baking time. The pieces should be completely firm and dry before cooling. Try baking for an additional 5-10 minutes next time, or use the double-baking method mentioned in the advanced techniques section. Also, ensure your cereal is stored in a completely airtight container to prevent moisture absorption.
Can I double or triple this recipe?
Certainly! This recipe scales up beautifully. When doubling or tripling, make sure you have enough oven space and baking sheets. You may need to bake in batches, which is perfectly fine. The dough can sit at room temperature while you bake the first batch. Just make sure to maintain consistent sizing for even baking results.
What’s the best way to get uniform O shapes?
The key to uniform shapes is using proper tools and taking your time. Small round cookie cutters work best – use a 3/4-inch cutter for the outside and a 1/4-inch cutter for the center hole. If you don’t have these specific sizes, the end of a wide straw or bottle cap can work for the outer circle, and a regular straw or small piping tip for the center. Roll all your dough balls first, then shape them all at once for consistency.
Can children help make this recipe?
This is an excellent recipe for involving children in the kitchen! Kids love the hands-on shaping process, and it’s a great way to teach them about measuring and following recipes. Children ages 6 and up can help with mixing ingredients and shaping the cereal rings, while older children can assist with the entire process. Always supervise children around the hot oven and allow adults to handle the baking steps.
How do I know if I’ve added enough cocoa powder?
The dough should have a rich, uniform chocolate Cereal color throughout. If it looks streaky or light brown rather than chocolate brown, you may need more cocoa powder. Start with the recommended 1/3 cup and add more gradually until you achieve the desired color and flavor intensity. Remember that the chocolate flavor will be more pronounced in the finished cereal than in the raw dough.
 DINNER
 LUNCH
LUNCH Desserts
 BREAKFAST
For more amazing recipes, be sure to check out our other sections to explore a variety of ideas that will enrich your cooking experience. Each section offers its own unique flavors to ensure a delightful culinary journey:
Easy and Quick Recipes: A collection of dishes that guarantee delicious meals with minimal effort and time.
Healthy Recipes: Discover healthy and delicious options that fit your lifestyle.
Desserts: A diverse selection of sweets that will add a special touch of sweetness to your table.
Lunch Recipes: Tasty lunch ideas that you can easily prepare to delight your family.
Dinner Recipes: Delicious and easy-to-make recipes that will make your dinner a memorable occasion.
Conclusion: Your New Favorite Breakfast Adventure
Creating homemade chocolate cereal is more than just a cooking project – it’s a journey toward healthier eating, family bonding, and rediscovering the joy of making food from scratch. This recipe proves that you don’t need to sacrifice taste or convenience to eat better. With simple ingredients and straightforward techniques, you can create a breakfast cereal that rivals any store-bought option while knowing exactly what goes into every bite.
The beauty of this homemade chocolate cereal lies not just in its delicious taste, but in its versatility and the control it gives you over your family’s nutrition. Whether you’re dealing with dietary restrictions, trying to reduce processed foods, or simply wanting to save money while eating better, this recipe delivers on all fronts.
As you embark on your cereal-making adventure, remember that practice makes perfect. Your first batch might not look exactly like the cereal aisle boxes, but it will taste infinitely better because it’s made with love and wholesome ingredients. Each time you make this recipe, you’ll discover little ways to improve and personalize it to your family’s preferences.
The satisfaction of pouring a bowl of cereal that you created with your own hands is incomparable. Watching your children’s faces light up as they crunch through their morning bowl, knowing they’re getting nutrition along with their chocolate Cereal fix, makes every minute of preparation worthwhile.
So gather your ingredients, preheat that oven, and prepare to revolutionize your breakfast routine. Your homemade chocolate cereal adventure starts now, and I guarantee it will become a cherished family tradition that brings everyone together around the breakfast table. Happy baking!