Table of Contents
Table of Contents
There’s something truly magical that happens when fire meets meat on a bed of ancient pink crystals. I’ll never forget the first time I tried cooking on a Himalayan salt slab – it was at my friend Marco’s backyard barbecue three summers ago. He pulled out this gorgeous pink slab that looked more like a piece of art than cooking equipment, and I thought he’d lost his mind. But one bite of that perfectly seared ribeye, infused with the subtle mineral sweetness of pure Himalayan salt, completely changed my perspective on grilling forever.
That evening sparked my obsession with Himalayan salt recipes, and this grilled ribeye has become my absolute go-to dish when I want to impress guests or simply treat myself to something extraordinary. The beauty of cooking on a Himalayan salt slab isn’t just about the incredible flavor it imparts – it’s about the entire experience. The way the salt heats evenly, creating the perfect searing surface, combined with the gentle mineral infusion that happens as you cook, creates a dining experience that’s both rustic and refined.
What makes this one of my favorite easy homemade recipes is that despite its impressive presentation, it’s surprisingly simple to master. You don’t need years of culinary school or expensive equipment – just a good ribeye, a quality Himalayan salt slab, and a willingness to embrace this ancient cooking method that’s been bringing people together around food for centuries.
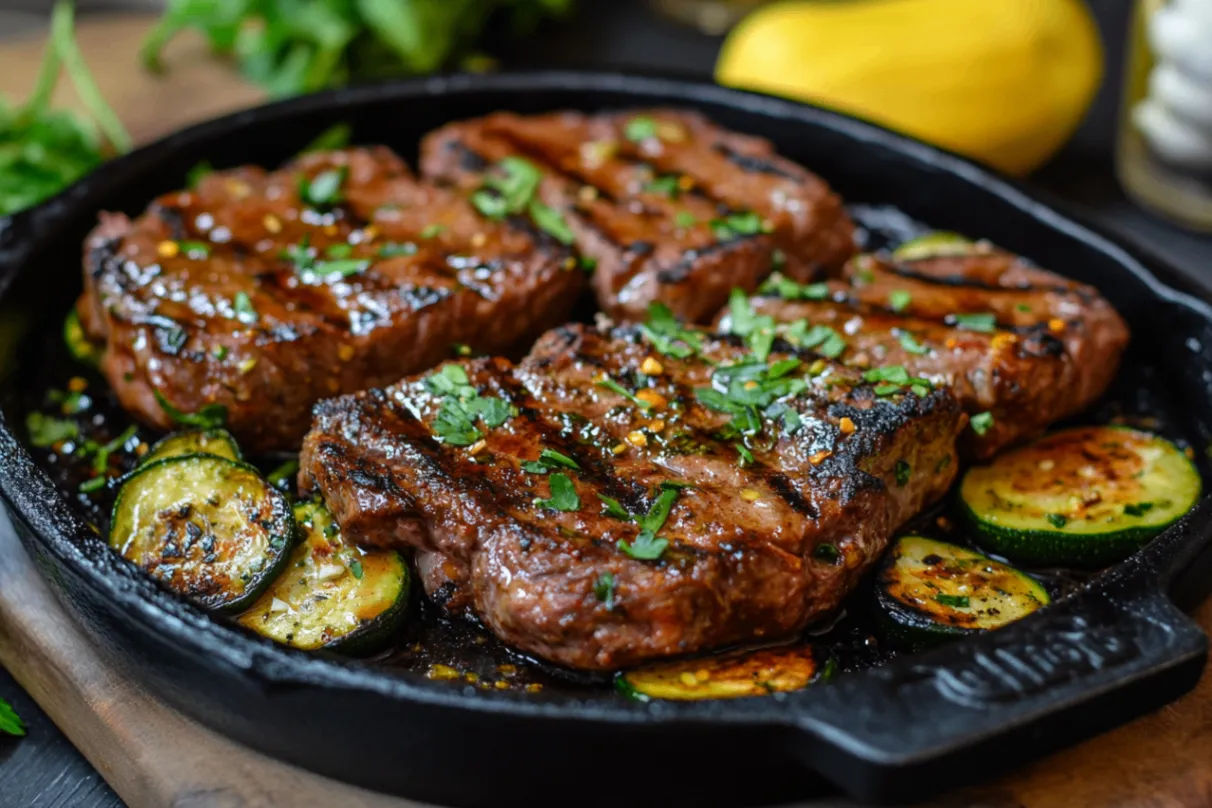
Grilled Ribeye on a Himalayan Salt Slab – Infused with Pure Pink Salt Flavor
Ingredients
Tried this recipe?
Let us know how it was!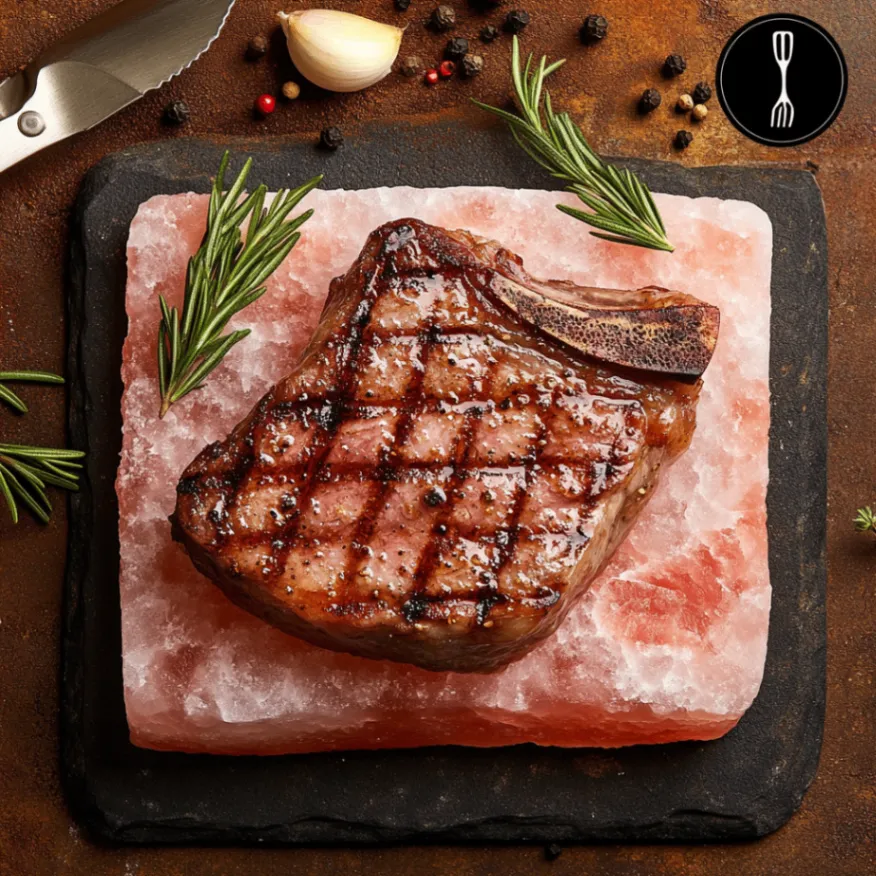
Ingredients
Understanding Your Key Ingredients and Their Role
When it comes to Himalayan salt recipes, the quality of your ingredients makes all the difference, and this dish is no exception. Let’s start with the star of the show – your ribeye steak. I always recommend choosing a cut that’s at least 1-inch thick, preferably 1.5 inches, with beautiful marbling throughout. The fat content in a good ribeye is what creates those incredible flavors when it renders on the hot salt slab, creating a natural basting effect that keeps the meat incredibly juicy.
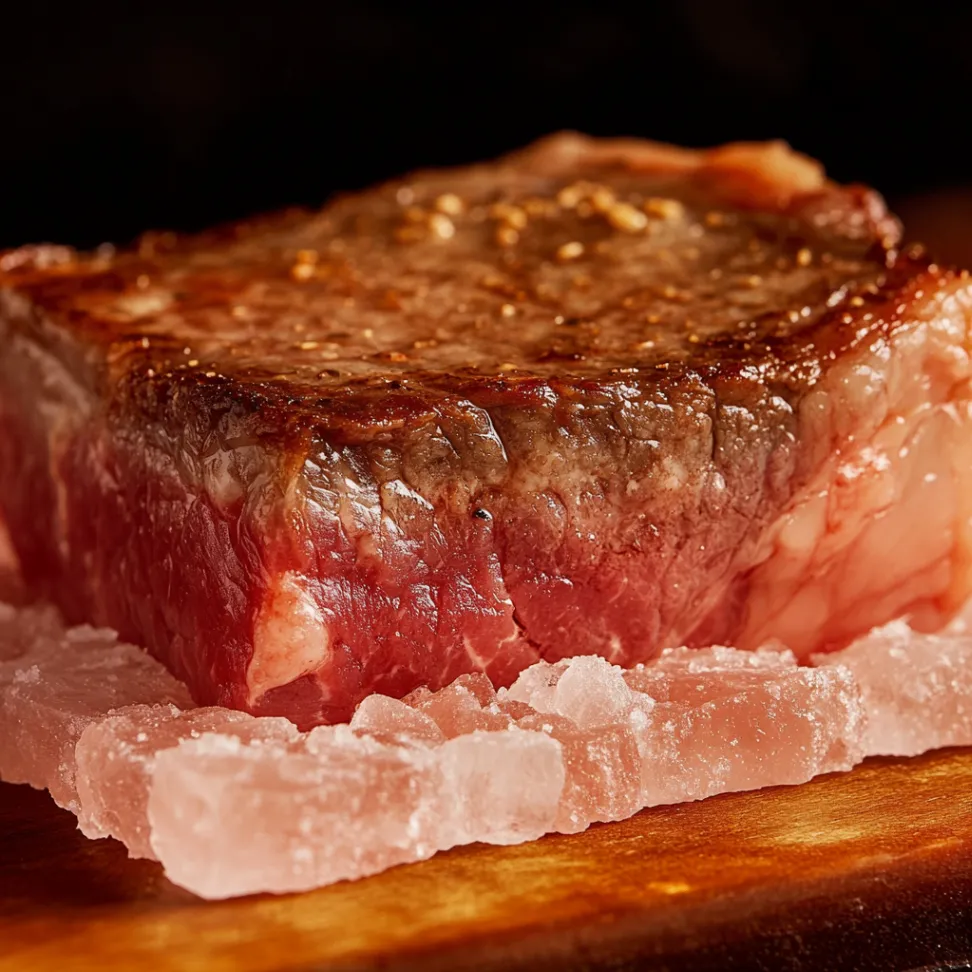
The Himalayan salt slab itself is your secondary ingredient, and yes, I consider it an ingredient because it actively contributes to the flavor profile of your dish. These beautiful pink slabs contain over 80 trace minerals, including iron, magnesium, and potassium, which subtly enhance the natural beef flavors without overwhelming them. Unlike regular table salt, Himalayan salt has a complex mineral profile that adds depth rather than just saltiness.
For seasoning, I keep it simple with just black pepper and perhaps a touch of garlic powder. The salt slab will handle all the sodium needs, so additional salt isn’t necessary. A light brush of high-heat oil like avocado or grapeseed oil helps prevent sticking and promotes even browning. Fresh herbs like rosemary or thyme make beautiful garnishes and add aromatic elements that complement the earthy mineral notes from the salt.
Tips for Selecting the Best Quality Ingredients
Shopping for the perfect ribeye can feel overwhelming, but I’ve learned a few tricks over the years that never fail me. First, look for steaks with consistent marbling throughout – those white fat lines should be evenly distributed rather than concentrated in one area. The meat should have a bright red color, never brown or grayish, and it should feel firm to the touch. I always ask my butcher when the meat arrived, and I prefer steaks that have been aged for at least 21 days for optimal tenderness and flavor development.
When selecting your Himalayan salt slab, size matters for this recipe. I recommend a slab that’s at least 12×8 inches and 1.5-2 inches thick. Thicker slabs retain heat better and are less likely to crack with temperature changes. Look for slabs with minimal veining or cracks, as these can become weak points during heating. The color can range from light pink to deep rose, and both work beautifully – it’s really about personal preference and what catches your eye.
For oils, choose something with a high smoke point since you’ll be working with intense heat. Avocado oil is my personal favorite because it has a neutral flavor and can handle temperatures up to 520°F without breaking down. Avoid olive oil for this recipe, as it will smoke and become bitter at the high temperatures needed for proper searing.
Substitutions and Alternatives
While ribeye is my preferred cut for this Himalayan salt recipe, several alternatives work wonderfully if ribeye isn’t available or doesn’t fit your budget. New York strip steaks are excellent choices with great flavor and less fat content, though they may not be quite as tender. Filet mignon creates an incredibly elegant presentation, though you’ll miss some of the rich, beefy flavor that comes from the higher fat content in ribeye.
For those following specific dietary preferences, thick portobello mushroom caps make surprisingly delicious alternatives when cooked on the salt slab. The mushrooms absorb the mineral flavors beautifully and develop an incredible meaty texture. Thick-cut pineapple slices also work wonderfully, creating a sweet and savory combination that’s perfect for vegetarian guests.
If you can’t find a Himalayan salt slab locally, they’re readily available online, but in a pinch, you can create a similar effect using coarse Himalayan salt in a cast-iron pan. Heat the pan, add a layer of coarse salt, and cook your protein directly on the salt bed. While it won’t provide exactly the same even heating and presentation, it will still infuse your food with those beautiful mineral flavors that make Himalayan salt recipes so special.
Preparation Steps
Initial Prep and Cleaning Tips
Before we dive into the cooking process, proper preparation of both your steak and salt slab is crucial for success. Start by removing your ribeye from the refrigerator about 30-45 minutes before cooking. This allows the meat to come to room temperature, which ensures even cooking throughout. While the steak is tempering, gently pat it dry with paper towels – this step is essential for achieving that beautiful sear we’re aiming for.
Preparing your Himalayan salt slab requires patience and gradual heating. Never place a cold salt slab directly onto high heat, as thermal shock can cause cracking. Instead, start by placing the slab on your grill grates or stovetop over the lowest possible heat setting. Gradually increase the temperature every 15 minutes, allowing the slab to heat slowly and evenly. This process typically takes about 45 minutes to an hour, but it’s worth every minute for the incredible results you’ll achieve.
While your slab is heating, this is the perfect time to prepare your workspace and gather all your tools. You’ll need long-handled tongs, a meat thermometer for checking doneness, and a plate for resting the finished steak. I also like to have a small bowl of coarse Himalayan salt nearby for finishing touches, though you may find the slab provides all the seasoning you need.
Step-by-Step Cooking Instructions with Secret Tips
Once your Himalayan salt slab reaches the proper temperature – you’ll know it’s ready when a drop of water sizzles and evaporates immediately upon contact – it’s time for the magic to happen. Lightly brush your ribeye with oil and season generously with freshly cracked black pepper. Here’s my secret tip: add just a tiny pinch of garlic powder to enhance the natural beef flavors without competing with the salt slab’s mineral complexity.
Place the steak directly onto the hot salt slab and resist the urge to move it immediately. Let it sear for 3-4 minutes for a 1.5-inch thick steak, allowing those beautiful grill marks to develop. The salt slab will create an incredible crust while slowly infusing the meat with subtle mineral flavors. You’ll hear that satisfying sizzle that tells you everything is working perfectly.
When it’s time to flip – and you’ll know because the steak will release easily from the slab – use your tongs to turn it gently. Here’s another secret from my years of perfecting Himalayan salt recipes: the second side typically cooks faster than the first, so reduce your cooking time by about a minute. For medium-rare, aim for an internal temperature of 130-135°F, remembering that the temperature will continue to rise during resting.
The final secret is in the resting process. Remove the steak from the salt slab and let it rest on a warm plate for 5-7 minutes. This allows the juices to redistribute throughout the meat, ensuring every bite is incredibly tender and flavorful. The residual salt from the slab will continue to enhance the flavors even during this resting period.
Common Mistakes and How to Avoid Them
Over the years of perfecting this dish and sharing it with friends, I’ve seen several common mistakes that can turn this amazing experience into a frustrating one. The biggest mistake people make is rushing the salt slab heating process. I cannot stress enough how important it is to heat your slab gradually. I’ve seen beautiful slabs crack right down the middle because someone was impatient and cranked up the heat too quickly.
Another frequent error is over-seasoning the meat before cooking. Remember, you’re cooking on salt – literally! The slab will provide all the sodium your steak needs, and then some. I learned this lesson the hard way when I first started experimenting with Himalayan salt recipes. My first attempt was so salty it was nearly inedible because I had seasoned the steak with regular salt before placing it on the slab.
Temperature control is crucial for success, and many home cooks struggle with this aspect. If your slab isn’t hot enough, you won’t get proper searing and the meat may stick. If it’s too hot, you’ll burn the exterior before the interior cooks properly. The sweet spot is when the slab is hot enough to sear immediately but not so hot that it chars everything on contact. Practice with the water drop test – when a single drop dances and evaporates within 2-3 seconds, you’re ready to cook.
Serving & Final Touches
Creative Presentation Ideas
The natural beauty of cooking on a Himalayan salt slab means your presentation is already halfway to spectacular before you even think about plating. One of my favorite ways to serve this dish is directly on the salt slab itself – it keeps the steak warm and continues the gentle salt infusion while your guests enjoy their meal. The pink hues of the salt create a stunning contrast against the rich, caramelized exterior of the ribeye.
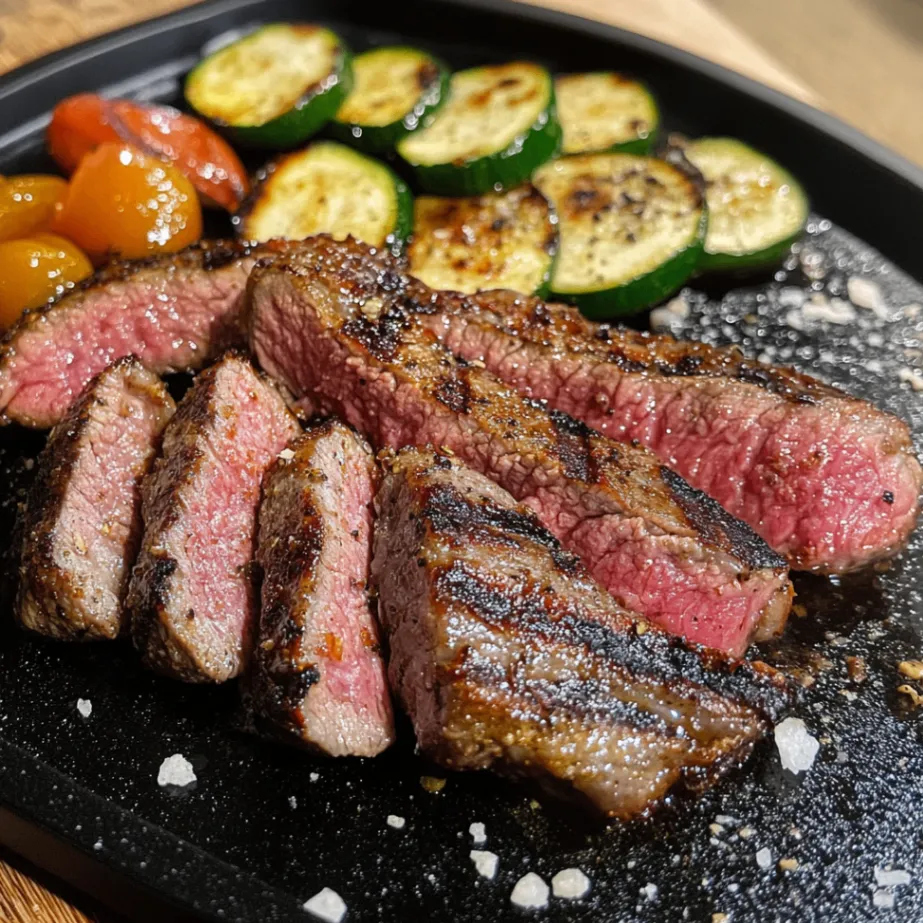
For a more formal presentation, I like to slice the ribeye against the grain and fan it out on warm plates, finishing with a sprinkle of flaky sea salt and freshly cracked black pepper. A small mound of compound butter made with fresh herbs melting slowly over the warm meat adds both visual appeal and incredible flavor. The key is to keep the presentation simple and let the natural beauty of the perfectly cooked meat shine through.
Consider adding height and color contrast to your plate with simple garnishes that complement rather than compete with your star ingredient. A small stack of grilled asparagus, a few cherry tomatoes that have been warmed on the salt slab, or even some caramelized onions can add visual interest while staying true to the rustic elegance that makes Himalayan salt recipes so appealing.
Recommended Side Dishes and Pairings
When it comes to pairing sides with this incredible ribeye, I’ve learned that simple, clean flavors work best to complement rather than compete with the complex mineral notes from the Himalayan salt. Roasted vegetables are always a winner – try Brussels sprouts with a touch of balsamic glaze, or simple roasted carrots that bring out the natural sweetness that pairs beautifully with the salty, mineral flavors of the steak.
For starches, I love serving this with garlic mashed potatoes or a simple baked sweet potato. The creamy textures provide a wonderful contrast to the perfectly seared exterior of the meat, while the mild flavors allow the unique taste profile from cooking on the salt slab to remain the star of the meal. Wild rice pilaf is another excellent choice that adds texture without overwhelming the delicate mineral flavors.
Wine pairing with Himalayan salt recipes requires consideration of both the beef and the unique mineral elements from the salt. A bold Cabernet Sauvignon or Malbec stands up beautifully to the rich ribeye while complementing the earthy mineral notes. For those who prefer lighter wines, a well-structured Syrah or even a robust Pinot Noir can work wonderfully, especially if you’ve cooked your steak to medium-rare.
Storage Tips and Reheating Advice
While this dish is absolutely best enjoyed fresh off the salt slab, life sometimes requires us to plan ahead or deal with leftovers. If you need to store cooked ribeye, wrap it tightly in plastic wrap or store it in an airtight container in the refrigerator for up to three days. The salt infusion actually helps preserve the meat slightly longer than traditionally cooked steaks, though I still recommend enjoying it as soon as possible.
Reheating steak can be tricky because you don’t want to overcook this beautiful piece of meat. My preferred method is to let the steak come to room temperature first, then warm it gently in a low oven (250°F) until just heated through. Alternatively, you can slice the cold steak thinly and use it for sandwiches or salads – the salt-infused flavor makes it incredible even when served cold.
For your Himalayan salt slab, proper care ensures you’ll be enjoying delicious Himalayan salt recipes for years to come. Allow the slab to cool completely after use, then scrape off any food residue with a plastic scraper. Never use soap on your salt slab – simply wipe it clean with a damp cloth and allow it to air dry completely before storing. With proper care, these beautiful slabs can last for dozens of cooking sessions.
Frequently Asked Questions
Q: How do I know when my Himalayan salt slab is hot enough for cooking? A: The best test is the water drop method – when a single drop of water hits the slab and dances around for 2-3 seconds before evaporating, your slab is ready. You should also feel intense heat radiating from the surface when you hold your hand about 4 inches above it. Remember, proper preheating is crucial for both safety and cooking success.
Q: Can I use my Himalayan salt slab on different types of grills? A: Absolutely! Himalayan salt slabs work beautifully on gas grills, charcoal grills, and even in your oven. The key is always gradual heating regardless of your heat source. On a gas grill, start with the lowest setting and increase gradually. For charcoal, place the slab on the cooler side initially and move it closer to the coals as it heats. In the oven, start at 200°F and increase by 50-degree increments every 15 minutes.
Q: How many times can I use my salt slab before it needs replacement? A: With proper care, a quality Himalayan salt slab can be used dozens of times. Each use will gradually wear down the surface slightly, but this is normal. You’ll know it’s time for replacement when the slab becomes too thin (less than 1 inch), develops significant cracks, or starts to break apart during heating. Most home cooks get 50-100 uses from a good slab.
Q: What other foods work well with Himalayan salt recipes besides steak? A: The possibilities are endless! Fish fillets like salmon and halibut are incredible on salt slabs, as are thick-cut pork chops and lamb. Vegetables like eggplant, portobello mushrooms, and even fruit like pineapple and peaches develop amazing flavors. The key is choosing foods that are thick enough to benefit from the extended contact with the salt surface.
Q: Is cooking on Himalayan salt slabs safe, and are there any health concerns? A: Cooking on pure Himalayan salt slabs is completely safe when done properly. The minerals in the salt are naturally occurring and beneficial. However, always ensure you’re purchasing food-grade salt slabs from reputable suppliers. Avoid decorative salt lamps or non-food-grade slabs for cooking. As with any high-heat cooking method, always use proper safety equipment and never leave your heating slab unattended.
 DINNER
 LUNCH
LUNCH Desserts
 BREAKFAST
For more amazing recipes, be sure to check out our other sections to explore a variety of ideas that will enrich your cooking experience. Each section offers its own unique flavors to ensure a delightful culinary journey:
Easy and Quick Recipes: A collection of dishes that guarantee delicious meals with minimal effort and time.
Healthy Recipes: Discover healthy and delicious options that fit your lifestyle.
Desserts: A diverse selection of sweets that will add a special touch of sweetness to your table.
Lunch Recipes: Tasty lunch ideas that you can easily prepare to delight your family.
Dinner Recipes: Delicious and easy-to-make recipes that will make your dinner a memorable occasion.
Conclusion
There’s something deeply satisfying about mastering a cooking technique that connects us to ancient culinary traditions while creating incredibly delicious modern meals. This grilled ribeye on a Himalayan salt slab represents everything I love about cooking – it’s simple enough for a weeknight dinner yet impressive enough for your most important guests. The way the salt slowly infuses the meat with complex mineral flavors while creating that perfect sear is nothing short of culinary magic.
I encourage you to take the leap and try this recipe. Yes, there’s a small learning curve with heating the salt slab properly, but once you experience that first bite of perfectly cooked, salt-infused ribeye, you’ll understand why Himalayan salt recipes have become such an obsession of mine. Start with a good-quality ribeye, take your time with the slab preparation, and trust the process.
Most importantly, share this experience with others. Some of my most treasured memories have been created around salt slab cooking – the anticipation as we wait for the slab to heat, the excitement of that first sizzle when the meat hits the salt, and the pure joy on people’s faces when they taste something they’ve never experienced before. Food has this incredible power to bring people together, and this recipe does exactly that.
I’d love to hear about your salt slab adventures! Whether this becomes a new family favorite recipe or sparks your own exploration into the wonderful world of Himalayan salt cooking, your journey with this ancient cooking method is just beginning. Drop me a line and let me know how your ribeye turned out – I’m always excited to hear about fellow food lovers discovering the magic of cooking on these beautiful pink slabs.