Table of Contents
Table of Contents
There’s something magical about transforming ordinary ingredients into spine-tingling Halloween eats that make both kids and adults squeal with delight. As someone who’s been hosting Halloween parties for over a decade, I’ve learned that the secret to a memorable celebration isn’t just the costumes or decorations—it’s the food that brings everyone together around the table, giggling and gasping at creatively spooky creations.
I still remember the first time I attempted Halloween-themed party food. It was 2015, and my daughter had just turned five. She wanted a “super scary but not too scary” birthday party since her special day falls right at the end of October. What started as a simple request for “ghost cookies” turned into an entire afternoon of experimenting with different Halloween eats, from mummy hot dogs to witch hat brownies. The joy on the kids’ faces—and honestly, the adults too—when they saw these playful, spooky treats made me realize that Halloween food isn’t just about feeding people; it’s about creating moments of pure wonder and connection.
Over the years, my collection of Halloween eats has grown exponentially. Friends now expect my annual Halloween spread, and I’ve become the go-to person for spooky food inspiration in my circle. What I’ve discovered is that the best Halloween treats don’t require professional pastry skills or expensive specialty ingredients. They just need a little creativity, some basic kitchen staples, and the willingness to embrace the beautifully silly spirit of the season.
Today, I’m sharing my favorite Halloween eats collection—recipes that have been tested by countless parties, approved by picky eaters, and perfected through years of happy accidents and delicious discoveries. These aren’t just recipes; they’re your toolkit for creating edible magic that will have your guests talking long after the last jack-o’-lantern has been blown out.
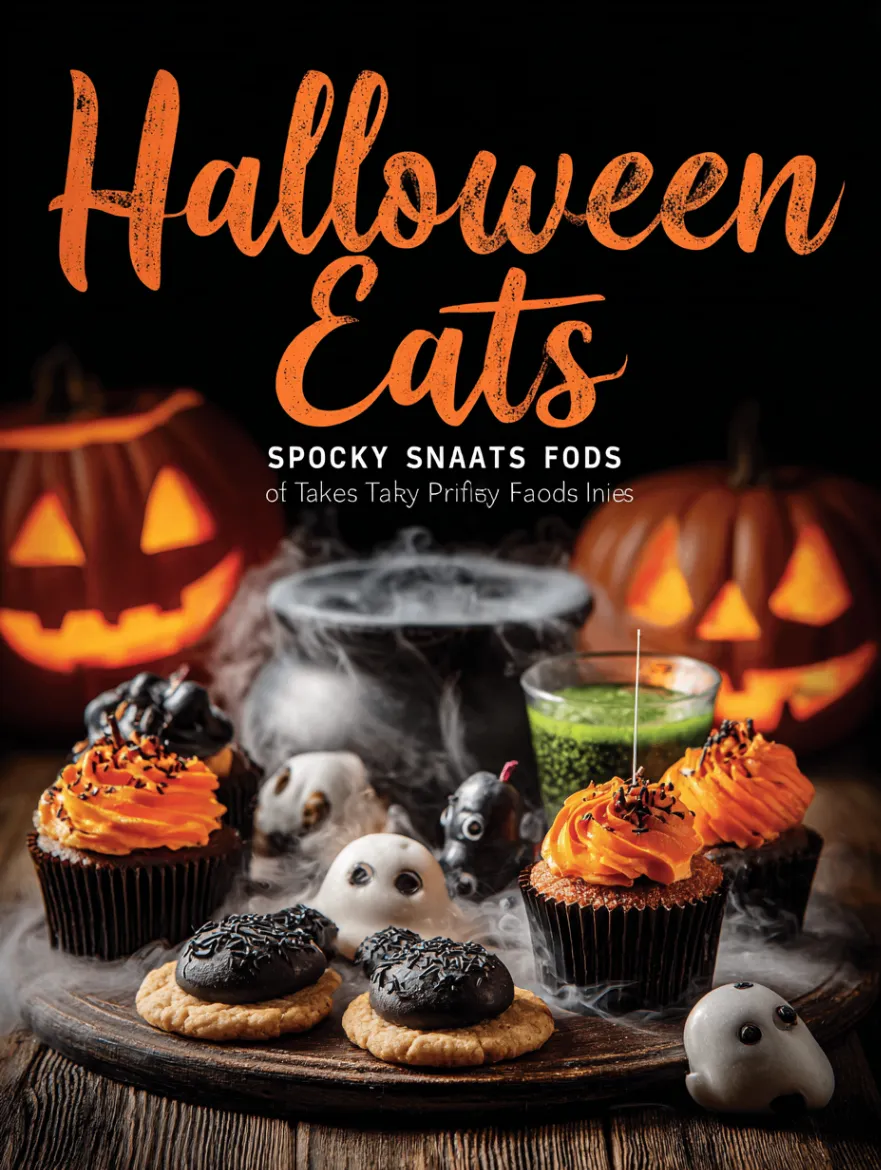
Halloween Eats: Spooky Snacks, Treats & Party Food Ideas
Ingredients
Tried this recipe?
Let us know how it was!Essential Ingredients for Spooky Success
Core Components That Make Halloween Eats Extraordinary
The foundation of any great Halloween spread lies in understanding which ingredients can pull double duty as both delicious and dramatically spooky. In my years of creating Halloween eats, I’ve discovered that certain ingredients are absolute game-changers because of their versatility and visual impact.
Orange food coloring is perhaps the most crucial ingredient in your Halloween arsenal. Unlike artificial dyes that can taste bitter, gel food coloring provides vibrant orange hues without affecting flavor. I use it in everything from orange-tinted cream cheese frosting for “pumpkin” cupcakes to coloring white chocolate for coating pretzel “branches.” The key is starting with small amounts—you can always add more, but you can’t take it back.
Black cocoa powder deserves special mention as a secret weapon for Halloween eats. Regular cocoa powder gives you brown, but black cocoa powder (the kind used in Oreo cookies) creates that deep, dramatic black color that’s perfect for “dirt” cake layers, black velvet cupcakes, and gothic-looking cookies. When mixed with regular cocoa, it creates rich, complex chocolate flavors that adults love while maintaining that spooky aesthetic kids crave.
Cream cheese is another versatile foundation ingredient that appears in countless Halloween eats. Its neutral flavor and smooth texture make it perfect for creating “ghostly” dips, orange-tinted pumpkin spreads, and moldable decorative elements. I always keep at least three blocks on hand during Halloween season because it’s the base for so many crowd-pleasing appetizers and dessert components.

Selecting Premium Ingredients for Maximum Impact
Quality ingredients make an enormous difference in Halloween eats, especially when you’re working with simple recipes that rely on pure flavors to shine through creative presentation. I’ve learned this lesson the hard way after serving flat, flavorless “spider” brownies made with bargain chocolate chips versus the rich, complex flavor achieved with high-quality dark chocolate.
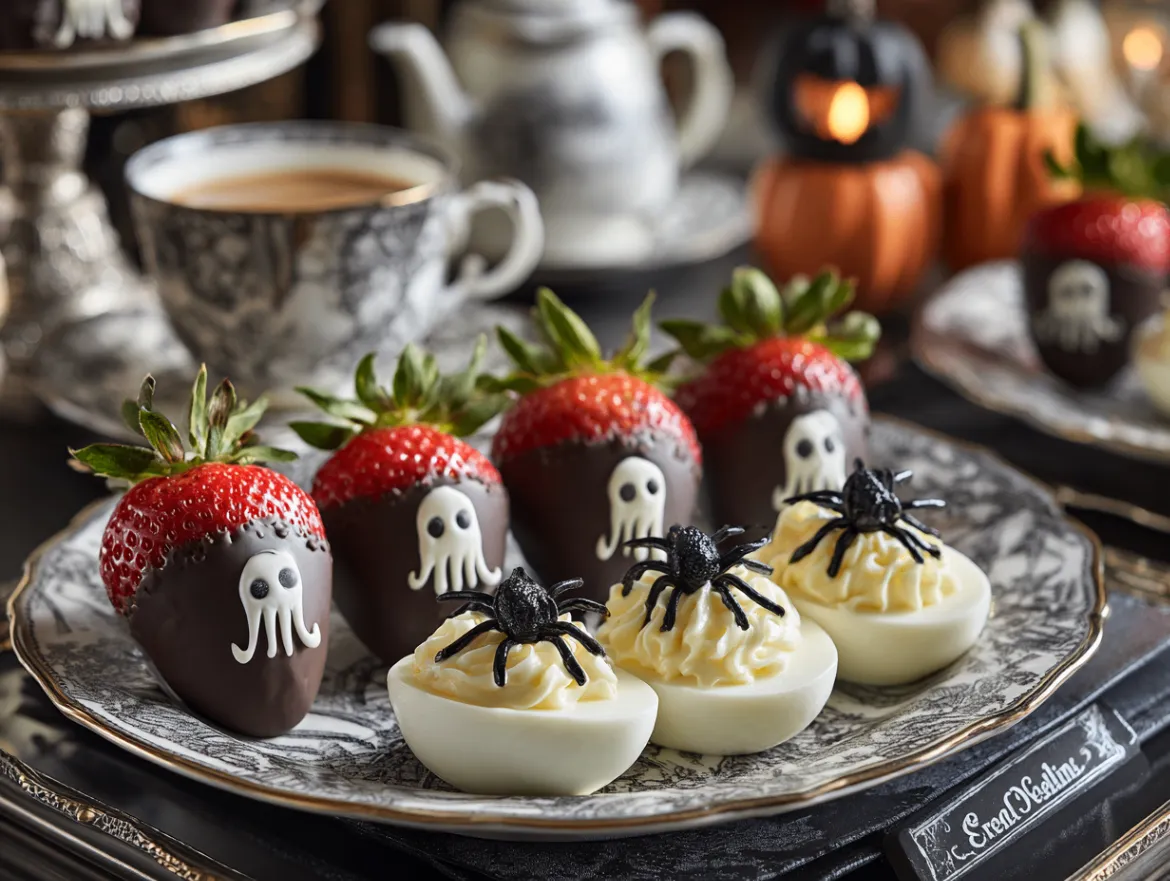
When selecting chocolate for Halloween eats, invest in real chocolate rather than chocolate-flavored coating. The difference is immediately apparent in taste and texture. Real chocolate melts more smoothly, has better flavor depth, and creates more professional-looking results when you’re dipping strawberries to look like “bloody” treats or creating chocolate “bark” with spooky mix-ins.
For produce-based Halloween eats, freshness is paramount. Orange bell peppers for jack-o’-lantern faces should be firm and bright. Apples for caramel dipping need crisp texture that won’t get soggy. Carrots for “finger” vegetables should snap cleanly rather than bend. I shop for Halloween party produce no more than two days before the event to ensure everything looks and tastes its best.
Spices deserve special attention in Halloween eats because they can transform ordinary treats into something that tastes as special as it looks. Real vanilla extract (not imitation) elevates ghost-shaped marshmallows. Fresh nutmeg makes pumpkin-flavored anything taste more authentic. Quality cinnamon turns simple sugar cookies into aromatic autumn delights that fill your kitchen with the scent of the season.
Smart Substitutions and Creative Alternatives
One of the most valuable skills I’ve developed over years of making Halloween eats is knowing how to adapt recipes for different dietary needs without losing the spooky magic. The key is understanding which substitutions maintain both flavor and visual appeal.
For gluten-free Halloween eats, almond flour often works better than standard gluten-free blends because it creates richer flavor and better texture, especially in cookies that need to hold decorative shapes. I’ve found that gluten-free “spider” cookies made with almond flour actually taste more luxurious than their traditional counterparts.
Dairy-free options for Halloween eats can be surprisingly successful with the right substitutions. Coconut cream (the thick part from chilled canned coconut milk) whips beautifully for ghostly toppings and can be tinted orange for pumpkin-themed treats. Cashew cream, made by blending soaked cashews with water, creates smooth, neutral-tasting bases for savory Halloween dips that no one would guess are dairy-free.
Natural food coloring alternatives work wonderfully for Halloween eats when you want to avoid artificial additives. Beet juice creates beautiful red “blood” effects. Turmeric provides gorgeous orange color. Spirulina powder makes convincing “swamp” green. These natural alternatives often provide more subtle, sophisticated colors that appeal to adult palates while still delivering the visual drama kids love.
Step-by-Step Preparation for Spooky Success
Foundation Prep and Kitchen Organization
Successfully executing multiple Halloween eats for a party requires strategic preparation that starts days before your event. I’ve learned through experience (and a few chaotic last-minute scrambles) that proper organization is the difference between enjoying your own party and spending it stressed in the kitchen.
Start your Halloween eats preparation by creating a detailed timeline working backward from your party date. Three days before, handle all the shopping and prep work that doesn’t involve fresh ingredients—making chocolate decorations, preparing cookie doughs that can be refrigerated, and setting up your workspace with all the tools you’ll need. This is also when I prepare my “emergency backup” treats—simple items like chocolate-dipped pretzels that can be made quickly if other recipes don’t turn out as planned.
Two days before your Halloween party, focus on items that actually improve with time. Caramel apples taste better after the coating has had time to set completely. Flavored popcorn mixtures develop deeper, more integrated flavors. Any baked goods that will be served at room temperature can be made now and stored properly. This is also the perfect time to prepare your mise en place for more complex Halloween eats—chopping vegetables, measuring spices, and organizing ingredients by recipe.
The day before your party should be dedicated to fresh preparations and final assembly of Halloween eats that are best served immediately. Make your dips, prepare fresh fruit arrangements, and do any delicate decorating work that requires steady hands and good lighting. I always reserve the most intricate decorating tasks for when I’m fresh and focused rather than trying to create detailed “spider web” patterns when I’m already tired from other party preparations.
Detailed Cooking Instructions with Professional Tips
The secret to impressive-looking Halloween eats often lies in mastering a few key techniques that can be applied across multiple recipes. Temperature control is crucial for chocolate work—whether you’re creating chocolate “bark” with spooky mix-ins or dipping strawberries to look like ghosts, maintaining chocolate at the proper temperature prevents streaking and ensures smooth, glossy finishes.
When working with chocolate for Halloween eats, use a double boiler or microwave in 30-second intervals, stirring between each heating. The chocolate is ready when it’s smooth and registers between 88-90°F on a candy thermometer. This temperature range ensures proper tempering, which means your finished treats will have that satisfying snap and won’t develop white bloom spots during storage.
For consistent results with shaped Halloween eats like ghost cookies or pumpkin muffins, invest in quality molds and cookie cutters, but more importantly, learn how to use them effectively. When cutting cookie dough, dip your cutters in flour between each use to prevent sticking. Press straight down and lift straight up—twisting or angling will blur the edges and make your Halloween shapes less defined.
Layered Halloween eats like “dirt cake” trifles or parfaits with spooky themes require understanding proper layering techniques. Each layer should be distinct but complementary in flavor. Allow each layer to set properly before adding the next—this usually means 15-20 minutes in the refrigerator between layers. Use a piping bag or offset spatula to create clean, professional-looking layers that showcase your Halloween theme effectively.
Common Pitfalls and Professional Solutions
Even experienced home cooks encounter challenges when creating elaborate Halloween eats, and I’ve made virtually every mistake possible over the years. The good news is that most problems have simple solutions once you understand what went wrong and why.
Chocolate seizing (becoming grainy and unusable) is perhaps the most common disaster in Halloween treat-making. This happens when even a tiny amount of water contacts melting chocolate. If this happens, don’t panic—you can often save seized chocolate by whisking in a small amount of warm cream or coconut oil. The mixture won’t be suitable for dipping, but it makes excellent hot chocolate or can be used in baked goods.
Food coloring disasters are another frequent issue with Halloween eats. Colors that look perfect in artificial light can appear completely wrong in natural light. Always check your colored frostings, doughs, and other mixtures in the same lighting where they’ll be served. If colors are too intense, add more base mixture. If they’re too pale, add coloring gradually—gel colors are much more concentrated than liquid varieties.
Structural failures in stacked or assembled Halloween eats usually stem from temperature issues or inadequate setting time. Warm kitchens cause buttercream to soften and decorations to slide. If your kitchen is warm, chill assembled treats for 15-20 minutes between decorating steps. For tiered presentations, use dowel rods or cake supports to maintain structural integrity, especially for treats that will be displayed for extended periods.
Serving Strategies and Presentation Magic
Creative Display Ideas That Wow Your Guests
The presentation of your Halloween eats can transform even simple recipes into show-stopping centerpieces that become the talk of your party. Over the years, I’ve discovered that the key to impressive Halloween food displays lies not in expensive serving pieces, but in creative use of lighting, levels, and themed accessories that enhance the spooky atmosphere.
Lighting is perhaps the most powerful tool for showcasing Halloween eats dramatically. Battery-operated LED candles placed strategically around your food display create flickering shadows that make everything look more mysterious. Orange and purple LED string lights woven through your serving area add ambient color without the fire risk of real candles. I particularly love using uplighting—small LED spots placed under glass serving stands—to create an eerie glow that makes translucent treats like gelatin “worms” or colored beverages look otherworldly.
Creating levels in your Halloween eats display adds visual interest and allows you to showcase more items in limited space. Use cake stands, inverted bowls, and books wrapped in Halloween fabric to create platforms at different heights. This technique also helps with traffic flow at parties—guests can easily see and reach items at various levels rather than crowding around a single flat surface. I arrange my spookiest, most impressive Halloween eats at eye level where they’ll have maximum impact, with simpler treats on lower levels.
Themed serving containers turn ordinary Halloween eats into integral parts of your decor. Clean glass jars become “specimen containers” for layered desserts when you add vintage-style labels. Black plastic cauldrons (available cheaply at dollar stores) are perfect for serving party mix or candy. Even simple white serving bowls become spooky when you add plastic spiders as garnishes or drape them with artificial spider webs.
Perfect Pairings That Enhance the Experience
Successful Halloween parties aren’t just about individual Halloween eats—they’re about creating combinations that enhance both flavors and the overall spooky experience. I’ve learned to think about my Halloween menu as a complete story, with each element supporting and amplifying the others.
Beverage pairings with Halloween eats deserve special attention because drinks can enhance themed presentations while providing necessary palate cleansers between rich treats. Orange-tinted drinks (orange juice with a splash of cranberry, or ginger ale with orange food coloring) complement the visual theme while providing refreshing contrast to sweet treats. “Witch’s brew” punch bowls with dry ice create dramatic fog effects, but remember to use food-grade dry ice and never put it directly in drinks—use a separate container within the punch bowl for safety.
Temperature contrasts make Halloween eats more memorable and satisfying. Plan your menu to include both warm and cool elements—hot cider or soup alongside cold desserts, or warm dips with crisp vegetables. This is especially important for longer parties where guests will be grazing over several hours. The variety keeps people interested and prevents palate fatigue from too many similar textures or temperatures.
Textural variety within your Halloween eats spread ensures that every guest finds something appealing. Include crunchy elements (spiced nuts, crisp vegetables, brittle), creamy options (dips, mousses, soft cookies), and chewy textures (caramels, certain candies). This variety also helps accommodate different age groups—while kids might gravitate toward softer, sweeter Halloween treats, adults often appreciate items with more complex textures and sophisticated flavor profiles.
Storage Solutions and Make-Ahead Strategies
Smart storage strategies for Halloween eats can make the difference between a successful party and a stressful experience. Understanding which treats improve with time, which need last-minute preparation, and how to store everything properly ensures your Halloween spread looks and tastes perfect when guests arrive.
Most baked Halloween eats actually benefit from being made 1-2 days ahead. Cookies develop better flavor and texture when stored properly in airtight containers. Layer them between sheets of parchment paper to prevent sticking, and store decorated cookies in single layers to protect delicate decorations. Brownies and bars often taste better the day after baking as flavors meld and textures settle.
Chocolate-based Halloween eats require special storage considerations. Store them in cool, dry places away from strong odors (chocolate readily absorbs surrounding flavors). If your kitchen is warm, refrigerate chocolate treats, but bring them to room temperature before serving for best flavor and texture. Condensation can ruin chocolate decorations, so when removing items from refrigeration, let them come to room temperature before unwrapping or uncovering.
Fresh fruit components in Halloween eats need careful timing and storage. Cut apples immediately before serving or treat with lemon juice to prevent browning. Store berry garnishes separately until serving time. If you’re making caramel or chocolate-dipped fruit, consume within 24 hours for best quality, and store in the refrigerator if your kitchen is warm or humid.
 DINNER
 LUNCH
LUNCH Desserts
 BREAKFAST
For more amazing recipes, be sure to check out our other sections to explore a variety of ideas that will enrich your cooking experience. Each section offers its own unique flavors to ensure a delightful culinary journey:
Easy and Quick Recipes: A collection of dishes that guarantee delicious meals with minimal effort and time.
Healthy Recipes: Discover healthy and delicious options that fit your lifestyle.
Desserts: A diverse selection of sweets that will add a special touch of sweetness to your table.
Lunch Recipes: Tasty lunch ideas that you can easily prepare to delight your family.
Dinner Recipes: Delicious and easy-to-make recipes that will make your dinner a memorable occasion.
Frequently Asked Questions
Q: How far in advance can I prepare Halloween eats for a party?
Most Halloween treats can be prepared 2-3 days ahead with proper storage. Baked goods like cookies, brownies, and muffins actually improve in flavor when stored in airtight containers. Chocolate decorations and candy work can be done up to a week ahead. However, fresh fruit components, cream-based dips, and anything requiring crisp textures should be prepared the day of serving. I recommend making a timeline working backward from your party date, with the most perishable items prepared last.
Q: What are the best natural alternatives to artificial food coloring for Halloween eats?
Natural coloring options work wonderfully for Halloween themes! For orange, use turmeric powder or carrot juice. Beet juice creates beautiful reds and pinks. Spirulina powder makes vibrant greens. Purple cabbage water (when mixed with baking soda) produces lovely purples and blues. These alternatives often provide more subtle, sophisticated colors and can actually enhance flavors rather than just adding color. Start with small amounts as natural colors can be quite potent.
Q: How do I prevent chocolate from seizing when making Halloween chocolate treats?
Chocolate seizing happens when water contacts melting chocolate, causing it to become grainy and unusable. Prevent this by ensuring all utensils are completely dry, avoiding steam from double boilers, and never covering melting chocolate (condensation can drip in). If chocolate does seize, you can often save it by whisking in a small amount of warm cream or neutral oil. While this chocolate won’t be ideal for dipping, it’s perfect for baking or making hot chocolate.
Q: What’s the secret to making Halloween eats that appeal to both kids and adults?
The key is balancing visual appeal with sophisticated flavors. Use high-quality ingredients like real vanilla and good chocolate, which adults appreciate, while maintaining fun presentations kids love. Offer variety in sweetness levels—some intensely sweet options for kids, and items with more complex flavors for adults. Include savory Halloween eats alongside sweet ones. Most importantly, focus on quality execution rather than overly complicated techniques.
Q: How do I keep Halloween party food safe, especially with decorative elements?
Food safety is crucial, especially with elaborate Halloween presentations. Keep cold items cold (below 40°F) and hot items hot (above 140°F). Use food-grade decorations only—craft materials aren’t safe for food contact. If using dry ice for dramatic effects, never put it directly in food or drinks; use a separate container within serving bowls. Label foods with common allergens clearly. For outdoor parties, protect food from contamination with covers, and don’t leave perishable items out longer than 2 hours (1 hour if temperature exceeds 90°F).
Creating Halloween Magic One Bite at a Time
As I wrap up this collection of Halloween eats wisdom, I’m reminded of why I fell in love with Halloween food creation in the first place. It’s not just about feeding people—though these recipes certainly do that deliciously. It’s about creating moments of pure joy, surprise, and connection that bring families and friends together in the most delightful way possible.
Your kitchen doesn’t need to be a professional bakery to create memorable Halloween eats. What it needs is your willingness to embrace the playful spirit of the season, your creativity in transforming ordinary ingredients into extraordinary experiences, and your love for the people you’re feeding. Some of my most treasured Halloween memories have come from the simplest treats—ghost-shaped marshmallows that made my daughter giggle, or spooky dips that kept adult guests lingering around the kitchen island long after the party was supposed to wind down.
The beauty of Halloween eats lies in their forgiving nature. If your “spider” cookies look more like abstract art, they’ll still taste wonderful. If your orange frosting turns out more coral than pumpkin, your guests will be charmed by the effort and delighted by the flavor. The imperfections often become the most beloved elements of your spread, the treats that guests remember and request year after year.
I encourage you to start with one or two recipes that speak to you, then build your Halloween repertoire gradually. Each year, add a new element or try a different technique. Before you know it, you’ll have your own collection of go-to Halloween eats that reflect your family’s tastes and traditions. Most importantly, involve others in the process—Halloween food creation is even more magical when shared with eager helpers, whether they’re small hands learning to decorate cookies or friends who come over for an afternoon of Halloween prep.
Your Halloween eats journey starts now. Choose a recipe, gather your ingredients, and prepare to create some deliciously spooky magic. I can’t wait for you to experience the joy of watching faces light up when they see your creative creations, and I’d love to hear about your Halloween adventures. Share your successes, your happy accidents, and your own creative twists—because the best part of any recipe is how it grows and evolves in kitchens like yours