Table of Contents
Table of Contents
There’s something magical about Halloween that brings out the playful side in all of us, and Halloween Dirt Cups have become one of those beloved traditions that perfectly captures the spooky spirit of the season. This delightfully creepy dessert has been enchanting families for decades, transforming simple ingredients into something that looks absolutely ghoulish but tastes heavenly.
I’ll never forget the first time I made Halloween Dirt Cups with my daughter when she was seven years old. Her eyes lit up with pure wonder as we layered the chocolate pudding and crushed cookies, and when those gummy worms peeked out from the “dirt,” she squealed with delight. That moment of shared joy over such a simple treat reminded me why these easy homemade recipes hold such a special place in our hearts – they’re not just about the food, but about creating memories that last a lifetime.
What makes Halloween Dirt Cups so special in the culinary world isn’t their complexity – quite the opposite. These delicious dishes represent the beautiful simplicity of no-bake desserts that anyone can master, regardless of their cooking experience. They’ve become a staple at Halloween parties, school celebrations, and family gatherings because they’re incredibly forgiving, endlessly customizable, and absolutely irresistible to both kids and adults.
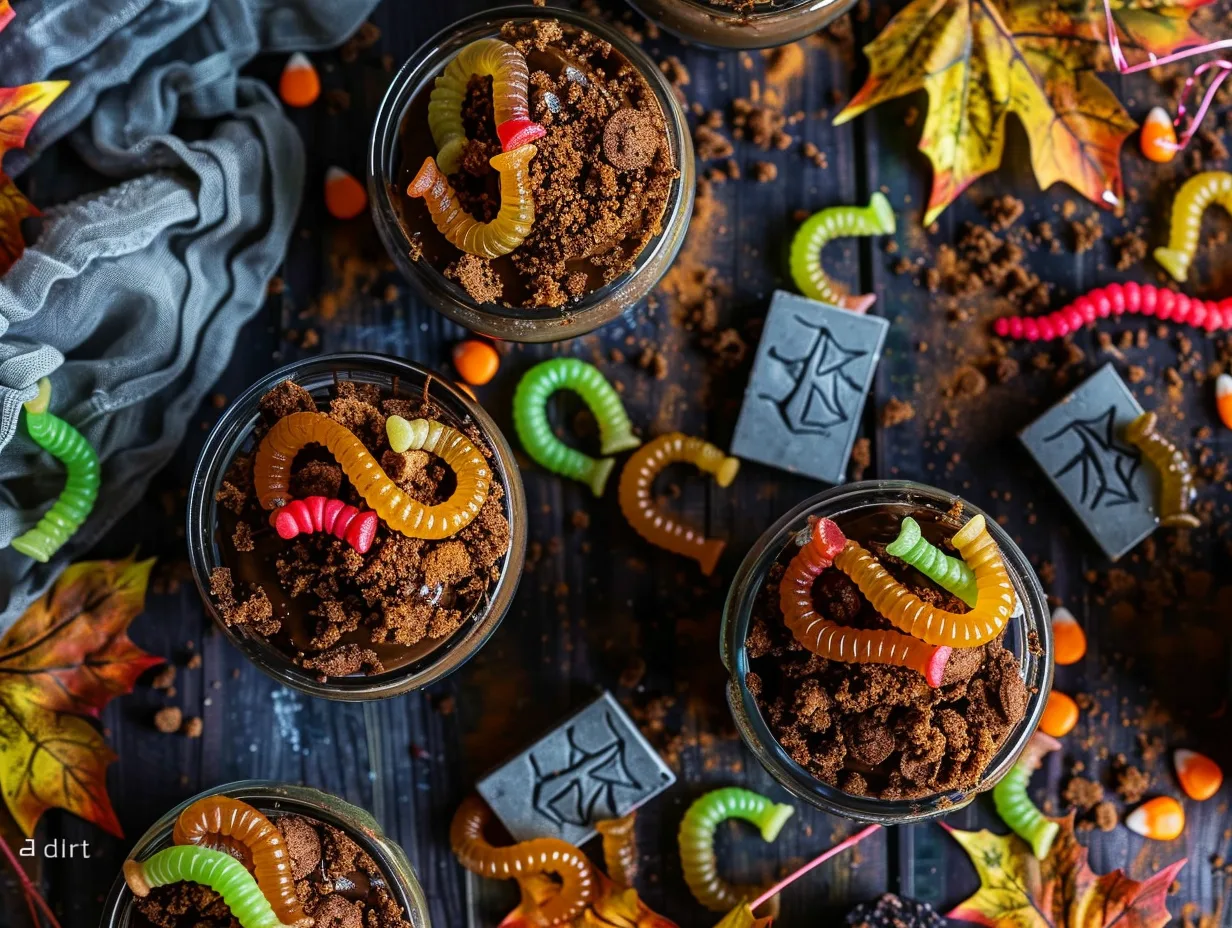
Spooky Halloween Dirt Cups Recipe with Gummy Worms
Ingredients
Tried this recipe?
Let us know how it was!Ingredients for Perfect Halloween Dirt Cups
Understanding the Key Ingredients and Their Magic
The beauty of Halloween Dirt Cups lies in their simplicity, but each ingredient plays a crucial role in creating that perfect spooky illusion. The foundation of this family favorite recipe starts with rich, creamy chocolate pudding – this isn’t just any dessert base, but the “soil” that gives our dirt cups their authentic earthy appearance. When you’re learning how to make Halloween Dirt Cups, understanding that the pudding’s consistency is key to the overall success of the dessert will help you achieve that perfect balance.
Chocolate sandwich cookies, like Oreos, are the stars of our “dirt” mixture. When crushed, they create those realistic dark crumbs that make people do a double-take. The cookies don’t just add visual appeal – they provide a delightful textural contrast to the smooth pudding, giving each spoonful that satisfying crunch that makes Halloween Dirt Cups so addictive.
The gummy worms are where the real Halloween magic happens. These chewy, colorful creatures peek out from the chocolate “soil” like they’re crawling through a garden bed. Choose worms in earthy colors – browns, greens, and reds – to maintain that realistic garden aesthetic that makes these delicious dishes so convincing.
Tips for Selecting the Best Quality Ingredients
When shopping for your Halloween Dirt Cups ingredients, quality makes a noticeable difference in the final result. For the pudding component, you have two excellent options: homemade chocolate pudding or store-bought. If you’re going the convenience route, choose a high-quality brand with rich chocolate flavor – avoid puddings that taste artificially sweet or have a chalky texture.
For the cookie “dirt,” chocolate sandwich cookies with cream filling work best because they create the most realistic soil appearance when crushed. Generic brands work just as well as name brands for this recipe, so don’t feel pressured to splurge. The key is ensuring the cookies are fresh and crisp – stale cookies won’t crush properly and can make your dirt look clumpy rather than realistic.
When selecting gummy worms for your Halloween Dirt Cups, look for ones that are soft and pliable rather than hard and chewy. Fresh gummy worms will have vibrant colors and won’t leave your guests struggling to bite through them. Some specialty stores even carry “sour dirt worms” or extra-long varieties that can add an extra element of surprise to your easy homemade recipes.
Substitutions and Alternatives for Every Dietary Need
One of the reasons Halloween Dirt Cups have remained such popular family favorite recipes is their incredible adaptability. For those with dairy sensitivities, dairy-free chocolate pudding works beautifully – simply substitute with coconut milk-based or almond milk-based pudding alternatives. The texture remains creamy and satisfying, and the chocolate flavor is just as rich.
Cookie alternatives open up even more possibilities for customization. Chocolate graham crackers, chocolate animal crackers, or even chocolate teddy grahams can replace traditional sandwich cookies. For a gluten-free version, use gluten-free chocolate cookies – they crush just as effectively and taste equally delicious in your Halloween Dirt Cups.
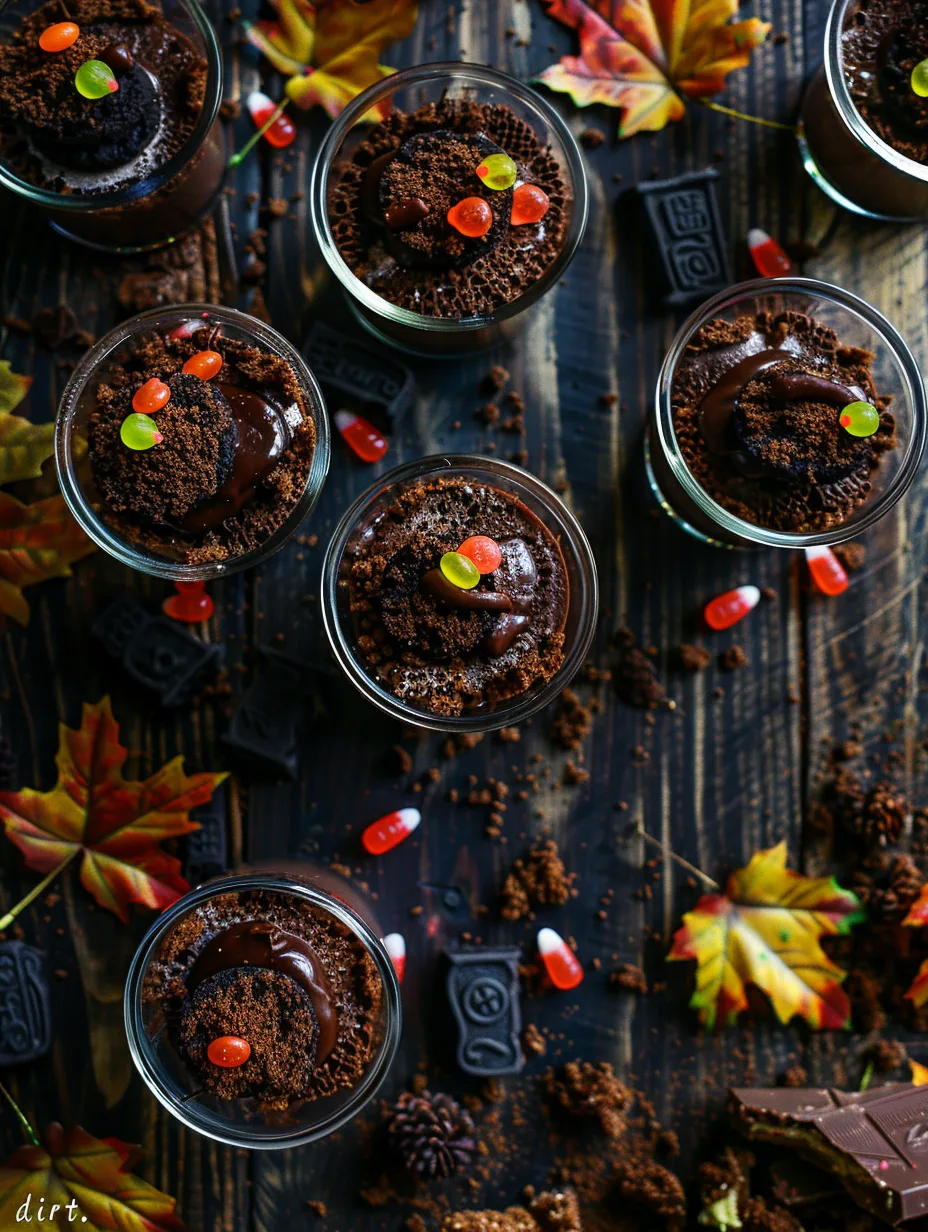
Creative worm alternatives can add personality to your delicious dishes. Swedish fish cut into strips, chocolate-covered raisins, or even crushed chocolate chips can provide that “something’s moving in the dirt” effect. For adult versions, consider adding a splash of coffee liqueur to the pudding or using dark chocolate cookies for a more sophisticated flavor profile.

Preparation Steps for Spooky Success
Initial Prep and Cleaning Tips for Seamless Creation
Creating perfect Halloween Dirt Cups starts with proper preparation, and trust me, a little organization goes a long way in making this process smooth and enjoyable. Begin by gathering all your ingredients and laying them out on your countertop – this mise en place approach prevents that frantic searching that can interrupt your creative flow when you’re in the middle of assembling these easy homemade recipes.
Clean and dry your serving cups thoroughly before beginning. Whether you’re using clear plastic cups, mason jars, or small bowls, any residual moisture can affect the texture of your pudding and make your cookie crumbs soggy. I learned this lesson the hard way during my first attempt at Halloween Dirt Cups when condensation from poorly dried cups created an unappetizing muddy mess instead of convincing “dirt.”
Set up an assembly line workspace with your crushed cookies in one bowl, prepared pudding ready for spooning, and gummy worms within easy reach. Having everything organized not only makes the process more efficient but also more enjoyable, especially if you’re making this a family activity. Kids love helping with these family favorite recipes, and proper preparation ensures everyone can participate safely and successfully.
Step-by-Step Instructions with Professional Secrets
The magic of perfect Halloween Dirt Cups lies in the layering technique, and I’m about to share some professional secrets that will take your dessert from good to absolutely spectacular. Start by placing your chocolate sandwich cookies in a food processor or sealed plastic bag. If using a bag, crush them with a rolling pin until you achieve a variety of textures – some fine crumbs and some slightly larger pieces that resemble actual soil particles.
Here’s my secret for the most realistic-looking dirt: don’t over-process the cookies. You want that natural variation in particle size that real soil has. Mix about 3/4 of your cookie crumbs with the pudding, reserving the remaining 1/4 for the top layer. This creates depth and prevents your Halloween Dirt Cups from looking too uniform and artificial.
When layering, start with a spoonful of the pudding-cookie mixture at the bottom of each cup. Add a few gummy worms, making sure some are visible along the sides of clear cups. Continue layering, gently pressing down each layer to eliminate air pockets that could make your delicious dishes look less convincing. Top with the reserved plain cookie crumbs and strategically place a few worms so they appear to be crawling out of the “soil.”
Common Mistakes and How to Avoid Them
Even though Halloween Dirt Cups are among the most forgiving easy homemade recipes, there are a few pitfalls that can diminish their spooky impact. The most common mistake is making the pudding too thin, which causes the cookie crumbs to sink and creates a muddy appearance instead of convincing dirt layers. Always chill your pudding until it’s thick enough to hold its shape when spooned.
Another frequent error is adding the gummy worms while the pudding is still warm. This causes the worms to become sticky and lose their shape, making them look less realistic and more like melted candy. Always ensure your pudding has cooled to room temperature or been chilled before adding any gummy elements to your Halloween Dirt Cups.
Overcrowding the cups is another mistake I see often with these family favorite recipes. While it’s tempting to pack in as many worms and as much “dirt” as possible, leaving some empty space actually makes the dessert look more realistic and allows room for the dramatic reveal when someone digs in. Remember, sometimes less is more when creating these deliciously deceptive delicious dishes.

Serving & Final Touches for Maximum Impact
Creative Presentation Ideas That Wow Your Guests
The presentation of Halloween Dirt Cups is where you can really let your creativity shine and transform these simple treats into show-stopping centerpieces. Consider serving them in small terracotta pots for an ultra-realistic garden effect – just make sure to line the pots with plastic wrap or use food-safe plant pots. Add small plastic flowers or herbs sticking out of the “soil” for an authentic garden bed appearance that will have your guests doing double-takes.
For a more elegant Halloween party presentation, serve your Halloween Dirt Cups in vintage mason jars with burlap ribbons and small chalkboard labels reading “Fresh Dirt” or “Worm Farm.” This rustic approach works beautifully for adult Halloween gatherings while maintaining the whimsical nature of these easy homemade recipes.
Create a dramatic “graveyard dirt” scene by adding cookie tombstones made from rectangular vanilla wafers or Milano cookies. Pipe “RIP” messages using white chocolate or royal icing. Surround your individual Halloween Dirt Cups with plastic skeleton hands emerging from additional cookie crumbs scattered across your serving table for a truly spine-chilling display.
Recommended Pairings and Party Planning
Halloween Dirt Cups pair wonderfully with other spooky-themed family favorite recipes to create a cohesive Halloween dessert spread. Consider serving them alongside “bloody” red velvet cupcakes, orange-tinted sugar cookies, or pumpkin-shaped treats. The chocolate richness of the dirt cups provides a nice balance to lighter, more colorful Halloween desserts.
For beverages, these delicious dishes complement both kid-friendly and adult options beautifully. Orange punch, apple cider, or “witches’ brew” (grape juice with dry ice for effect) work wonderfully for children’s parties. For adult gatherings, consider pairing with coffee, hot chocolate with peppermint schnapps, or even a dark beer that complements the chocolate flavors.
When planning quantities for parties, figure approximately one Halloween Dirt Cup per person if serving multiple desserts, or two per person if these are the main sweet treat. The recipe scales beautifully, making it perfect for large Halloween gatherings or intimate family celebrations.
Storage Tips and Make-Ahead Strategies
One of the greatest advantages of Halloween Dirt Cups is how well they store and travel, making them ideal for potluck gatherings and classroom parties. These easy homemade recipes actually improve with time as the flavors meld and the cookie crumbs soften slightly, creating an even more realistic “dirt” texture.
Store completed Halloween Dirt Cups in the refrigerator for up to three days before serving. Cover each cup individually with plastic wrap to prevent the cookie crumbs from absorbing refrigerator odors and to maintain the proper moisture balance. If you’re making them more than 24 hours in advance, consider adding the top layer of cookie crumbs just before serving to maintain optimal texture.
For transport to parties or events, these delicious dishes are remarkably stable. Use cups with tight-fitting lids when possible, or cover with plastic wrap secured with rubber bands. The gummy worms actually help hold everything in place during transport, making Halloween Dirt Cups one of the most travel-friendly family favorite recipes in your Halloween arsenal.
 DINNER
 LUNCH
LUNCH Desserts
 BREAKFAST
For more amazing recipes, be sure to check out our other sections to explore a variety of ideas that will enrich your cooking experience. Each section offers its own unique flavors to ensure a delightful culinary journey:
Easy and Quick Recipes: A collection of dishes that guarantee delicious meals with minimal effort and time.
Healthy Recipes: Discover healthy and delicious options that fit your lifestyle.
Desserts: A diverse selection of sweets that will add a special touch of sweetness to your table.
Lunch Recipes: Tasty lunch ideas that you can easily prepare to delight your family.
Dinner Recipes: Delicious and easy-to-make recipes that will make your dinner a memorable occasion.

Frequently Asked Questions About Halloween Dirt Cups
Q: Can I make Halloween Dirt Cups ahead of time for a party? A: Absolutely! Halloween Dirt Cups are perfect make-ahead desserts and actually taste better after sitting for a few hours as the flavors meld together. You can prepare them up to 2 days in advance and store them covered in the refrigerator. Just add any final decorative touches like extra gummy worms or cookie crumbs right before serving for the best visual impact.
Q: What’s the best way to crush cookies for the most realistic dirt appearance? A: The key to authentic-looking dirt in your Halloween Dirt Cups is achieving varied particle sizes. Place cookies in a sealed plastic bag and use a rolling pin to crush them, checking frequently to ensure you have a mix of fine crumbs and slightly larger pieces. Avoid over-processing in a food processor, which creates uniformly fine crumbs that look less like real soil.
Q: Are there dairy-free or vegan alternatives for this recipe? A: Yes! You can easily make dairy-free Halloween Dirt Cups by substituting the chocolate pudding with coconut milk-based or other plant-based pudding alternatives. Many store brands now offer delicious vegan chocolate pudding options. For the cookies, use dairy-free chocolate sandwich cookies, which are increasingly available in most grocery stores.
Q: How can I prevent the gummy worms from getting too sticky in the pudding? A: Always ensure your pudding has cooled completely before adding gummy worms to your Halloween Dirt Cups. Warm pudding will cause the worms to become sticky and lose their shape. If you’re making homemade pudding, chill it thoroughly before assembly. You can also lightly dust the gummy worms with a tiny bit of powdered sugar to help them maintain their texture.
Q: What size cups work best for individual servings? A: For Halloween Dirt Cups, 6-8 ounce clear plastic cups or small mason jars work perfectly for individual servings. Clear containers are ideal because they allow the layered “dirt” effect to be visible from the sides. If serving at a children’s party, smaller 4-ounce cups might be more appropriate to avoid overwhelming young eaters with too large a portion.
Conclusion: Dig Into Halloween Fun
Creating Halloween Dirt Cups isn’t just about following a recipe – it’s about embracing the playful spirit of Halloween and sharing moments of wonder with the people you care about. These delightfully deceptive delicious dishes represent everything I love about easy homemade recipes: they’re accessible to bakers of all skill levels, endlessly customizable, and guaranteed to bring smiles to faces both young and old.
The beauty of this family favorite recipe lies not just in its simplicity, but in its ability to transform ordinary ingredients into something extraordinary. Every time I watch someone take their first bite of Halloween Dirt Cups, unsure whether to be disgusted or delighted, I’m reminded of why cooking is such a joyful art form. These treats prove that the most memorable dishes don’t always require complex techniques or exotic ingredients – sometimes, all you need is creativity and a willingness to play with your food.
I encourage you to make this recipe your own. Add your personal touches, experiment with different “worm” varieties, or create themed presentations that reflect your unique Halloween style. Don’t forget to involve kids in the process – their natural enthusiasm and creativity often lead to the most delightful variations of these easy homemade recipes.
Once you’ve created your own batch of Halloween Dirt Cups, I’d love to hear about your experience! Share photos of your creations, tell me about any creative modifications you discovered, or let me know how your guests reacted to these spooky treats. After all, the best part of any family favorite recipe isn’t just the eating – it’s the memories we create along the way.
So grab your mixing bowls, gather your gummy worms, and get ready to dig into some serious Halloween fun. Your taste buds – and your Halloween guests – will thank you for it!