Table of Contents
Table of Contents
There’s something magical about a Fruit Tart that makes everyone at the table pause and smile. I’ll never forget the first time I made one for my sister’s birthday—she’d requested “something beautiful but not too fancy,” and when I brought out this glossy masterpiece covered in jewel-toned berries, her eyes lit up like she was eight years old again. That’s the beauty of a Fruit Tart: it looks like you spent hours in a professional pastry kitchen, but the truth is, it’s one of the most forgiving and joyful desserts you can create at home.
In the world of desserts, the Fruit Tart holds a special place. It’s the showstopper that bridges the gap between rustic home baking and elegant patisserie. French in origin, this dessert has graced celebration tables for generations, and for good reason. The combination of a buttery, crisp tart shell, silky pastry cream, and vibrant fresh fruit creates a symphony of textures and flavors that feels both indulgent and refreshingly light. Whether you’re hosting a summer garden party, celebrating a milestone, or simply treating yourself to something special on a Sunday afternoon, this Fresh Fruit Tart recipe will become your go-to impressive dessert that’s surprisingly easy to master.
What I love most about this recipe is its versatility. You can adapt it to any season, any color scheme, any dietary preference. And the best part? Each component can be made ahead, so you’re never stressed when guests arrive. Let me walk you through everything you need to know to create your own stunning Fruit Tart.
Fresh Fruit Tart Recipe | Easy & Colorful Dessert
Ingredients
Nutrition
Tried this recipe?
Let us know how it was!Ingredients for Your Perfect Fruit Tart
Understanding the Key Ingredients and Their Role
Creating an exceptional Fruit Tart starts with understanding what each component brings to the final masterpiece. This dessert is built on three fundamental layers, and each one plays a crucial role in the overall experience.
The Tart Shell (Pâte Sucrée): This sweet pastry crust is the foundation of your Fruit Tart. Made with butter, sugar, flour, and egg yolk, it creates a tender, cookie-like base that’s both sturdy enough to hold the filling and delicate enough to melt in your mouth. The butter provides richness and creates that flaky texture we crave, while the sugar adds sweetness and helps achieve that beautiful golden color when baked. The egg yolk acts as a binder and contributes to the tender crumb. You’ll need approximately 1¼ cups all-purpose flour, ½ cup unsalted butter (cold and cubed), ¼ cup powdered sugar, 1 large egg yolk, and 2 tablespoons cold water.
The Pastry Cream Filling: This is where your Fruit Tart transforms from good to extraordinary. Traditional pastry cream (crème pâtissière) is a cooked custard made with milk, egg yolks, sugar, cornstarch, and vanilla. It’s smooth, creamy, and provides a luxurious cushion for your fruit. The milk creates the base, while egg yolks add richness and that beautiful yellow color. Cornstarch thickens the mixture and keeps it stable, and vanilla extract brings warmth and depth. For a standard 9-inch tart, you’ll need 2 cups whole milk, 4 large egg yolks, ½ cup granulated sugar, ¼ cup cornstarch, 2 tablespoons unsalted butter, and 2 teaspoons pure vanilla extract.
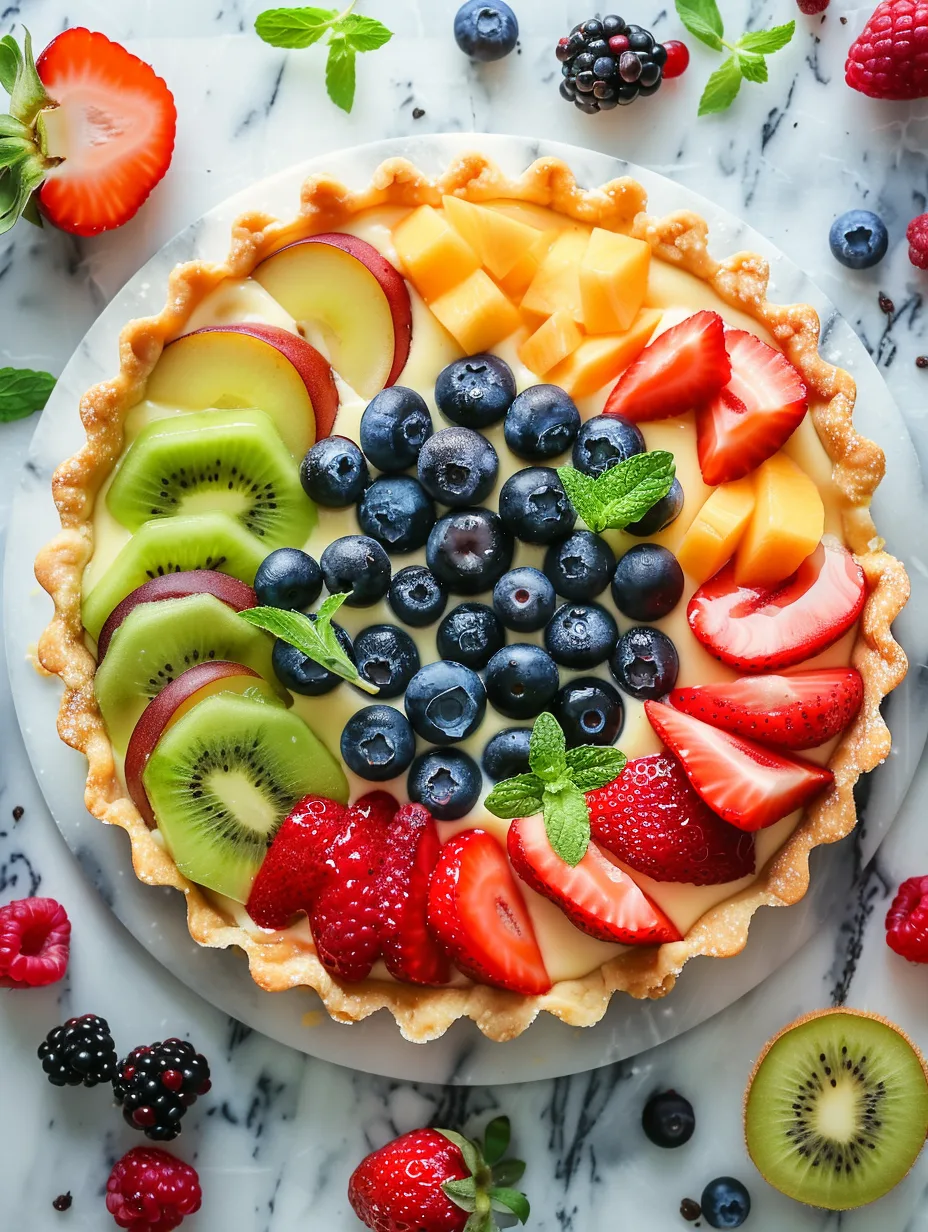
The Fresh Fruit Topping: This is where your creativity shines and your Fruit Tart becomes a work of art. The fruit provides not just visual appeal but also freshness and acidity that cuts through the richness of the cream and crust. I typically use a combination of strawberries, blueberries, raspberries, blackberries, kiwi, and sometimes mandarin oranges. The variety of colors and shapes creates visual interest, while the different flavor profiles keep each bite exciting. You’ll need approximately 3-4 cups of mixed fresh fruit, plus ½ cup apricot jam for the glaze that gives your Fruit Tart that professional, glossy finish.
Tips for Selecting the Best Quality Ingredients
The secret to an outstanding Fruit Tart lies not in complicated techniques but in choosing the finest ingredients you can find. Here’s what to look for:
Butter Quality Matters: Use European-style butter with higher fat content (around 82% versus the standard 80%) if you can find it. This creates a richer, more flavorful crust with better texture. The butter should smell sweet and clean, never sour or off. Always use unsalted butter so you can control the salt level in your recipe. Keep it cold until you’re ready to use it—warm butter won’t create those desirable flaky layers in your tart shell.
Fruit Selection Strategy: Visit your farmers’ market or the best produce section you can access. For strawberries, look for bright red berries with fresh green caps—avoid any with white shoulders or soft spots. Blueberries should be plump with a silvery bloom on their surface. Raspberries and blackberries are delicate; check the container bottom for staining, which indicates crushed or moldy berries. Kiwis should yield slightly to pressure but not feel mushy. The golden rule for your Fruit Tart: use fruit at peak ripeness, as it won’t ripen further once arranged on your tart. Smell your berries—they should smell sweet and fruity. If they have no aroma, they’ll have no flavor.
Dairy and Eggs: Use whole milk for the richest pastry cream—low-fat milk will result in a thinner, less satisfying filling. Your eggs should be fresh, with bright orange yolks from well-fed chickens if possible. These create a more vibrant yellow pastry cream. Pure vanilla extract (not imitation) is essential; if you really want to elevate your Fruit Tart, use the seeds scraped from half a vanilla bean instead of extract. The visual vanilla specks and complex flavor are worth the splurge for special occasions.
Substitutions and Alternatives for Every Diet
One of the reasons this Fruit Tart recipe has become such a family favorite recipe in my home is its adaptability. Life happens, dietary needs change, and sometimes you’re just missing an ingredient. Here’s how to adjust:
Gluten-Free Fruit Tart: Replace the all-purpose flour with a 1:1 gluten-free baking blend that contains xanthan gum. Bob’s Red Mill and King Arthur both make excellent versions. The texture will be slightly more delicate, so handle the dough gently and chill it well before rolling. Some people find success using almond flour for a more flavorful, nutty crust—use 1½ cups almond flour, increase the egg to one whole egg, and add a pinch of salt. This creates a different but delicious base for your Fruit Tart.
Dairy-Free Variations: You can create a beautiful dairy-free Fruit Tart by using coconut oil in place of butter in the crust (use refined coconut oil if you don’t want coconut flavor). For the pastry cream, substitute full-fat coconut milk for regular milk, and use coconut oil or vegan butter in place of regular butter. The texture won’t be identical, but it’s remarkably close and delicious. Another option is to skip the pastry cream entirely and use a whipped coconut cream or a dairy-free mascarpone alternative as your filling layer.
Simplified Fruit Tart Filling: If making pastry cream feels intimidating, you have options. Whip 1 cup of heavy cream with 2 tablespoons of powdered sugar and ½ teaspoon vanilla until stiff peaks form, then fold in 8 ounces of softened cream cheese for stability. This creates a lighter, tangier filling that many people actually prefer. Alternatively, use store-bought vanilla pudding (the kind you cook, not instant) mixed with whipped cream for a shortcut that still tastes homemade. Mascarpone cheese mixed with a little sugar and vanilla also creates a luxurious, easy filling for your Fruit Tart.
Seasonal Fruit Swaps: Don’t limit yourself to berries! In fall, try sliced pears, figs, and pomegranate seeds. Winter calls for citrus segments, persimmons, and sugared cranberries. Spring brings apricots, cherries, and edible flowers. Your Fruit Tart can celebrate every season beautifully.
Preparation Steps: How to Make a Fruit Tart
Initial Prep and Essential Cleaning Tips
Before you begin creating your Fruit Tart, proper preparation will make the entire process smooth and enjoyable. This is what I call the “mise en place” phase, and it’s when you set yourself up for success.
Organizing Your Workspace: Clear your counter space and gather all your tools: a 9-inch tart pan with removable bottom, rolling pin, mixing bowls, whisk, saucepan, fine-mesh sieve, plastic wrap, and parchment paper. Having everything within reach means you won’t be frantically searching for a tool with flour-covered hands. Measure out all your ingredients and set them in small bowls—this not only looks professional but ensures you don’t forget anything mid-recipe. Your Fruit Tart making experience should feel calm, not chaotic.
Preparing Your Fruit: This step is crucial for a beautiful Fruit Tart. Wash all berries gently in cool water—never soak them, as they’ll absorb water and become mushy. Pat them completely dry with paper towels or a clean kitchen towel. Wet fruit will make your glaze slide off and can make the pastry cream weep. Hull your strawberries and slice them uniformly, about ¼-inch thick. Leave smaller berries like blueberries and raspberries whole. Peel and slice kiwis into rounds or half-moons. If using citrus, supreme them (remove all pith and membrane) so you have clean segments. Arrange your prepared fruit on a large plate or tray so it’s ready to compose your masterpiece once the base is prepared.
The Make-Ahead Strategy: Here’s a secret that takes all the stress out of making a Fruit Tart for entertaining: almost everything can be done in advance. The tart shell can be baked up to two days ahead and stored at room temperature in an airtight container. The pastry cream can be made a day ahead and refrigerated (press plastic wrap directly on the surface to prevent a skin from forming). The fruit should be prepared the day you’re serving for maximum freshness, but you can wash and dry berries the night before and store them in the refrigerator on paper towels. The only thing you must do the same day is assembling and glazing your Fruit Tart, which takes just 15-20 minutes.
Step-by-Step Cooking Instructions with Secret Tips
Now for the fun part—creating your Fruit Tart from scratch. I’ll walk you through each step with the insider tips that make the difference between good and extraordinary.
Making the Perfect Tart Shell: In a food processor, pulse together 1¼ cups flour and ¼ cup powdered sugar. Add ½ cup cold, cubed butter and pulse until the mixture resembles coarse crumbs. Add 1 egg yolk and 2 tablespoons cold water, then pulse just until the dough begins to come together—don’t overwork it or your crust will be tough. Turn the dough onto a piece of plastic wrap, shape it into a disk, and refrigerate for at least 30 minutes. This resting period is non-negotiable; it allows the gluten to relax and the butter to firm up, making the dough easier to roll and preventing shrinkage.
When ready to roll, let the dough sit at room temperature for about 5 minutes—you want it cold but not rock-hard. Lightly flour your work surface and rolling pin. Roll from the center outward, rotating the dough a quarter-turn after each roll to maintain an even circle about 11 inches in diameter and ⅛-inch thick. Here’s a secret: if the dough cracks or tears, don’t panic! This dough is forgiving. Just press the cracks together with your fingers or patch tears with scraps. Carefully transfer the dough to your tart pan by rolling it loosely around your rolling pin, then unrolling it over the pan. Gently press the dough into the bottom and sides, then roll your pin across the top edge to trim excess dough. Prick the bottom all over with a fork to prevent bubbling.
Chill the shell for another 15 minutes while you preheat your oven to 375°F. Line the shell with parchment paper and fill with pie weights, dried beans, or rice. This “blind baking” prevents the bottom from puffing up. Bake for 15 minutes, then carefully remove the weights and parchment. Bake for another 10-12 minutes until golden brown. If any bubbles form, gently press them down with the back of a spoon. Cool completely before filling—this is essential for your Fruit Tart.
Creating Silky Pastry Cream: In a medium saucepan, heat 2 cups whole milk until it just begins to steam (don’t let it boil). While the milk heats, whisk together 4 egg yolks, ½ cup sugar, and ¼ cup cornstarch in a bowl until smooth and pale yellow. Here’s the crucial technique: when the milk is hot, slowly pour about ½ cup into the egg mixture while whisking constantly. This “tempering” prevents the eggs from scrambling. Pour this warmed egg mixture back into the saucepan with the remaining milk, whisking constantly.
Cook over medium heat, whisking continuously, until the mixture thickens dramatically and begins to bubble—this usually takes 3-5 minutes. Once it bubbles, cook for one more minute while whisking (this cooks out the starchy taste). Remove from heat and whisk in 2 tablespoons butter and 2 teaspoons vanilla extract. The butter adds richness and shine. Immediately pour the pastry cream through a fine-mesh sieve into a clean bowl to remove any cooked egg bits or lumps. Press plastic wrap directly onto the surface to prevent a skin from forming, and refrigerate until completely cold, at least 2 hours. This filling is the heart of your Fruit Tart—smooth, sweet, and utterly delicious.
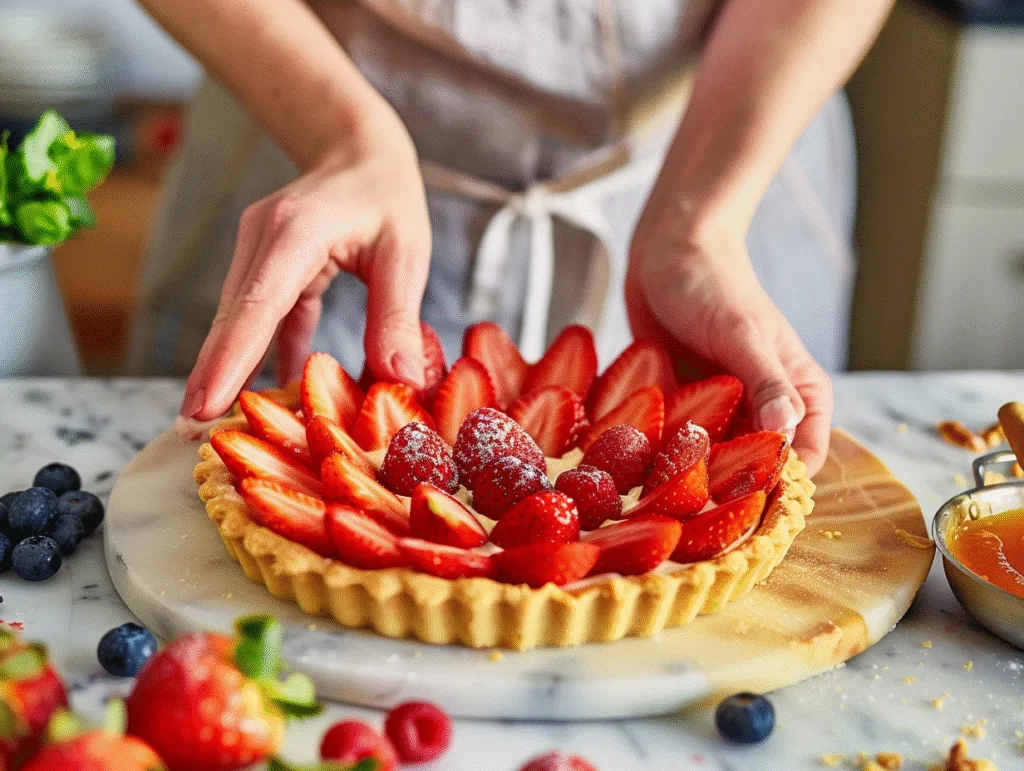
Assembling Your Fruit Tart Masterpiece: Once your tart shell is completely cool and your pastry cream is cold, you’re ready for the best part. Whisk the chilled pastry cream until smooth (it will have thickened considerably). If it seems too thick, you can whisk in a tablespoon or two of cold milk or cream. Spread the pastry cream evenly in the tart shell—I use an offset spatula for this, creating a smooth, level surface that comes just to the top of the shell.
Now, arrange your fruit. There’s no wrong way to do this, but I’ll share my approach for an easy homemade recipe that looks professional. Start from the outside and work inward in concentric circles. I typically place strawberry slices around the outer edge, overlapping them slightly like shingles. Next comes a ring of blueberries, then raspberries, with blackberries or kiwi in the center. You can also create patterns, rows, or random arrangements—your Fruit Tart, your rules! Press the fruit gently into the cream so it adheres.
The Glaze That Makes It Shine: In a small saucepan, heat ½ cup apricot jam with 1 tablespoon water until melted and smooth. Strain through a fine-mesh sieve to remove any fruit chunks. Let it cool slightly until it’s still liquid but not hot (you don’t want to melt your pastry cream). Using a pastry brush, gently brush the glaze over all the fruit, taking care not to disturb your arrangement. This glaze does three things: it adds a beautiful shine, seals the fruit so it doesn’t dry out, and adds a subtle sweet layer that ties everything together. Your Fruit Tart is now complete!
Common Mistakes and How to Avoid Them
Even experienced bakers can stumble when making a Fruit Tart. Here are the pitfalls I’ve encountered and how to sidestep them:
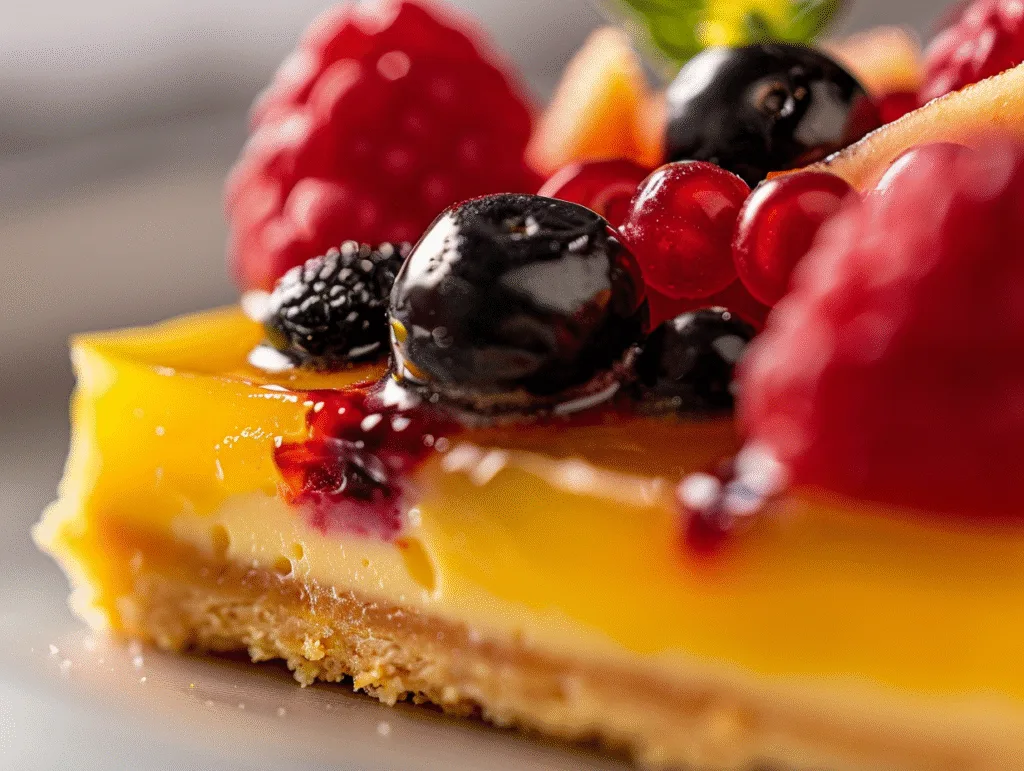
Soggy Bottom Syndrome: Nothing’s more disappointing than cutting into a beautiful Fruit Tart only to find a soggy, undercooked crust. This happens when the shell isn’t fully baked, when it’s filled while still warm, or when the pastry cream is too thin. Solution: Bake your shell until it’s deeply golden brown, cool it completely, and make sure your pastry cream is thick and cold before spreading it in the shell. Some bakers brush the cooled shell with a thin layer of melted white chocolate before adding the cream—this creates a moisture barrier and adds a subtle chocolatey note to your Fruit Tart.
Cracked or Crumbling Crust: If your tart shell cracks when you try to remove it from the pan, the dough was probably overworked or didn’t have enough butter. To prevent this, handle the dough gently, keep it cold, and don’t skip the resting periods. If your crust crumbles when sliced, it might be too dry—next time, add an extra teaspoon of water to the dough. To remove your Fruit Tart from the pan safely, place the tart pan on top of a sturdy can or jar smaller than the pan’s diameter. The outer ring will drop down, leaving your tart on the base. Slide a large, thin spatula underneath to transfer it to your serving plate.
Lumpy Pastry Cream: Lumpy cream usually results from not whisking constantly while cooking or from letting the mixture get too hot too quickly. Prevention is key: use a whisk (not a spoon), keep the heat at medium, and never stop whisking once you’ve added the egg mixture to the hot milk. If lumps do form, immediately strain the cream through a fine-mesh sieve while it’s still hot—this will catch any cooked egg bits and give you silky-smooth pastry cream for your Fruit Tart.
Fruit Oxidation: Some fruits, like apples and pears, brown quickly when cut. If you want to use these on your Fruit Tart, brush them with a little lemon juice immediately after slicing. This prevents oxidation while adding a nice bright flavor. Bananas also brown quickly, so if you’re using them, slice and arrange them just before serving.
Glaze Gone Wrong: If your glaze hardens too much before you can brush it on, it will pull your fruit arrangement apart. If it’s too thin, it will run off the fruit and pool in your pastry cream. The solution: heat your jam until just melted, strain it, and let it cool to room temperature but still liquid. Work quickly but gently. If it starts to set before you’re finished, warm it again for a few seconds. Your Fruit Tart deserves that perfect glossy finish!

Serving & Final Touches for Your Fruit Tart
Creative Presentation Ideas
A Fruit Tart is already visually stunning, but thoughtful presentation elevates it from delicious dish to unforgettable experience. Here’s how to make your creation truly special:
Plating Perfection: Slice your Fruit Tart with a sharp, thin knife, wiping the blade clean between each cut for neat slices. Place each slice on a dessert plate—white plates show off the colors beautifully, but soft pastels or even black plates create dramatic contrast. Add a small dollop of freshly whipped cream or a quenelle of vanilla ice cream alongside. A few fresh mint leaves tucked beside the slice add a pop of color and hint at freshness. For an elegant touch, dust the plate rim lightly with powdered sugar or drizzle a simple berry coulis in an artistic pattern.
Seasonal Styling: Match your Fruit Tart presentation to the occasion or season. For a spring celebration, garnish with edible flowers like pansies or violas. Summer calls for a scattering of fresh lavender or a basil leaf. Fall presentations can include a sprinkle of cinnamon or a few toasted, sliced almonds. Winter holiday versions might feature a light dusting of edible silver dust or pearl sugar for a snow-like effect. These small touches transform your Fruit Tart from everyday dessert to memorable centerpiece.
Individual Fruit Tarts: For parties or when you want portion control, make individual tartlets using 4-inch tart pans. The process is identical, but the baking time decreases to about 12-15 minutes for the shells. Individual Fruit Tarts feel special and sophisticated, and guests love having their own personal dessert. You can even let people customize their own fruit arrangement at the table—set out the components and let everyone build their perfect bite.
The Instagram-Worthy Moment: Before slicing, photograph your whole Fruit Tart from directly above in natural light. The geometric patterns of fruit, the glossy glaze, and the golden crust create a stunning image that captures the care you’ve put into this homemade recipe. Share it and inspire others to create their own beautiful desserts!
Recommended Side Dishes and Pairings
While a Fruit Tart is delicious on its own, thoughtful pairings can enhance the entire dessert experience and create a memorable finish to any meal.
Beverage Pairings: A well-chosen drink can complement and elevate your Fruit Tart. For a classic pairing, serve with hot tea—Earl Grey’s bergamot notes play beautifully with berries, while chamomile provides a gentle, floral counterpoint. Coffee lovers should try a light roast or a cappuccino; the milk echoes the creaminess of the pastry cream. For wine enthusiasts, a slightly sweet Moscato d’Asti, with its gentle bubbles and peach notes, is divine with Fruit Tart. A late-harvest Riesling or Sauternes also works beautifully. For non-alcoholic options, sparkling lemonade or a berry-infused iced tea creates a refreshing contrast to the rich pastry cream.
Complementary Desserts: If you’re creating a dessert table, your Fruit Tart pairs beautifully with lighter, less sweet options. Consider French macarons in complementary flavors, lemon madeleines, or delicate shortbread cookies. The variety of textures and flavors gives guests choices while maintaining a cohesive, elegant dessert spread. For a family favorite recipe menu, add vanilla ice cream or gelato—the cold, creamy simplicity lets the Fruit Tart shine while providing temperature contrast.
Complete Menu Integration: Consider what came before your Fruit Tart when planning your menu. After a heavy, rich main course, the fresh fruit and light pastry cream provide the perfect refreshing conclusion. If you’re serving this as part of a brunch, pair it with savory quiches, fresh salads, and good bread. The sweetness of your Fruit Tart becomes the highlight that balances the meal. For afternoon tea service, surround your Fruit Tart with finger sandwiches, scones with jam and cream, and a selection of teas—the combination is quintessentially elegant.
Storage Tips and Reheating Advice
Proper storage ensures your Fruit Tart remains as delicious on day two as it was when freshly made—though it rarely lasts that long in my house!
Short-Term Storage: An assembled Fruit Tart should be stored in the refrigerator and is best consumed within 24 hours. The fruit remains fresh, the pastry cream stays safe, but the crust will gradually soften as it absorbs moisture from the filling. To store, loosely cover the tart with plastic wrap or place it in a large, shallow container with a lid. Don’t wrap it tightly or you’ll disturb your beautiful fruit arrangement. Before serving leftover Fruit Tart, let it sit at room temperature for 15-20 minutes—the flavors and textures are better when not ice-cold.
Component Storage: This is where your make-ahead strategy shines. The unbaked tart shell dough can be frozen for up to three months—wrap it tightly in plastic wrap, then in foil. Thaw overnight in the refrigerator before rolling. The baked, cooled tart shell (unfilled) can be stored at room temperature in an airtight container for up to two days, or frozen for up to one month. Wrap it carefully to prevent breakage. The pastry cream will keep in the refrigerator for up to three days with plastic wrap pressed directly on its surface. The fruits should be prepared fresh on the day of serving for the best Fruit Tart results.
Extending Freshness: If you need to make your Fruit Tart a few hours ahead, don’t glaze it until just before serving. The glaze seals the fruit but also adds moisture that can eventually soften the crust. Another trick: brush the baked, cooled shell with a thin layer of melted white or dark chocolate before adding the pastry cream. This creates a waterproof barrier that keeps the crust crisp longer. Some bakers even sprinkle a very thin layer of fine cookie crumbs or ground nuts on the pastry cream before arranging fruit—this additional barrier absorbs any fruit juices before they reach the cream.
Freezing Considerations: While I don’t recommend freezing an assembled Fruit Tart (the fruit and cream don’t survive well), you can freeze the components. A baked tart shell freezes beautifully—just thaw it at room temperature and it’s ready to fill. You can even freeze pastry cream (press plastic wrap on the surface, then cover the entire container). Thaw overnight in the refrigerator and whisk until smooth before using. The only component that must be fresh is the fruit itself. This flexibility means you can prep ahead without sacrificing quality when you’re ready to create your stunning Fruit Tart.
 DINNER
 LUNCH
LUNCH Desserts
 BREAKFAST
For more amazing recipes, be sure to check out our other sections to explore a variety of ideas that will enrich your cooking experience. Each section offers its own unique flavors to ensure a delightful culinary journey:
Easy and Quick Recipes: A collection of dishes that guarantee delicious meals with minimal effort and time.
Healthy Recipes: Discover healthy and delicious options that fit your lifestyle.
Desserts: A diverse selection of sweets that will add a special touch of sweetness to your table.
Lunch Recipes: Tasty lunch ideas that you can easily prepare to delight your family.
Dinner Recipes: Delicious and easy-to-make recipes that will make your dinner a memorable occasion.
Frequently Asked Questions About Fruit Tarts
Q1: Can I make a Fruit Tart without pastry cream? What are good alternatives?
Absolutely! While traditional pastry cream is wonderful, several alternatives work beautifully in a Fruit Tart. The most popular option is whipped cream cheese filling: beat 8 ounces of softened cream cheese with ½ cup powdered sugar and 1 teaspoon vanilla until smooth, then fold in 1 cup of whipped heavy cream. This creates a tangy, stable filling that many people actually prefer. Another excellent choice is mascarpone cream—mix 1 cup mascarpone with ⅓ cup powdered sugar and ½ teaspoon vanilla, then fold in 1 cup whipped cream. For a lighter option, stabilized whipped cream works well: whip 2 cups heavy cream with ¼ cup powdered sugar and 1 teaspoon unflavored gelatin (dissolved in 2 tablespoons warm water) until stiff peaks form. You can even use a thick vanilla Greek yogurt sweetened with honey for a tangy, protein-rich Fruit Tart. Each alternative creates a slightly different flavor profile, so choose based on your preference and dietary needs.
Q2: Why did my tart crust shrink during baking, and how can I prevent it?
Crust shrinkage is one of the most common frustrations when making a Fruit Tart, but it’s preventable with the right techniques. Shrinkage occurs when gluten develops too much in the dough and then contracts when exposed to heat. To prevent this: First, don’t overwork your dough—mix just until it comes together. Second, always chill the dough for at least 30 minutes before rolling, and chill the shaped shell for 15 minutes before baking. Third, avoid stretching the dough when fitting it into the pan; let it relax into place naturally. If you pull it tight, it will snap back when baked. Finally, blind bake with weights—this holds the shape in place while the structure sets. If despite your best efforts the crust still shrinks slightly, don’t worry! You can patch small gaps with extra dough scraps before baking, or simply fill the slightly shorter shell and your Fruit Tart will still be delicious and beautiful.
Q3: What’s the best way to slice a Fruit Tart cleanly without making a mess?
Achieving clean slices is easier than you think with the right technique. Use a sharp, thin-bladed knife—a long serrated knife works particularly well. Before making any cut, dip the blade in hot water, then wipe it completely dry with a clean towel. The heat helps the knife glide through the cold pastry cream without dragging. Make one clean, decisive cut straight down through the tart (no sawing motion for that first cut through the fruit and cream—save the gentle sawing for the crust). After each cut, wipe the blade clean of any pastry cream and fruit, dip it in hot water again, dry it, and make your next cut. This hot knife method ensures each slice looks as beautiful as your whole Fruit Tart did before cutting. Use a pie server or thin, offset spatula to lift each slice onto plates. If you’re serving at a formal dinner, you can even pre-slice the tart in the kitchen, plate each piece beautifully, and serve individually.
Q4: Can I use frozen fruit on my Fruit Tart?
While fresh fruit creates the most beautiful and delicious Fruit Tart, frozen fruit can work in a pinch with the right approach. The main challenge is moisture—frozen fruit releases a lot of liquid when thawed, which can make your pastry cream watery and your crust soggy. If you must use frozen fruit, here’s how: Thaw the fruit completely in a strainer set over a bowl to catch the juices. Pat the fruit very dry with paper towels—you want to remove as much moisture as possible. Use the fruit immediately after thawing and drying, as it will continue to release juice. Brush your baked tart shell with melted chocolate to create a moisture barrier before adding pastry cream. Arrange the fruit and glaze it immediately—the glaze will help seal in what remains of the fruit’s structure. That said, certain frozen fruits work better than others. Frozen blueberries and raspberries are the most successful, while frozen strawberries tend to become too mushy. My honest recommendation? Save your Fruit Tart for when you can access fresh fruit, or make a cooked fruit tart like a rustic galette instead, where frozen fruit actually performs beautifully.
Q5: How far in advance can I assemble a Fruit Tart, and how do I keep it fresh?
Timing is everything with a Fruit Tart. For the absolute best results—crisp crust, fresh fruit, and beautiful presentation—assemble your tart no more than 4-6 hours before serving. The good news is that you can prepare all the components well in advance, making that final assembly quick and stress-free. Bake your tart shell up to 2 days ahead and store it covered at room temperature. Make your pastry cream up to 2 days ahead and refrigerate it with plastic wrap pressed on the surface. Wash and dry your berries the night before (store them in the fridge on paper towels). On serving day, fill, arrange, and glaze your Fruit Tart, then refrigerate it until 15 minutes before serving (letting it come to room temperature slightly improves the flavor and texture). If you absolutely must assemble further ahead, brush the shell with melted chocolate first, use extra-thick pastry cream, and don’t add the glaze until just before serving. Store the assembled tart uncovered or loosely covered in the refrigerator—tight covering can cause condensation that makes everything soggy. With this strategy, you can create an impressive Fruit Tart without last-minute stress, making it perfect for those delicious dishes you want to serve when entertaining.
Conclusion: Your Journey to Fruit Tart Mastery
Creating a stunning Fresh Fruit Tart is one of the most rewarding experiences in baking. Yes, there are multiple components, but each one is straightforward, and together they create something truly spectacular—a dessert that tastes as incredible as it looks and brings people together around the table. This is more than just a recipe; it’s a template for celebration, a canvas for creativity, and a delicious dish that will earn you compliments every single time you make it.
I encourage you to approach this Fruit Tart recipe with a spirit of adventure. Maybe your first attempt won’t be perfect—mine certainly wasn’t—but it will absolutely be delicious. With each tart you make, you’ll develop your own rhythm, discover your favorite fruit combinations, and find those little shortcuts and techniques that work for your kitchen. Before long, you’ll be the person everyone asks to bring dessert because your Fruit Tarts have become legendary.
So gather your ingredients, set aside an afternoon, and create something beautiful. Whether it’s for a special celebration or just because you deserve something lovely on a random Wednesday, this easy homemade recipe will not disappoint. And when you slice into that glossy masterpiece and see the smiles around your table, you’ll understand exactly why the Fruit Tart has remained a beloved classic for generations.
I’d love to hear about your Fruit Tart adventures! Did you try a unique fruit combination? Discover a clever technique? Have questions about any step in the process? Share your experiences, photos, and questions in the comments below. Your feedback and creativity inspire me and help build our community of passionate home bakers. Happy baking, and may your Fruit Tarts be forever beautiful and utterly delicious!