Table of Contents
Table of Contents
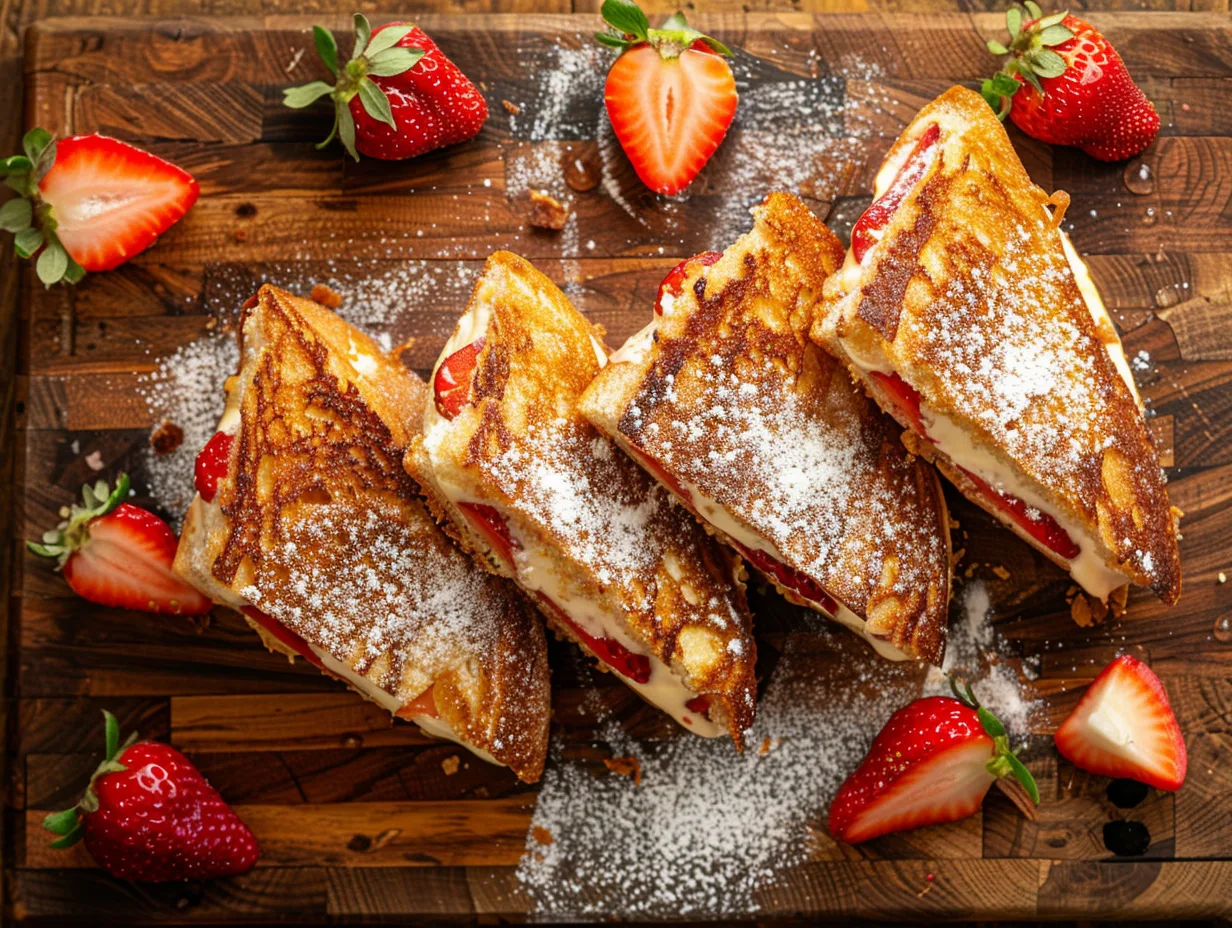
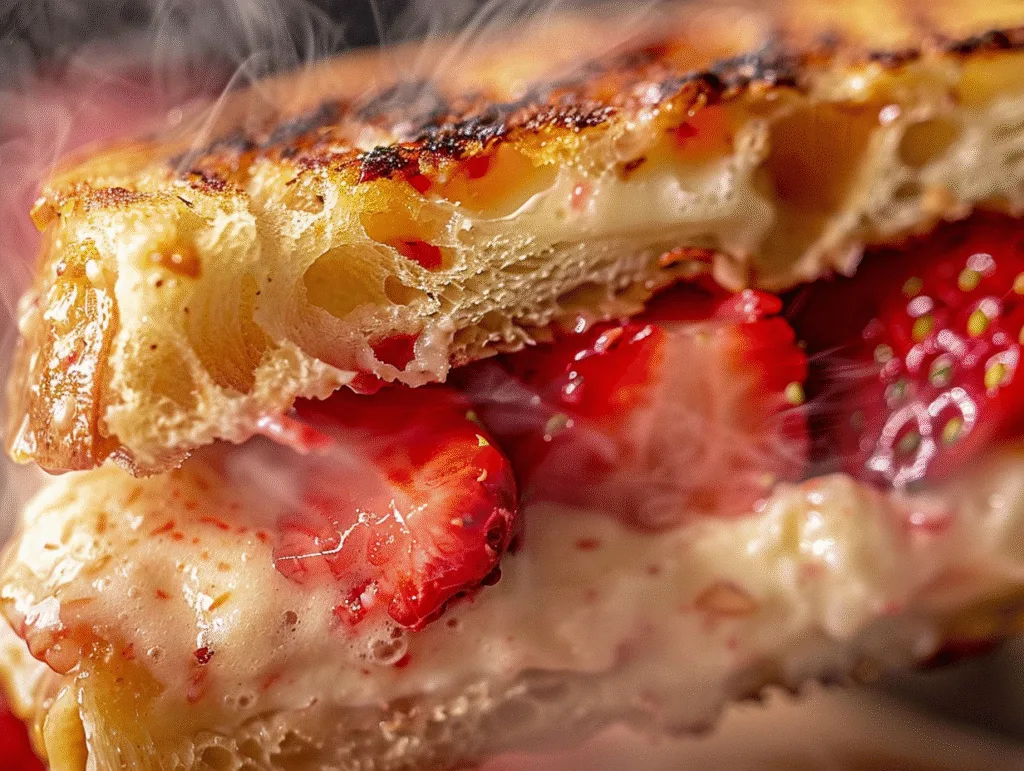
There’s something absolutely magical about the moment when you bite into a perfectly crafted Fried Strawberry Cheesecake Sandwich. The crispy, golden exterior gives way to a warm, gooey center bursting with creamy cheesecake filling and sweet strawberry goodness. It’s like having your favorite slice of cheesecake transformed into the ultimate comfort food experience.
I’ll never forget the first time I encountered Fried Strawberry Cheesecake Sandwiches at a local county fair three summers ago. My daughter had been begging to try “that crazy sandwich thing” from a food truck, and honestly, I was skeptical. How could something so indulgent possibly live up to the hype? But one bite changed everything. The contrast between the crispy exterior and the molten cheesecake interior was pure genius, and the burst of fresh strawberry flavor tied it all together in the most delightful way.
Since that day, I’ve been perfecting my own version of these incredible Fried Strawberry Cheesecake Sandwiches at home, and let me tell you – they’ve become an absolute family favorite. Whether we’re hosting a summer barbecue, celebrating a birthday, or just wanting to turn an ordinary Tuesday into something special, these sandwiches never fail to bring smiles to everyone’s faces. Today, I’m excited to share this beloved recipe with you, complete with all my tried-and-true tips for achieving that perfect crispy-gooey balance that makes these sandwiches absolutely irresistible.
Fried Strawberry Cheesecake Sandwiches (Crispy & Gooey)
Ingredients
Nutrition
Tried this recipe?
Let us know how it was!Ingredients: Building the Perfect Fried Strawberry Cheesecake Sandwich
Understanding the Key Components and Their Magic
The beauty of Fried Strawberry Cheesecake Sandwiches lies in their simplicity, but each ingredient plays a crucial role in creating that perfect harmony of flavors and textures. Let’s start with the foundation – thick-cut brioche or challah bread. These rich, slightly sweet breads provide the ideal canvas for our creation, with their sturdy structure holding up beautifully to the frying process while their buttery flavor complements the cheesecake filling perfectly.
The star of our show is undoubtedly the cream cheese filling. You’ll need 8 ounces of full-fat cream cheese, softened to room temperature, which we’ll blend with 1/2 cup of powdered sugar, 1 teaspoon of pure vanilla extract, and a pinch of salt. This creates a luxuriously smooth filling that becomes wonderfully gooey when heated. The powdered sugar dissolves completely, preventing any grittiness, while the vanilla adds that classic cheesecake flavor we all crave.
Fresh strawberries are absolutely essential for authentic Fried Strawberry Cheesecake Sandwiches. You’ll want about 2 cups of ripe, hulled strawberries, either sliced thin or diced, depending on your preference. I personally love a combination of both – some sliced for visual appeal and some diced for even distribution throughout each bite. The natural sweetness and slight tartness of the strawberries provide the perfect counterbalance to the rich cream cheese, while their juiciness adds another layer of texture that makes each bite exciting.
Selecting Premium Ingredients for Maximum Impact
When shopping for ingredients for your Fried Strawberry Cheesecake Sandwiches, quality truly makes a difference. For the bread, seek out a local bakery’s brioche or challah if possible – the extra richness and superior texture will elevate your sandwiches significantly. Look for loaves that are slightly dense rather than airy, as they’ll hold the filling better and create a more satisfying bite.
Choosing the right cream cheese is crucial for achieving that perfect creamy texture. Always opt for full-fat, brick-style cream cheese rather than the spreadable tub varieties. Philadelphia cream cheese consistently delivers excellent results, but don’t overlook local dairy brands, which often have exceptional flavor profiles. Make sure to check the expiration date and choose the freshest package available – fresh cream cheese blends more smoothly and tastes noticeably better.
For strawberries, timing is everything. Look for berries that are deep red with bright green tops, and give them a gentle sniff – they should smell sweet and fragrant. Avoid strawberries with white or green shoulders, as these were picked too early and won’t develop the sweetness your Fried Strawberry Cheesecake Sandwiches deserve. If fresh strawberries aren’t in season, high-quality frozen strawberries that have been thawed and thoroughly drained can work as a substitute, though fresh always yields superior results.
Smart Substitutions and Creative Alternatives
While traditional Fried Strawberry Cheesecake Sandwiches are absolutely delicious as written, there’s plenty of room for creativity and dietary adaptations. For those watching their sugar intake, you can substitute the powdered sugar with an equal amount of powdered erythritol or stevia blend designed for baking. The texture might be slightly different, but the flavor remains delightfully sweet.
If brioche or challah aren’t available, thick-cut Texas toast or even pound cake slices can create interesting variations of these beloved sandwiches. Hawaiian sweet bread also works wonderfully, adding a subtle tropical note that pairs beautifully with strawberries. For a more indulgent twist, try using thick slices of cinnamon swirl bread – the extra spice adds warmth and complexity to every bite.
Dairy-free versions of Fried Strawberry Cheesecake Sandwiches are definitely possible with today’s excellent plant-based alternatives. Vegan cream cheese brands like Kite Hill or Tofutti work surprisingly well, though you may need to add an extra tablespoon of powdered sugar to achieve the right sweetness level. For the bread, just ensure your chosen variety doesn’t contain butter or eggs if you’re keeping the recipe completely plant-based. The results might be slightly different from traditional versions, but they’re still absolutely delicious and allow everyone to enjoy this special treat.
Preparation Steps: Mastering the Art of the Perfect Sandwich
Initial Preparation and Essential Setup Tips
Success with Fried Strawberry Cheesecake Sandwiches begins long before you heat the pan. Start by bringing your cream cheese to room temperature at least two hours before cooking – this is absolutely crucial for achieving a smooth, lump-free filling. Cold cream cheese will create a chunky mixture that’s difficult to spread and won’t melt evenly during the frying process.
While your cream cheese warms up, prepare your strawberries by washing them gently under cool water and patting them completely dry with paper towels. Remove the green tops and slice or dice according to your preference. I like to toss the prepared strawberries with just a pinch of sugar and let them sit for about 15 minutes – this draws out some of their natural juices and intensifies their flavor, creating an even more delicious filling for your sandwiches.
Set up your workspace efficiently to make the assembly process smooth and enjoyable. Arrange your softened cream cheese, prepared strawberries, bread slices, and all your mixing tools within easy reach. Have a large skillet or griddle ready, along with butter for frying and a spatula for flipping. I also recommend having a wire cooling rack set over a baking sheet nearby – this will keep your finished Fried Strawberry Cheesecake Sandwiches crispy while you complete the batch.
Step-by-Step Assembly and Cooking Techniques
Begin creating your filling by beating the softened cream cheese with an electric mixer until it’s completely smooth and fluffy, about 2-3 minutes. Gradually add the powdered sugar, vanilla extract, and salt, beating until everything is perfectly incorporated. The mixture should be smooth, sweet, and easily spreadable. Gently fold in your prepared strawberries, being careful not to overmix and break up the fruit too much.
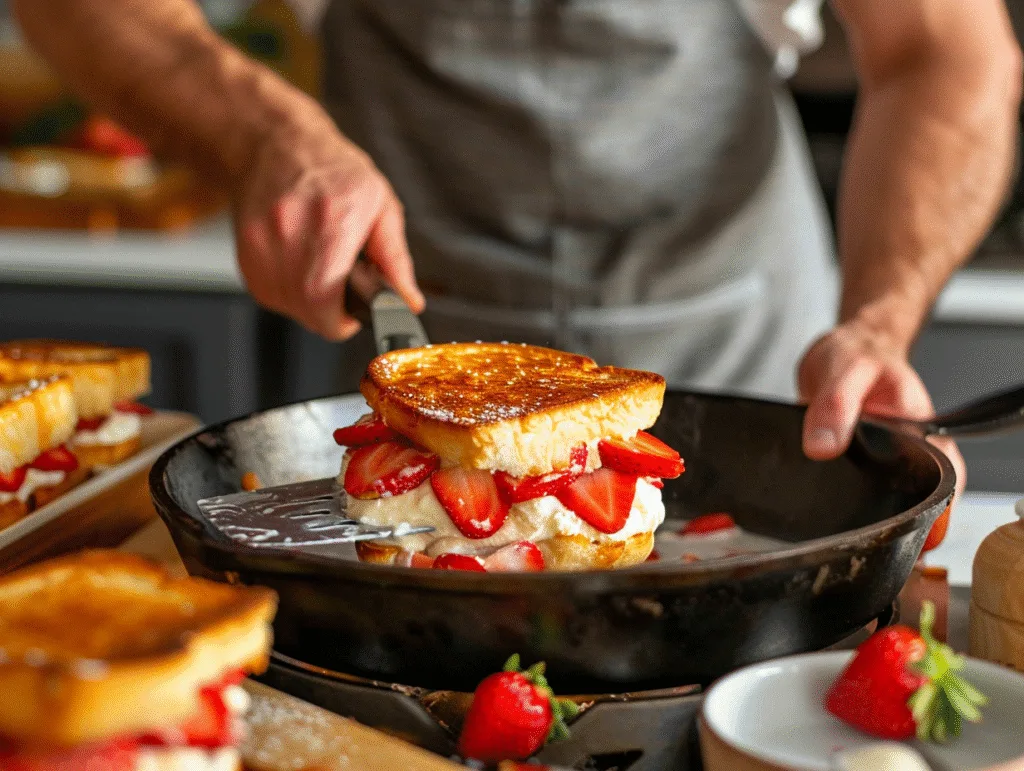
Now comes the fun part – assembling your Fried Strawberry Cheesecake Sandwiches! Lay out your bread slices and generously spread the cream cheese and strawberry mixture on half of them, leaving about a half-inch border around the edges. Don’t be shy with the filling – you want each bite to be packed with that delicious cheesecake flavor. Top with the remaining bread slices and gently press the edges together to seal, being careful not to squeeze out the filling.
Heat your skillet or griddle over medium-low heat – this is crucial for achieving that perfect golden crust without burning. Add a generous pat of butter and let it melt and foam. Carefully place your assembled sandwiches in the pan, leaving space between each one. Cook for 3-4 minutes on the first side until golden brown and crispy, then carefully flip using a wide spatula. Cook for another 2-3 minutes until the second side is equally golden and the filling is heated through and gooey. The key is patience – rushing the process with too-high heat will burn the outside before the inside has a chance to warm up properly.
Avoiding Common Pitfalls and Pro Tips for Success
One of the most common mistakes when making Fried Strawberry Cheesecake Sandwiches is using heat that’s too high. While it might seem like a good idea to speed up the process, high heat will create a burnt exterior and cold, unmelted interior. Medium-low heat allows the bread to develop that beautiful golden crust while giving the cream cheese filling time to warm and become wonderfully gooey.
Another frequent issue is overfilling the sandwiches. While it’s tempting to pile on the delicious cream cheese mixture, too much filling will cause it to leak out during cooking, creating a mess in your pan and leaving you with sad, deflated sandwiches. Stick to about 2-3 tablespoons of filling per sandwich, spread evenly but not all the way to the edges.
Pay close attention to your butter temperature as well. If the butter is too hot when you add the sandwiches, it will splatter and potentially burn. Wait for the initial foaming to subside before adding your sandwiches – this indicates the butter is at the perfect temperature for frying. If you notice the butter browning too quickly, reduce the heat slightly. Remember, the goal is even browning and a crispy texture, not a burnt flavor that will overpower the delicate cheesecake and strawberry flavors in your beautiful Fried Strawberry Cheesecake Sandwiches.
Serving & Final Touches: Creating an Unforgettable Experience
Creative Presentation Ideas That Wow
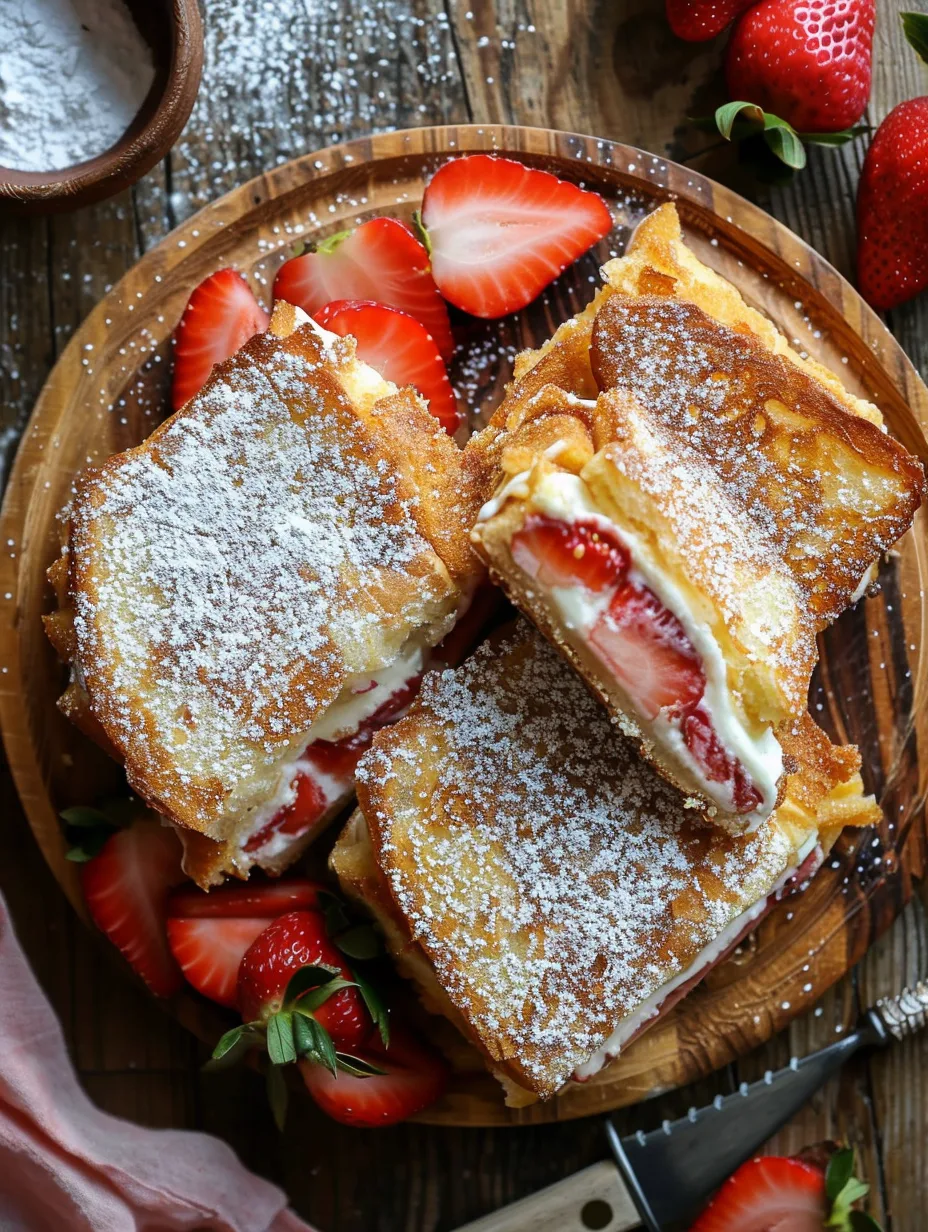
The presentation of your Fried Strawberry Cheesecake Sandwiches can transform them from a simple treat into a restaurant-quality dessert that will have your guests talking for weeks. Start by cutting each sandwich diagonally – this not only creates an appealing visual but also shows off the beautiful layers of golden bread, creamy filling, and colorful strawberries inside.
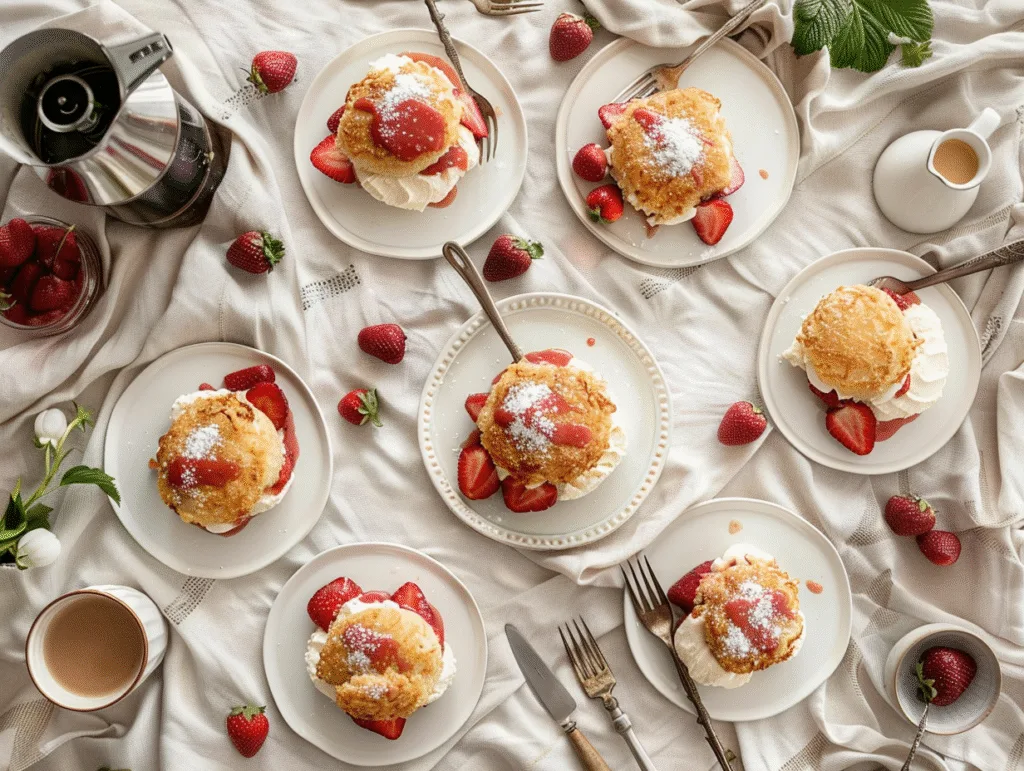
For an elegant touch, dust the tops of your sandwiches with powdered sugar using a fine-mesh sieve. This adds a beautiful snowy appearance that contrasts gorgeously with the golden-brown exterior. You can also create stunning presentations by arranging the sandwich halves on individual plates with a small scoop of vanilla ice cream or a dollop of freshly whipped cream on the side.
Consider creating a beautiful garnish station that allows each person to customize their Fried Strawberry Cheesecake Sandwiches. Set out small bowls of sliced fresh strawberries, a drizzle of strawberry sauce or maple syrup, chopped toasted nuts like pecans or almonds, and perhaps some mini chocolate chips. This interactive element makes the dining experience more memorable and allows everyone to personalize their dessert exactly how they like it.
Perfect Pairings and Complementary Flavors
While Fried Strawberry Cheesecake Sandwiches are absolutely delicious on their own, the right accompaniments can elevate them to an entirely new level. A scoop of high-quality vanilla bean ice cream is perhaps the most classic pairing – the cool, creamy texture provides a lovely contrast to the warm, crispy sandwich, while the vanilla flavor enhances the cheesecake notes without competing with them.
For a more sophisticated presentation, consider serving these sandwiches alongside a mixed berry compote made with blueberries, raspberries, and blackberries. The variety of flavors and textures creates a more complex dessert experience, and the additional fruit adds beautiful color to the plate. A small glass of cold milk or a cup of freshly brewed coffee also makes an excellent accompaniment, especially for those who enjoy the contrast between sweet and slightly bitter flavors.
Don’t overlook beverage pairings when serving Fried Strawberry Cheesecake Sandwiches. A dessert wine like Moscato or a sweet Riesling complements the fruit and cream flavors beautifully for adult gatherings. For family meals, consider serving sparkling apple cider or flavored sparkling water with fresh fruit slices – these options cleanse the palate between bites and add a festive element to the meal.
Storage Solutions and Reheating Magic
Proper storage of Fried Strawberry Cheesecake Sandwiches ensures you can enjoy this delicious treat even as leftovers, though I’ll warn you – they rarely last long enough to require storage! If you do find yourself with extras, wrap each sandwich individually in aluminum foil and store them in the refrigerator for up to two days. The foil helps maintain moisture while preventing the bread from becoming soggy.
When it comes to reheating, avoid the microwave if possible, as it tends to make the bread chewy and can cause the filling to become too hot and runny. Instead, unwrap your refrigerated sandwiches and place them in a 350°F oven for about 8-10 minutes, or until heated through and the exterior becomes crispy again. For even better results, you can reheat them in a skillet over medium-low heat, just as you cooked them originally, for about 2-3 minutes per side.
If you want to prepare components ahead of time, the cream cheese and strawberry filling can be made up to 24 hours in advance and stored covered in the refrigerator. This actually allows the flavors to meld together beautifully. You can also pre-slice your bread and store it covered at room temperature. However, I don’t recommend assembling the complete Fried Strawberry Cheesecake Sandwiches too far in advance, as the moisture from the filling can make the bread soggy. For best results, assemble and cook them the same day you plan to serve them.
 DINNER
 LUNCH
LUNCH Desserts
 BREAKFAST
For more amazing recipes, be sure to check out our other sections to explore a variety of ideas that will enrich your cooking experience. Each section offers its own unique flavors to ensure a delightful culinary journey:
Easy and Quick Recipes: A collection of dishes that guarantee delicious meals with minimal effort and time.
Healthy Recipes: Discover healthy and delicious options that fit your lifestyle.
Desserts: A diverse selection of sweets that will add a special touch of sweetness to your table.
Lunch Recipes: Tasty lunch ideas that you can easily prepare to delight your family.
Dinner Recipes: Delicious and easy-to-make recipes that will make your dinner a memorable occasion.
Frequently Asked Questions
Q: Can I make Fried Strawberry Cheesecake Sandwiches ahead of time for a party? A: While these sandwiches are best served immediately after cooking, you can prepare the cream cheese filling up to 24 hours ahead and store it covered in the refrigerator. I recommend assembling and cooking the sandwiches no more than 2-3 hours before serving, then keeping them warm in a 200°F oven until ready to serve. This maintains their crispy exterior while keeping the interior perfectly gooey.
Q: What’s the best way to prevent the filling from leaking out during cooking? A: The key is using the right amount of filling (about 2-3 tablespoons per sandwich) and leaving a border around the edges when spreading. Press the edges of the bread together gently but firmly to create a seal, and cook over medium-low heat to prevent the filling from heating too quickly and bursting out. Using slightly stale or day-old bread can also help, as it’s less likely to tear during assembly.
Q: Can I use frozen strawberries instead of fresh ones? A: Yes, but make sure to thaw them completely and drain off excess liquid before mixing with the cream cheese. Pat the thawed strawberries dry with paper towels to remove as much moisture as possible. While fresh strawberries provide better texture and flavor, properly prepared frozen strawberries can work in a pinch, especially when fresh berries are out of season.
Q: How do I know when the sandwiches are cooked perfectly? A: Look for a deep golden-brown color on both sides, which usually takes 3-4 minutes per side over medium-low heat. The bread should sound hollow when tapped gently with a spatula, and you should see a bit of the melted filling starting to peek out at the edges. If you’re unsure, you can carefully lift one corner with a spatula to check the color underneath.
Q: What other fruits work well in this recipe besides strawberries? A: Many fruits can be substituted for strawberries in these sandwiches! Sliced peaches, blueberries, raspberries, or blackberries all work wonderfully. Diced apples mixed with a pinch of cinnamon create an apple pie version, while sliced bananas with a touch of chocolate create an indulgent twist. Just ensure any fruit you use isn’t too watery, as excess moisture can make the sandwiches soggy.
Related Recipe Ideas
For those who love these [Fried Strawberry Cheesecake Sandwiches], you might also enjoy our [Classic New York Cheesecake] recipe, which features the same creamy texture in traditional form. Our [Strawberry Shortcake French Toast] offers another creative way to combine bread with strawberries and cream, while our [Easy Homemade Strawberry Sauce] can serve as a perfect topping for these sandwiches.
Conclusion: Your Journey to Crispy-Gooey Perfection
There’s something truly special about creating Fried Strawberry Cheesecake Sandwiches in your own kitchen. These incredible treats represent the perfect marriage of comfort food and elegant dessert, offering that irresistible combination of crispy exterior and molten, cheesecake-filled interior that makes every bite a moment of pure joy.
As you embark on making your own batch of these delicious dishes, remember that the key to success lies in patience and attention to detail. Take your time with each step, from properly softening your cream cheese to maintaining the right cooking temperature, and you’ll be rewarded with family favorite recipes that will become a treasured part of your culinary repertoire.
I encourage you to make this recipe your own by experimenting with different fruits, trying various bread types, or adding your own creative touches to the presentation. The beauty of easy homemade recipes like this one is that they provide a solid foundation while leaving plenty of room for personal expression and creativity.
Don’t forget to share your Fried Strawberry Cheesecake Sandwich creations with friends and family – these treats are meant to be enjoyed together, creating memories and moments of sweetness that last far beyond the last bite. I’d love to hear about your experiences with this recipe, so please share your photos and any creative variations you discover along the way.
Now, gather your ingredients, warm up that skillet, and get ready to create something truly magical. Your first bite of these crispy, gooey Fried Strawberry Cheesecake Sandwiches is just minutes away, and I promise it will be worth every moment you spend preparing them. Happy cooking!