Oh, how I love Easter no bake desserts! They’re my secret weapon when I’m juggling family visits, egg hunts, and last-minute meal prep. I’ll never forget the year my niece declared my no-bake cheesecake “better than the Easter bunny himself” – and honestly, that’s all the motivation I need to keep making these simple treats. There’s something magical about creating festive desserts without ever turning on the oven, especially when you’re short on time but still want that special holiday touch. Whether you’re hosting a big gathering or just want a sweet treat after Sunday dinner, these easy desserts come together in minutes and disappear just as fast. The pastel sprinkles and chocolate eggs make them look like springtime exploded in the best possible way!
Why You’ll Love These Easter No Bake Desserts
Let me tell you why these treats are my Easter lifesavers every single year. First off – no oven means no stress about timing or burnt edges while you’re juggling ham glazing and table settings. They come together in 20 minutes flat (I’ve timed it while wrangling kids in bunny ears). The pastel sprinkles and chocolate eggs make them instantly festive without any fancy decorating skills. And here’s the best part – they taste even better after chilling, so you can make them the night before when you’ve got a spare moment. Perfect for when you want something special but don’t want to spend your whole Easter in the kitchen!
Ingredients for Easter No Bake Desserts
Gathering ingredients for these Easter treats is half the fun! I love how simple everything is – you probably have most of this in your pantry already. Just make sure everything’s measured and ready to go before you start. Trust me, it makes the whole process smoother when you’re not digging through cabinets mid-recipe!
For the Base
The crust couldn’t be easier – just graham cracker crumbs, melted butter, and a bit of sugar. I always use the whole crackers and crush them myself for the freshest taste (a rolling pin works great if you don’t have a food processor). The butter should be properly melted but not hot – I microwave it in 15-second bursts to get it just right.
For the Filling
Here’s where the magic happens! You’ll need softened cream cheese (leave it out for about 30 minutes first), powdered sugar, vanilla extract, and whipped cream. Pro tip: if you forget to soften the cream cheese, microwave it for 5-10 seconds at 50% power – just don’t let it get melty! The whipped cream folds in last to make everything light and fluffy.
For Decoration
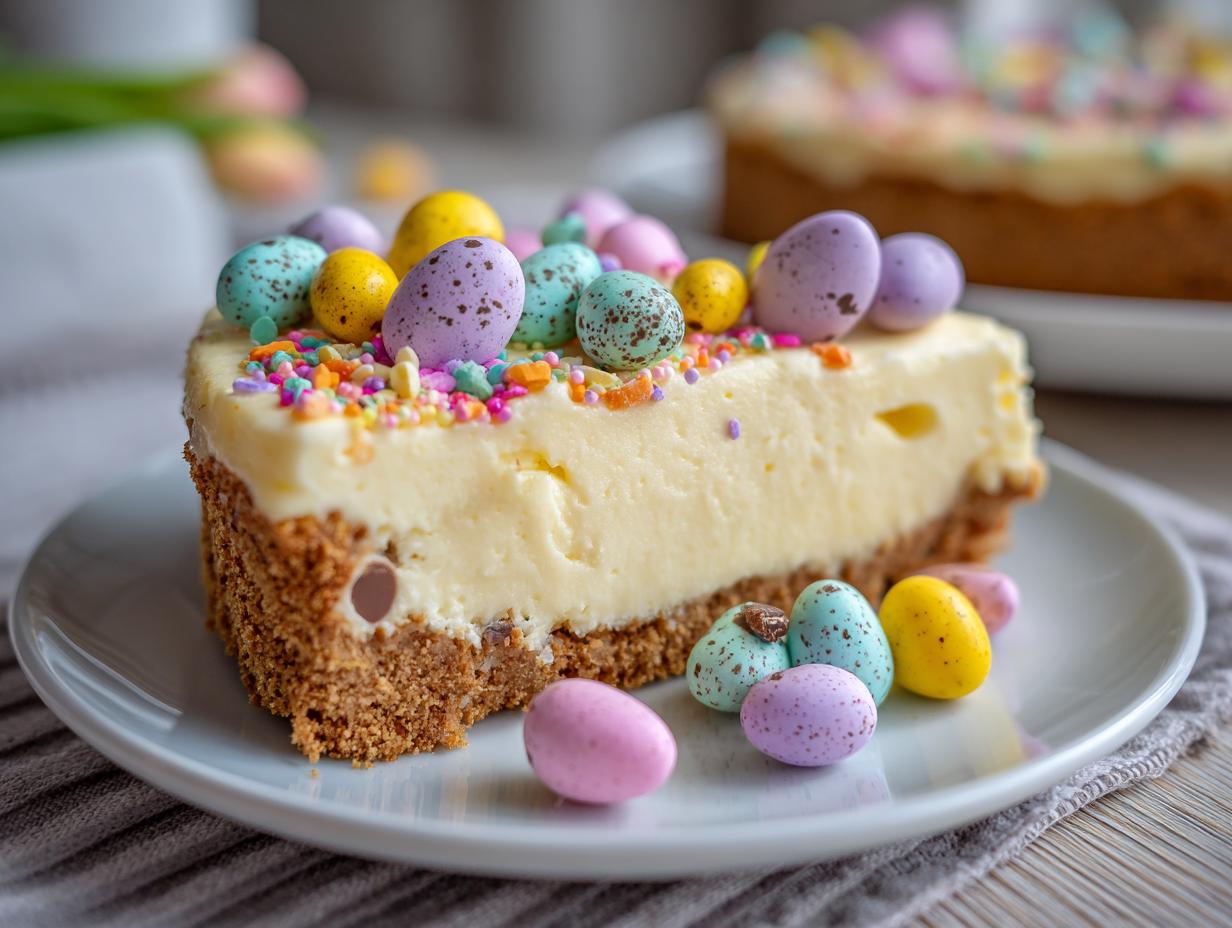
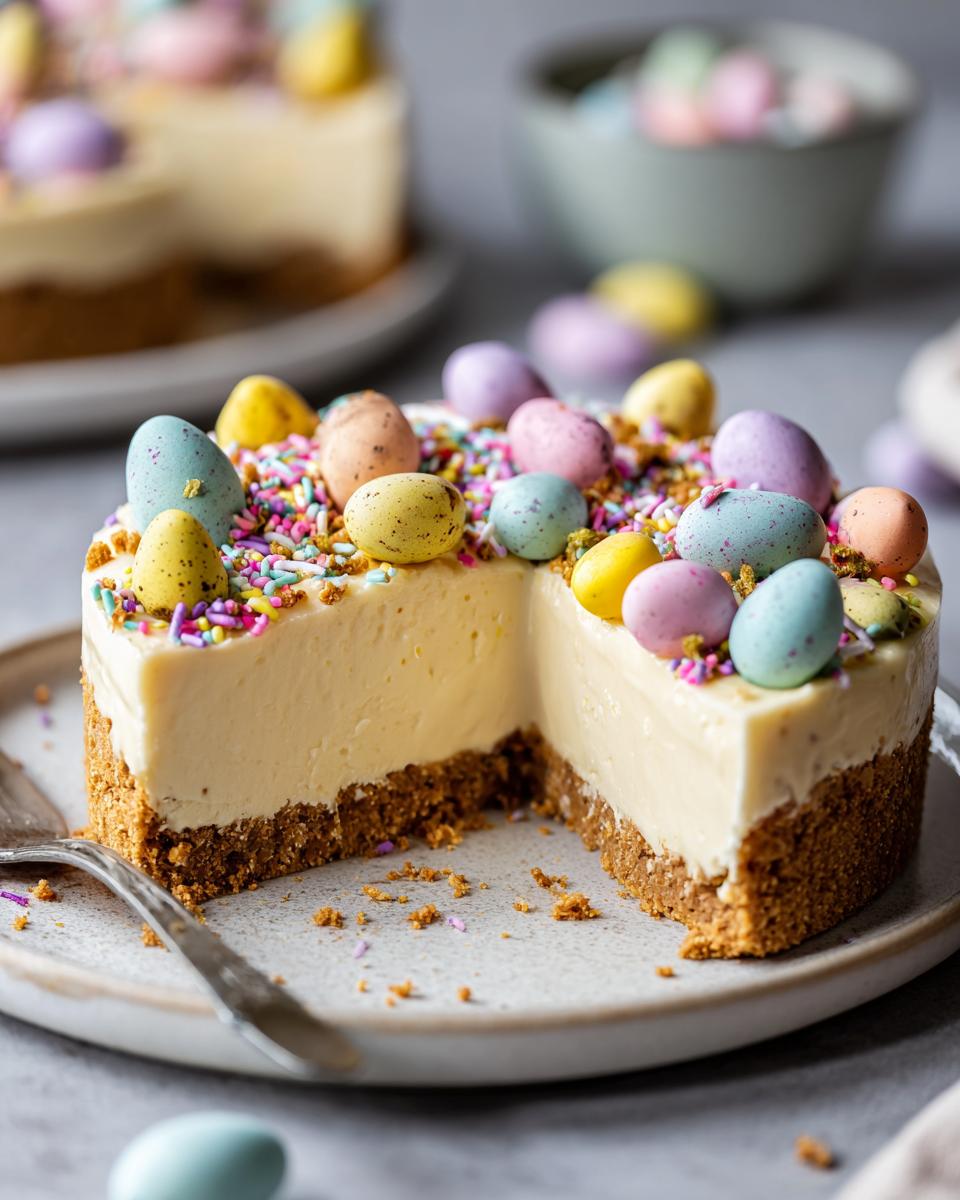
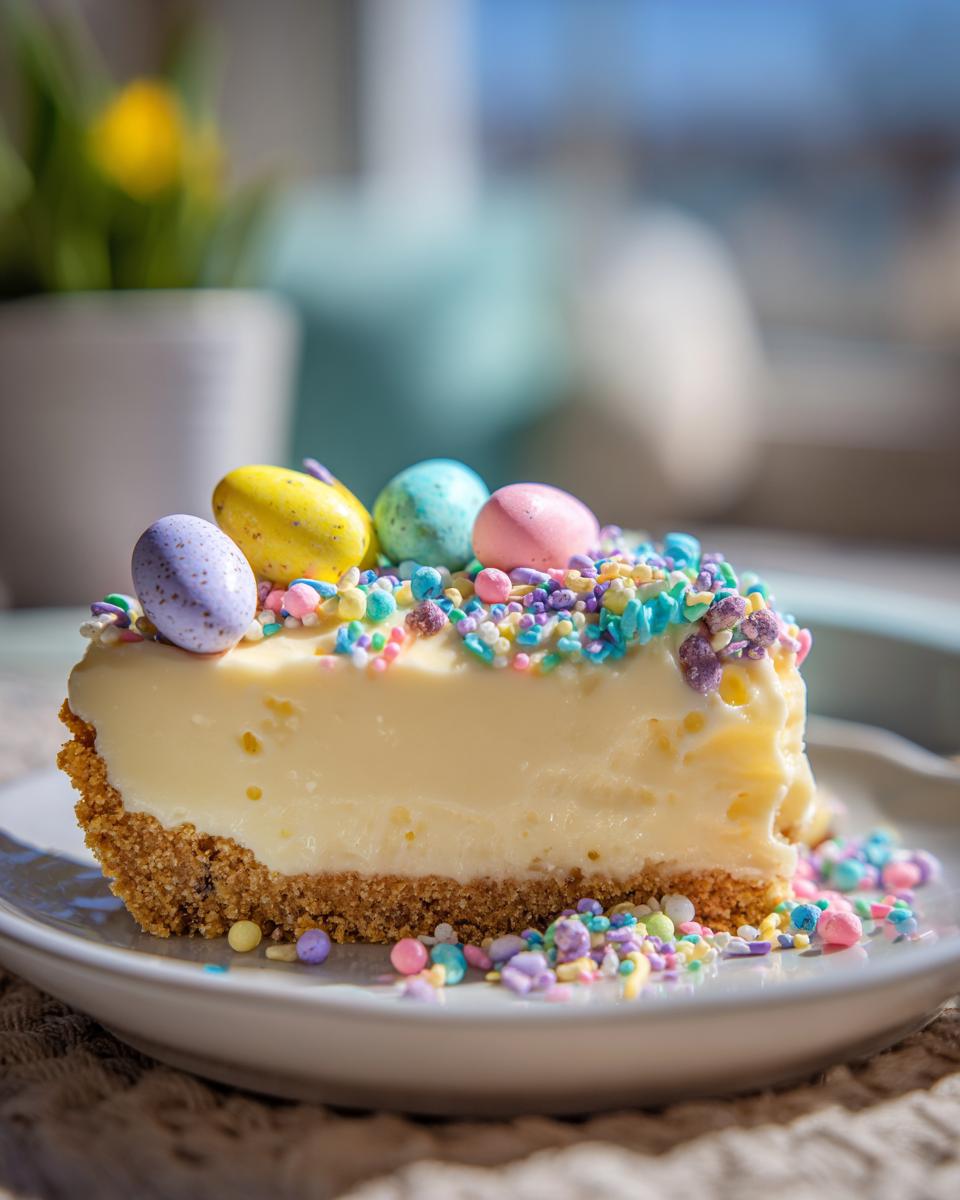
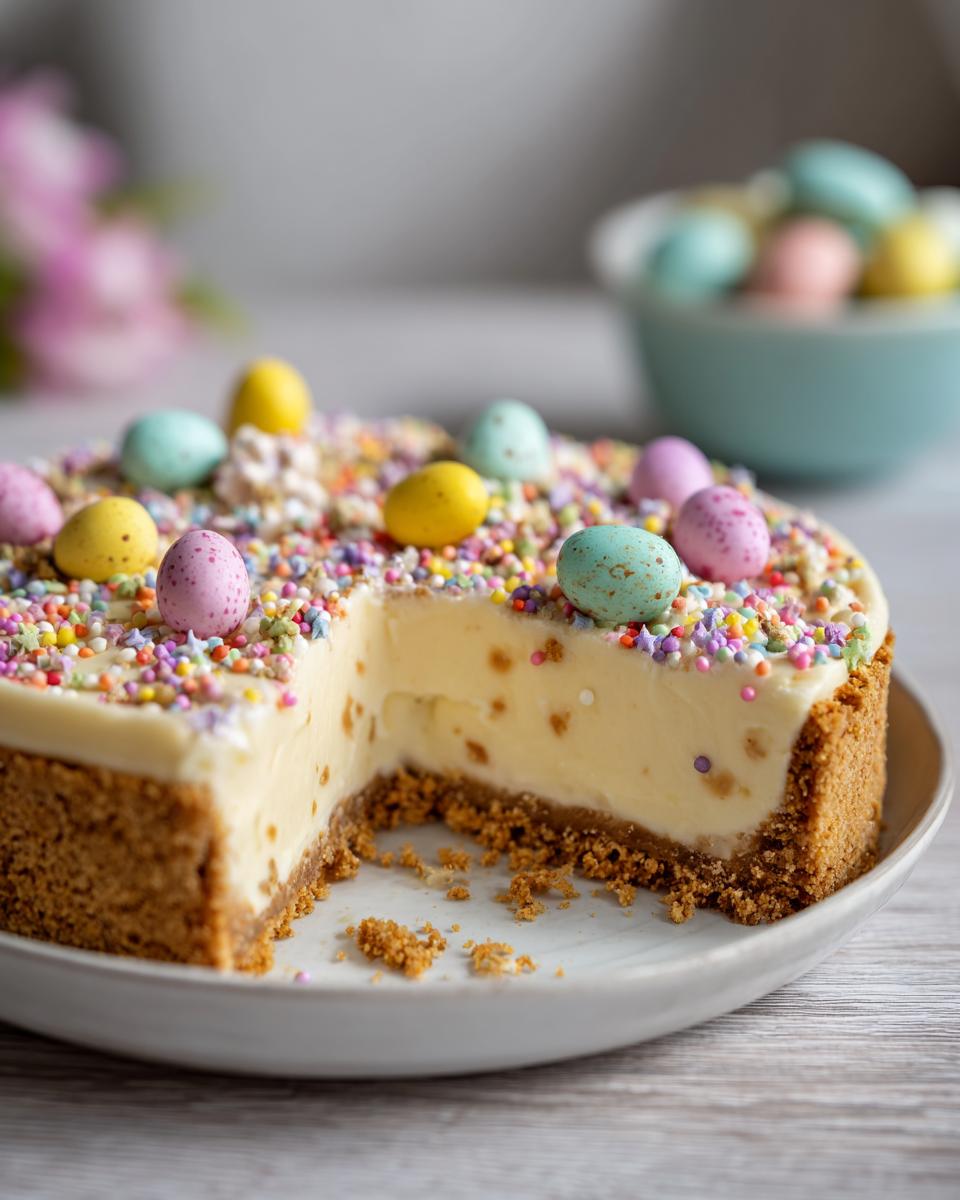
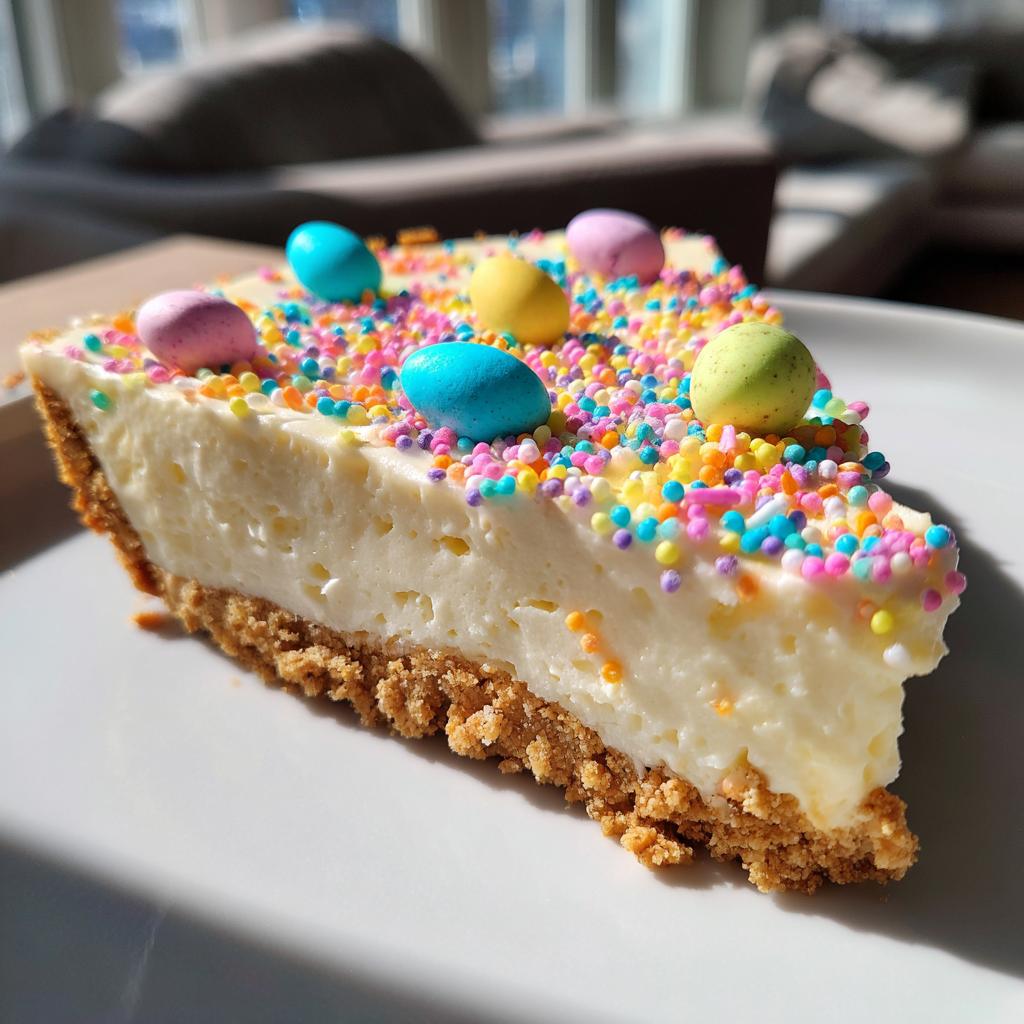
This is where Easter comes alive! Pastel sprinkles and mini chocolate eggs transform simple cheesecake into a spring celebration. I like using pastel nonpareils for extra crunch, but any festive sprinkles will do. The chocolate eggs? Well, let’s just say I always buy extra because some mysteriously disappear before decorating!
How to Make Easter No Bake Desserts
Alright, let’s get to the fun part – making these adorable Easter treats! I promise it’s easier than dyeing eggs (and way less messy). The whole process flows together beautifully once you get going. Just follow these steps and you’ll have dessert ready before the kids finish hunting for chocolate bunnies!
Preparing the Crust
First, grab your graham cracker crumbs and mix them with melted butter and sugar in a medium bowl. I like to use a fork to really work that butter in evenly – you want every crumb coated. Then dump it into your pie dish and press firmly with your fingers or the back of a measuring cup. Pro tip: press the crumbs up the sides first, then do the bottom for an even layer. Don’t worry about perfection – rustic is charming!
Making the Filling
Now for the creamy goodness! Beat your softened cream cheese until it’s completely smooth – no lumps allowed! Then add powdered sugar and vanilla, mixing until it’s silky. Here’s where patience pays off – scrape down the bowl often to catch any stubborn bits. Finally, gently fold in the whipped cream with a rubber spatula. Think of it like folding egg whites – you want to keep all that airiness intact. The mixture should be light and fluffy, like edible clouds!
Assembling and Chilling
Spoon your dreamy filling over the crust and smooth it out with an offset spatula (or the back of a spoon in a pinch). Now the fun part – sprinkle those pastel sprinkles liberally and artfully arrange your chocolate eggs. I like to do a ring around the edge with a few in the center. Then pop it in the fridge for at least 2 hours – I know it’s tempting, but trust me, the wait makes all the difference! The filling sets up perfectly and the flavors meld together beautifully.

Tips for Perfect Easter No Bake Desserts
After making these Easter treats more times than I can count, I’ve picked up some foolproof tricks! First – that cream cheese really needs to be room temp. Cold cream cheese equals lumpy filling, and nobody wants that. I take mine out about an hour before starting. When folding in whipped cream, use a light hand and swooping motions – overmixing makes it dense. For decorations, sprinkle from high up for even coverage (my nephew calls this “the snow method”). My secret presentation trick? Run a warm knife around the edge before slicing for clean, pretty pieces that show off those colorful layers!
Variations for Easter No Bake Desserts
One of my favorite things about this recipe is how easily you can mix it up! Last Easter, I made three different versions just for fun. For crust lovers, try swapping graham crackers for crushed Oreos (my nephew’s favorite) or pretzels for a sweet-salty twist. If you’re feeling fancy, this no-bake Oreo cheesecake version is always a hit at our gatherings. Want to brighten up the filling? Add lemon zest or swirl in some strawberry jam before chilling – instant spring flavors! And decorations? Oh, the possibilities! Fresh berries make it look garden-fresh, while edible flowers (find them in the produce section) turn it into a centerpiece. My sister even did mini nests with shredded coconut and jellybean eggs on top – pure Easter magic!
Serving Suggestions for Easter No Bake Desserts
Oh, let me tell you how I love serving these Easter treats! They’re perfect alongside a bowl of fresh berries – the tartness balances the sweetness beautifully. After Easter dinner, I always serve slices with coffee (the adults appreciate this) while the kids go wild for milk pairings. Last year, I made mini versions in muffin tins for our dessert buffet – they disappeared faster than the Easter eggs! The creamy filling cuts through rich holiday meals perfectly, making it ideal after ham or lamb. Pro tip: garnish plates with edible flowers for that extra springtime wow factor!
Storage and Reheating Instructions
Here’s the good news – these Easter treats keep beautifully! Just cover the pie dish tightly with plastic wrap (I press it right against the surface to prevent drying) and pop it in the fridge. They’ll stay fresh for up to 3 days – though in my house, they never last that long! Unlike baked desserts, there’s no reheating needed – just slice and serve chilled. The creamy filling actually gets better after a day as the flavors meld together. Perfect for sneaking a midnight snack when everyone’s asleep!
Nutritional Information
Now, I’m no nutritionist, but here’s what I can tell you about these Easter treats. The nutritional info varies based on your specific ingredients and brands – that cream cheese you grab makes a difference! These estimates assume standard ingredients, but let’s be real – we’re here for the deliciousness, not the calorie count. Just enjoy every creamy, crunchy, pastel-sprinkled bite!
Frequently Asked Questions
Can I use a different crust for these Easter no bake desserts?
Absolutely! I’ve experimented with all sorts of crusts over the years. Crushed Oreos make a delicious chocolatey base (just skip the extra sugar), while gingersnaps add a lovely spice. For something lighter, try vanilla wafer crumbs or even crushed pretzels for that sweet-salty combo we all love. Just keep the same butter ratio and press firmly – the crust needs to hold up to that creamy filling!
How long should these Easter desserts chill before serving?
I know it’s tempting to dig in right away, but trust me – give it at least 2 hours in the fridge. That’s the magic number where the filling sets perfectly. Overnight is even better if you can wait! The flavors meld together beautifully, and you’ll get those picture-perfect slices. Pro tip: if you’re in a real hurry, pop it in the freezer for 30 minutes first.
Can I make these Easter treats ahead of time?
Oh honey, these are my go-to make-ahead Easter dessert! They actually taste better after chilling overnight. Just decorate right before serving so the sprinkles stay crisp. I’ve made them up to 24 hours in advance with perfect results – one less thing to worry about on Easter morning while you’re hiding eggs and prepping the ham!
Easter No Bake Desserts
Ingredients
Method
- Mix graham cracker crumbs, melted butter, and sugar in a bowl.
- Press the mixture into a 9-inch pie dish to form the crust.
- In another bowl, beat cream cheese, powdered sugar, and vanilla until smooth.
- Fold in whipped cream gently.
- Spread the filling over the crust.
- Sprinkle with pastel-colored sprinkles and top with mini chocolate eggs.
- Chill for at least 2 hours before serving.
Notes
Tried this recipe?
Let us know how it was!For more amazing recipes, be sure to check out our other sections to explore a variety of ideas that will enrich your cooking experience. Each section offers its own unique flavors to ensure a delightful culinary journey:
Easy and Quick Recipes: A collection of dishes that guarantee delicious meals with minimal effort and time.
Healthy Recipes: Discover healthy and delicious options that fit your lifestyle.
Desserts: A diverse selection of sweets that will add a special touch of sweetness to your table.
Lunch Recipes: Tasty lunch ideas that you can easily prepare to delight your family.
Dinner Recipes: Delicious and easy-to-make recipes that will make your dinner a memorable occasion.