Table of Contents
Table of Contents
Introduction
There’s something truly magical about a dish that brings together speed, flavor, and nutrition in one sizzling pan. In the culinary world, Chicken Stir-Fry stands as a testament to the beauty of simplicity meeting sophistication. This beloved recipe has earned its place in kitchens worldwide, from bustling Asian street markets to suburban American homes, proving that extraordinary meals don’t require hours of preparation or a Michelin-starred chef’s expertise.
I’ll never forget the first time I truly understood the power of a well-executed Chicken Stir-Fry. It was a chaotic Wednesday evening—one of those days where everything that could go wrong did. I’d promised my family a proper dinner, but between back-to-back meetings and my daughter’s soccer practice running late, I found myself staring at a clock showing 6:45 PM with nothing planned. That’s when I remembered my grandmother’s words: “A hot wok and fresh ingredients can save any day.” Twenty-five minutes later, I served a colorful, aromatic Chicken Stir-Fry that not only saved dinner but became our most-requested weeknight meal.
This recipe isn’t just about feeding hungry mouths quickly—though it certainly excels at that. It’s about creating moments of joy around the dinner table, teaching yourself (and maybe your kids) fundamental cooking techniques, and proving that healthy, delicious dishes don’t have to be complicated. Whether you’re a complete beginner or a seasoned home cook looking for reliable go-to recipes, this Chicken Stir-Fry will quickly become your secret weapon for those busy weeknights when you need something spectacular without the stress.
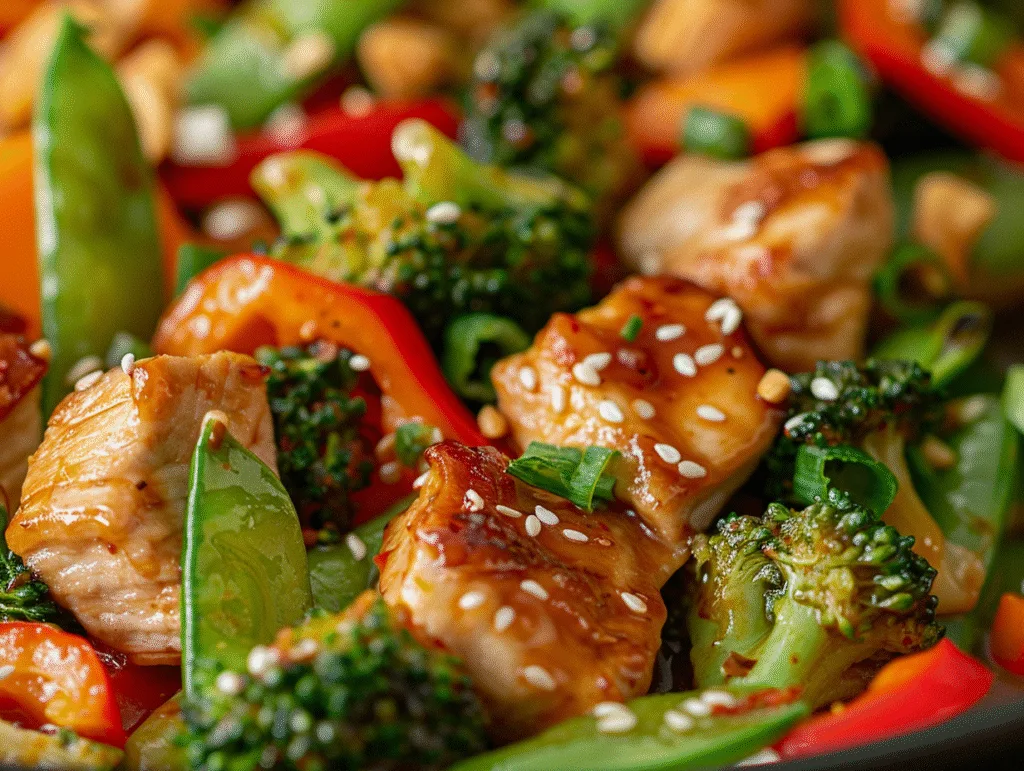
30-Minute Chicken Stir-Fry: Your New Favorite Easy Weeknight Dinner
Ingredients
Tried this recipe?
Let us know how it was!Ingredients for the Perfect Chicken Stir-Fry
Understanding Key Ingredients and Their Essential Role
The beauty of Chicken Stir-Fry lies in its harmonious blend of proteins, vegetables, and a flavor-packed sauce that ties everything together. Let’s break down what makes this dish truly special and why each component matters.
The Protein Foundation: At the heart of our Chicken Stir-Fry sits 1.5 pounds of boneless, skinless chicken breast or thighs. I personally lean toward chicken thighs when I have the time to trim them—they’re more forgiving if you overcook them slightly and offer richer flavor. However, chicken breasts work beautifully and are often what I grab for this easy homemade recipe when I’m watching my fat intake. The key is cutting your chicken into uniform, bite-sized pieces (about 1-inch cubes) to ensure even cooking. This isn’t just aesthetic—uniform pieces mean everything finishes at the same time, preventing that frustrating scenario where some pieces are perfect while others are dry or undercooked.
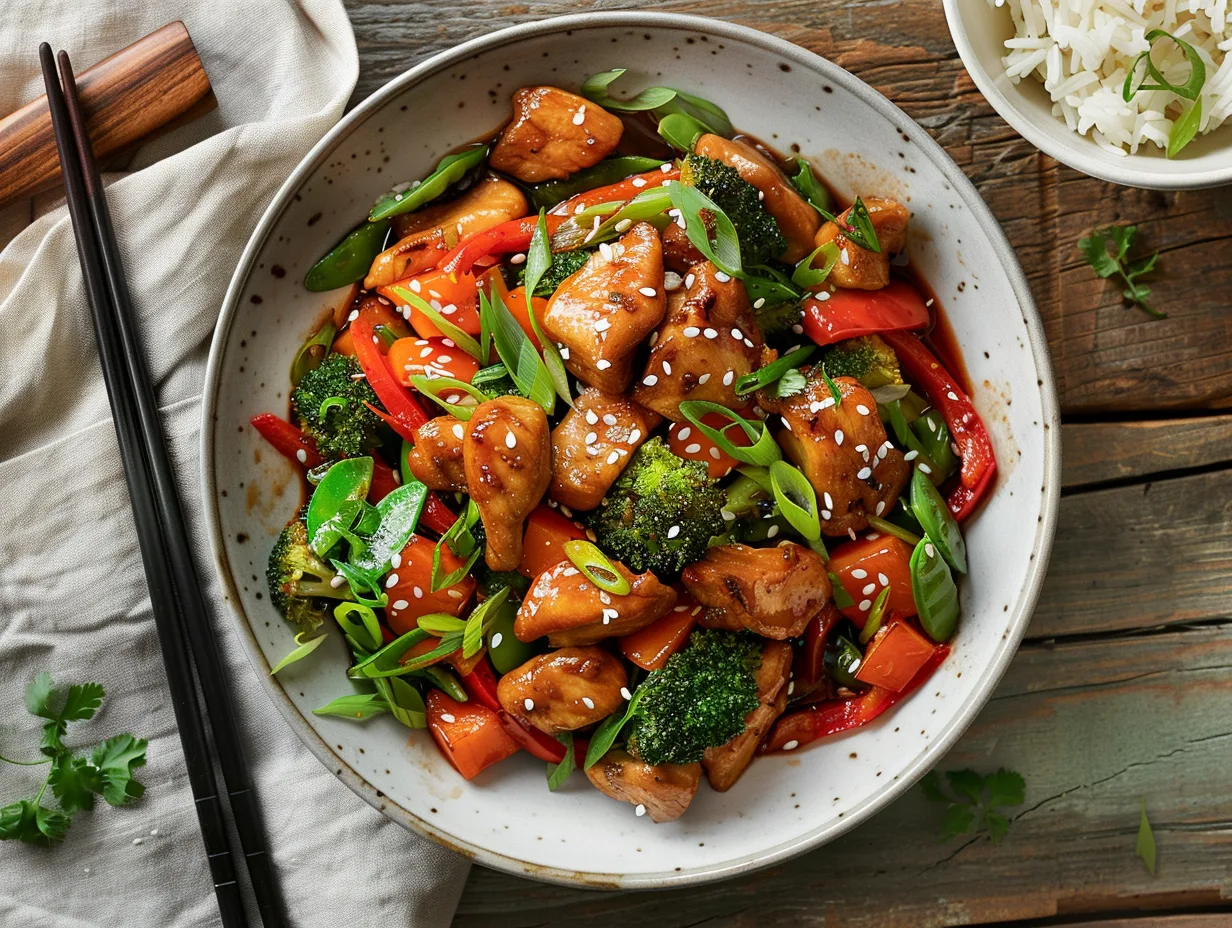
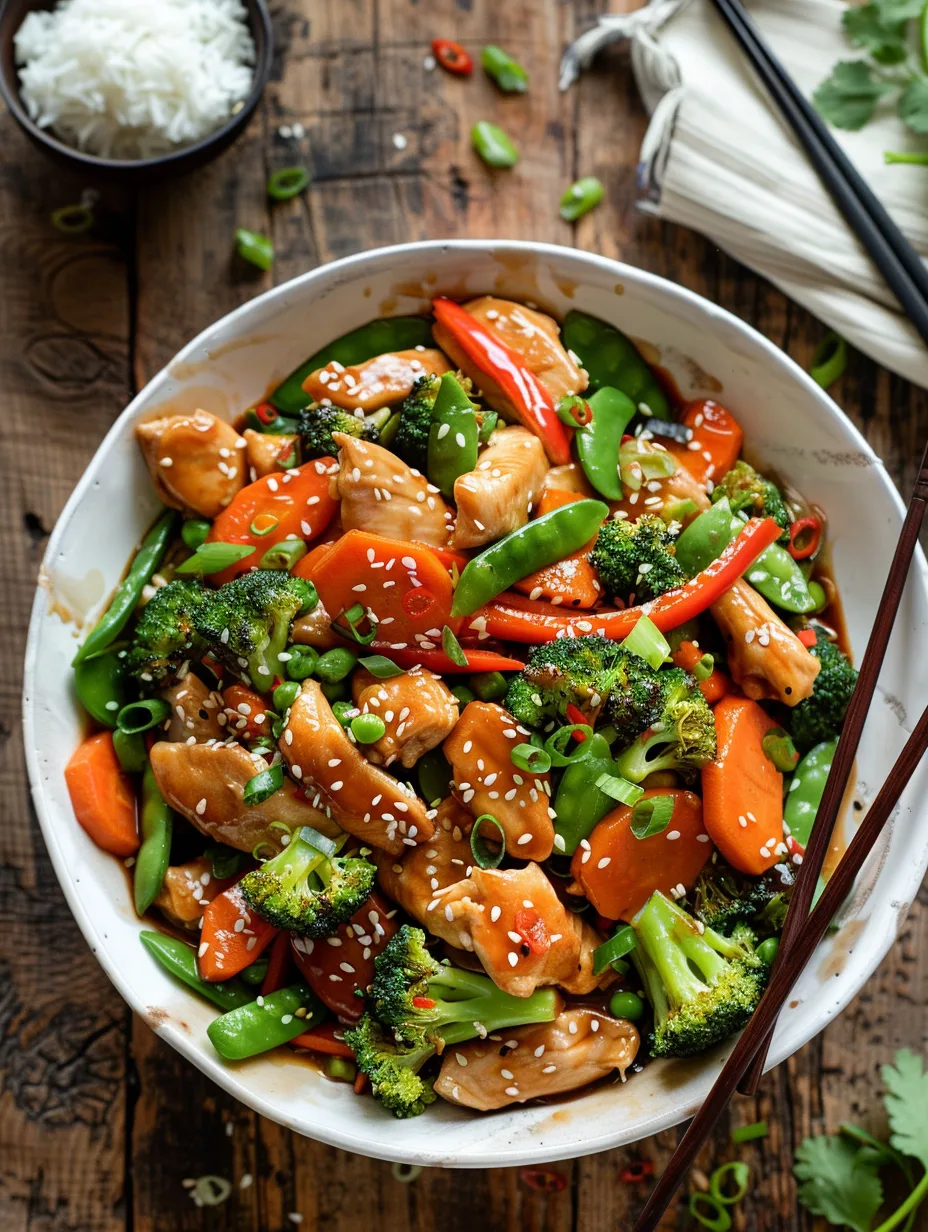
The Vegetable Medley: A proper Chicken Stir-Fry showcases a rainbow of vegetables, each contributing unique textures and flavors. For this recipe, you’ll need 2 cups of broccoli florets, 1 large red bell pepper (sliced into strips), 1 cup of snap peas, 1 medium carrot (julienned), and 1 small onion (sliced). The broccoli provides that satisfying crunch and earthy flavor, while the bell pepper adds sweetness and vibrant color. Snap peas bring a delightful pop and freshness, carrots contribute natural sweetness and visual appeal, and onions create the aromatic foundation that makes your kitchen smell absolutely incredible. Don’t skip the variety—this colorful array isn’t just pretty; it delivers a complete nutritional profile and ensures every bite offers something different.
The Sauce Symphony: What transforms a simple chicken and vegetable combination into an irresistible Chicken Stir-Fry is the sauce. You’ll need 1/4 cup low-sodium soy sauce, 2 tablespoons oyster sauce, 1 tablespoon rice vinegar, 1 tablespoon honey or brown sugar, 2 teaspoons sesame oil, 1 tablespoon cornstarch, and 1/2 cup chicken broth. Each ingredient serves a purpose: soy sauce provides the salty umami foundation, oyster sauce adds depth and slight sweetness, rice vinegar brings brightness to cut through richness, honey balances the saltiness, sesame oil delivers that distinctive nutty aroma, cornstarch creates the glossy coating that clings to every piece, and chicken broth loosens everything to the perfect consistency.
The Aromatics Arsenal: Don’t underestimate the power of 4 cloves of minced garlic, 1 tablespoon of fresh grated ginger, and 2-3 thinly sliced green onions. These aromatic ingredients are what separate a good Chicken Stir-Fry from an absolutely phenomenal one. They’re added at strategic moments to build layers of flavor that make this family favorite recipe so addictive.
The Essential Oils: You’ll need 3 tablespoons of a high-heat cooking oil (vegetable, canola, or peanut oil work best). This isn’t the time for extra virgin olive oil, which has a low smoke point and can turn bitter at the high temperatures required for authentic stir-frying.
Expert Tips for Selecting the Best Quality Ingredients
Creating an outstanding Chicken Stir-Fry starts long before you turn on your stove—it begins in the grocery store or farmer’s market with smart ingredient selection.
Choosing Your Chicken: When selecting chicken for your Chicken Stir-Fry, look for pieces that are pale pink (not gray), with no unpleasant odor, and packaged with minimal liquid. If you’re buying chicken breasts, avoid the enormous ones that have clearly been enhanced—they contain added water and sodium that can interfere with proper browning. For chicken thighs, look for pieces with even coloring and firm texture. Organic or free-range chicken typically offers superior flavor, but standard quality works perfectly fine for this recipe. If possible, buy chicken that hasn’t been previously frozen, as it will brown more effectively and maintain better texture.
Selecting Perfect Vegetables: The vegetable component can make or break your Chicken Stir-Fry. For broccoli, choose heads with tight, compact florets that are deep green (not yellowing) and firm stems. The florets should feel slightly heavy for their size, indicating freshness and moisture content. Bell peppers should be firm, glossy, and heavy with tight, wrinkle-free skin—avoid any with soft spots. Fresh snap peas should be bright green, crisp enough to snap audibly when bent, and relatively flat (overly bulging pods indicate the peas inside are too mature and will be starchy). Carrots should be firm with no soft spots, and if they still have their greens attached, that’s a great freshness indicator. For onions, choose ones that feel heavy and solid with dry, papery skin and no soft spots or sprouting.
Garlic and Ginger Wisdom: Fresh garlic should have tight, papery skin with no green shoots emerging (which indicates age and can bring bitterness to your Chicken Stir-Fry). The cloves should feel firm when squeezed gently. For ginger, look for pieces with smooth, taut skin and break off a small piece to check—it should be fibrous but juicy, not dried out. Young ginger has thin, almost translucent skin and offers a more delicate flavor, while mature ginger has thicker skin and more pronounced spiciness. Both work wonderfully, so choose based on your preference.
Sauce Component Quality: For soy sauce, read labels carefully—low-sodium varieties still provide plenty of saltiness while giving you better control over the final taste of your Chicken Stir-Fry. Oyster sauce varies significantly in quality; look for brands that list oyster extract as the first ingredient rather than corn syrup. Real rice vinegar (not “rice wine vinegar” or distilled vinegar with rice flavoring) makes a noticeable difference. Toasted sesame oil (darker brown, not light amber) provides much more flavor than regular sesame oil.
The Freshness Test: Here’s a professional tip I learned from a Chinese cooking instructor: for any Chicken Stir-Fry or delicious dish, your ingredients should smell fresh and appealing before cooking. If your vegetables smell grassy and bright, your ginger spicy and clean, and your chicken neutral (not at all off), you’re set for success.
Smart Substitutions and Creative Alternatives
Life doesn’t always cooperate with recipe ingredient lists, and one of the joys of mastering Chicken Stir-Fry is learning it’s incredibly adaptable to what you have on hand.
Protein Variations: While chicken is the star here, this versatile recipe framework works beautifully with other proteins. Substitute with 1.5 pounds of pork tenderloin, sirloin steak, large shrimp (peeled and deveined), or even extra-firm tofu for a vegetarian version. If using beef or pork, slice thinly against the grain. For shrimp, they cook even faster than chicken—just 2-3 minutes total. Tofu should be pressed, cubed, and ideally pan-fried separately until crispy before adding to your Chicken Stir-Fry near the end. Turkey breast also works wonderfully and is perfect for using up Thanksgiving leftovers.
Vegetable Flexibility: The vegetable component of Chicken Stir-Fry is where you can really personalize based on preferences, seasons, or what’s lurking in your crisper drawer. No broccoli? Try cauliflower, broccolini, or Chinese broccoli (gai lan). Instead of bell peppers, use baby corn, water chestnuts, or mushrooms (shiitake, cremini, or button all work). Snap peas can be replaced with snow peas, green beans, or asparagus cut into 2-inch pieces. Don’t have fresh vegetables? Frozen stir-fry vegetable blends are a legitimate shortcut—just make sure to thaw and pat them dry before cooking to avoid excess water that prevents proper browning. Summer squash, zucchini, bok choy, cabbage, bean sprouts, and bamboo shoots all make excellent additions or substitutions.
Sauce Adaptations: If you’re missing an ingredient for your Chicken Stir-Fry sauce, don’t panic. No oyster sauce? Mix hoisin sauce with a touch of soy sauce, or simply use an extra tablespoon of soy sauce plus a teaspoon of Worcestershire sauce. Rice vinegar can be replaced with apple cider vinegar or white wine vinegar (use slightly less, as they’re more acidic). Honey and brown sugar are interchangeable, or try maple syrup for a different sweetness profile. If you don’t have sesame oil, your Chicken Stir-Fry will still be delicious—just finish with a sprinkle of toasted sesame seeds for that nutty element. Cornstarch can be replaced with equal amounts of arrowroot powder or even all-purpose flour (though the sauce won’t be quite as glossy).
Aromatic Alternatives: Fresh garlic can be replaced with 1 teaspoon of garlic powder in a pinch, though fresh is vastly superior. Similarly, if fresh ginger isn’t available, use 1 teaspoon of ground ginger, or try a tablespoon of ginger paste from a jar. Green onions can be substituted with regular onions, leeks, or even chives, though you’ll miss that fresh, bright finish they provide.
Dietary Modifications: For a gluten-free Chicken Stir-Fry, use tamari instead of soy sauce and check that your oyster sauce is gluten-free (many contain wheat). For low-sodium diets, use all low-sodium sauces and reduce quantities, relying more on aromatics and a splash of citrus for flavor. For paleo or Whole30 diets, use coconut aminos instead of soy sauce, skip the cornstarch thickener (the sauce will be thinner but still tasty), and use honey if paleo or skip sweetener entirely for Whole30.
Spice It Up: The basic Chicken Stir-Fry recipe is relatively mild, making it perfect for families with kids. However, if you love heat, add 1-2 teaspoons of chili garlic sauce, a sliced fresh chili pepper, or red pepper flakes to the sauce. Sriracha, gochugaru (Korean chili flakes), or a splash of hot sauce can all be incorporated to match your spice preference.
Preparation Steps for Restaurant-Quality Chicken Stir-Fry at Home
Initial Prep Work and Essential Mise en Place
The secret to effortless Chicken Stir-Fry lies in preparation—specifically, having absolutely everything ready before you heat your wok or pan. Stir-frying happens fast, and there’s no time to chop vegetables or mix sauce once cooking begins.
Chicken Preparation: Start by removing your chicken from the refrigerator and letting it sit for 10-15 minutes to take the chill off—room temperature chicken browns better than ice-cold chicken. Place your chicken pieces on a clean cutting board and pat them thoroughly dry with paper towels. This critical step can’t be skipped—moisture is the enemy of proper browning in Chicken Stir-Fry. Slice your chicken breasts horizontally to create thinner cutlets, then cut into 1-inch cubes. If using thighs, trim excess fat and cut into similar-sized pieces. Transfer to a bowl and lightly season with a pinch of salt and white pepper (black pepper works too, but white pepper is traditional and slightly more subtle).
Vegetable Prep Excellence: Proper vegetable preparation ensures your Chicken Stir-Fry cooks evenly and looks professional. Wash and thoroughly dry all vegetables—again, excess water causes steaming instead of that desirable high-heat sear. Cut broccoli into small, bite-sized florets, but don’t discard those stems! Peel the tough outer layer and slice the tender interior into thin coins—they’re delicious and reduce waste. Slice your bell pepper into strips about 1/4-inch wide and 2 inches long. Remove the strings from snap peas by snapping off the stem end and pulling down along the seam. Julienne your carrot into matchsticks, or use a vegetable peeler to create ribbons for a different texture. Slice onions into 1/4-inch thick half-moons. Group your vegetables on your cutting board or in small bowls based on cooking time—hardier vegetables like broccoli and carrots in one group, quicker-cooking peppers and snap peas in another.
Aromatics Preparation: For the freshest flavor in your Chicken Stir-Fry, prepare aromatics just before cooking. Peel and mince your garlic cloves—I like to use a garlic press for convenience, but hand-mincing creates larger pieces that provide bursts of flavor. Peel your ginger with the edge of a spoon (it removes just the skin without wasting flesh), then grate it using a microplane or the small holes of a box grater. Slice your green onions, separating the white and light green parts (which get cooked) from the dark green tops (which are used as garnish).
Sauce Mixing: In a medium bowl or large measuring cup, combine your soy sauce, oyster sauce, rice vinegar, honey, sesame oil, cornstarch, and chicken broth. Whisk vigorously until the cornstarch is completely dissolved—no lumps should remain. This premixed sauce is your secret weapon for a perfect Chicken Stir-Fry. The cornstarch will settle as it sits, so give it another quick whisk right before adding it to the pan.
Setting Up Your Station: Arrange everything within arm’s reach of your stove: bowl of chicken, groups of vegetables (ordered by cooking time), bowl of aromatics, bowl of sauce, your cooking oil, and serving dish. Have a clean plate ready for the cooked chicken. This organization—called “mise en place” in professional kitchens—transforms making Chicken Stir-Fry from stressful to streamlined. Trust me, the first time I tried cooking this without proper prep, I burned the garlic while frantically cutting peppers. Learn from my mistake!
Step-by-Step Cooking Instructions with Professional Secrets
Now for the exciting part—transforming your prepared ingredients into an incredible Chicken Stir-Fry that rivals your favorite takeout restaurant.
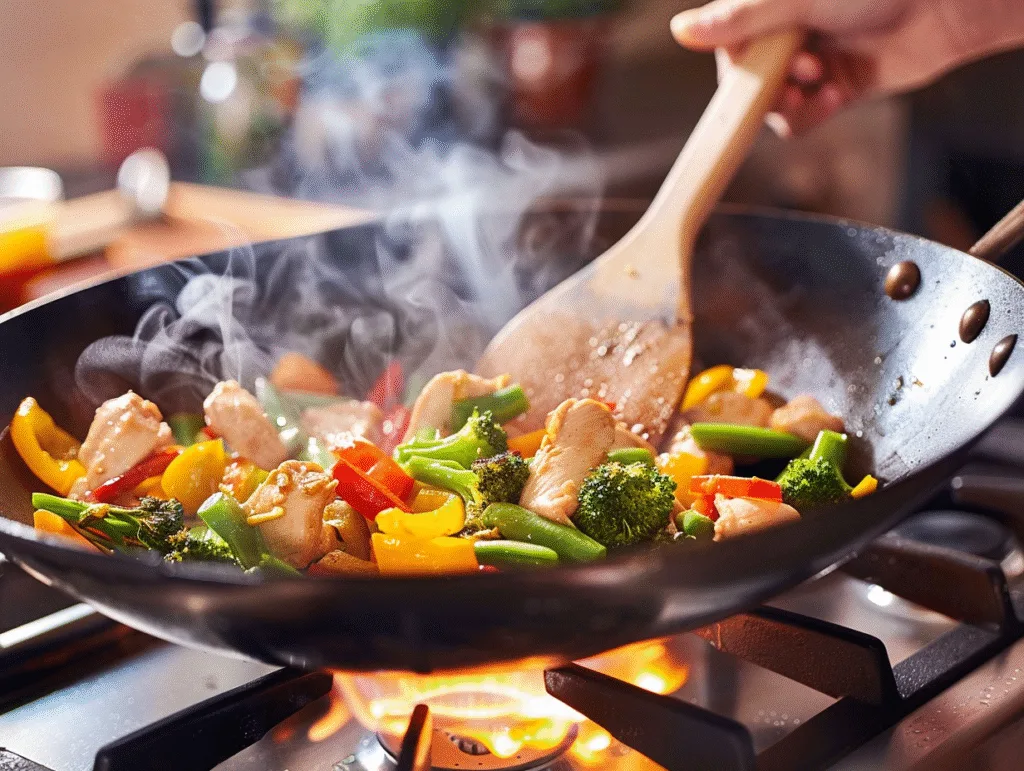
Step 1: Heat Management (The Most Crucial Element) Place your wok or large skillet over high heat and let it heat for 2-3 minutes until it’s genuinely hot—you should feel strong heat radiating when you hold your hand several inches above the surface. This high heat is the single most important factor in achieving that elusive “wok hei” (breath of the wok) that characterizes excellent Chicken Stir-Fry. Add 1.5 tablespoons of your high-heat oil and swirl to coat the cooking surface. The oil should shimmer and thin out almost immediately—if it smokes instantly, your heat is too high; if it doesn’t shimmer, wait a bit longer.
Step 2: Cooking the Chicken Perfectly Add your chicken pieces in a single layer—don’t crowd the pan. If necessary, cook in two batches. Here’s a professional secret many home cooks miss: once you add the chicken, resist the urge to move it for 2 full minutes. This undisturbed time allows proper browning to occur, creating depth of flavor in your Chicken Stir-Fry. After 2 minutes, flip the pieces and cook another 2-3 minutes until golden and just cooked through (internal temperature of 165°F). The chicken doesn’t need to be completely cooked at this stage—it will continue cooking later—so slightly undercooking now prevents dry, rubbery chicken in the final dish. Transfer chicken to your waiting plate.
Step 3: Vegetable Cooking in Stages Add the remaining 1.5 tablespoons of oil to your hot pan. Add your harder vegetables first—broccoli and carrots. Stir-fry for 2 minutes, keeping everything moving with a spatula or by tossing the pan if you’re comfortable with that technique. The vegetables should develop some charred spots while remaining crisp-tender—this contrast of textures is what makes Chicken Stir-Fry so satisfying. Add your peppers and snap peas, stir-frying for another 1-2 minutes. If vegetables start sticking or the pan seems dry, add a tablespoon of water to create steam and prevent burning. Push all vegetables to the sides of the pan, creating a well in the center.
Step 4: The Aromatic Bloom Add your minced garlic and grated ginger to the center well of the pan. Let them sizzle for just 15-20 seconds, stirring constantly—they should become fragrant but not brown. This brief moment is when the aromatic magic happens in your Chicken Stir-Fry, infusing the oil with incredible flavor. Work quickly here; burned garlic tastes bitter and will ruin the dish.
Step 5: Bringing It All Together Return your chicken to the pan, along with any accumulated juices from the plate. Give your sauce one final whisk, then pour it over everything. Stir constantly for 1-2 minutes as the sauce thickens and coats all the ingredients in a glossy, clingy glaze. This is the moment when separate ingredients transform into cohesive Chicken Stir-Fry. The sauce should thicken noticeably—if it remains thin after 2 minutes, continue cooking a bit longer. If it becomes too thick, add a splash of water or chicken broth to loosen.
Step 6: The Finishing Touch Add the white and light green parts of your sliced green onions, stirring for just 30 seconds to soften slightly while maintaining their bright color. Turn off the heat. Taste and adjust seasoning if needed—perhaps a splash more soy sauce for saltiness, or a teaspoon of rice vinegar for brightness.
The Professional Secret That Changes Everything: Here’s what separates good from transcendent Chicken Stir-Fry: the order of operations and maintaining high heat throughout. Home cooks often work at medium heat, fearing burning, but this causes vegetables to steam rather than sear. Trust your preparation work, work quickly, and keep that heat high. The entire active cooking time from when the pan first hits the heat until you’re plating should be only about 10-12 minutes.
Common Mistakes and How to Avoid Them for Perfect Results
Even with a detailed recipe, certain pitfalls can derail your Chicken Stir-Fry. Let me share the most common mistakes I see (and have made myself!) and how to sidestep them.
Mistake #1: Overcrowding the Pan This is perhaps the number one error that prevents home-cooked Chicken Stir-Fry from matching restaurant quality. When too much food hits the pan at once, the temperature drops dramatically, and instead of searing and browning, ingredients steam and become soggy. The solution is simple but requires patience: cook in batches if necessary. Your pan should look spacious with visible surface showing between pieces. If you’re doubling the recipe, either work in batches or use two pans simultaneously. Yes, it takes slightly longer, but the textural difference is night and day.
Mistake #2: Using the Wrong Pan While this recipe title says Chicken Stir-Fry, attempting it in a small, lightweight pan is a recipe for frustration. Ideally, use a large (14-inch) carbon steel wok or a large (12-inch or larger) cast iron or heavy stainless steel skillet. These vessels retain heat well, crucial for maintaining high temperatures when you add ingredients. Nonstick pans, while convenient, generally can’t withstand the high heat necessary for proper stir-frying and are typically too lightweight. If a wok or heavy skillet isn’t available, the best nonstick option is hard-anodized aluminum, but keep the heat at medium-high rather than high to protect the coating.
Mistake #3: Wet Ingredients Water is the archenemy of the crispy, caramelized edges that make Chicken Stir-Fry irresistible. Failing to dry your chicken and vegetables thoroughly, or using frozen vegetables without completely thawing and draining them, introduces moisture that creates steam. This steam prevents browning and results in a pale, mushy, unappealing dish. Always pat everything dry with paper towels, and if using frozen vegetables for convenience, spread them on a kitchen towel to absorb excess moisture before cooking.
Mistake #4: Irregular Cutting When vegetable pieces vary wildly in size, some end up burnt while others remain raw—a frustrating problem I encountered frequently when I first learned how to make Chicken Stir-Fry. Take the extra few minutes to cut everything uniformly. Chicken pieces should all be roughly the same size, vegetables should be consistent within their type, and everything should be bite-sized. This ensures even cooking and a better eating experience.
Mistake #5: Moving Food Too Much (or Not Enough) Finding the balance takes practice. When cooking chicken, let it sit undisturbed to develop that golden crust; constant stirring prevents browning. However, once vegetables and aromatics are in the pan, you need to keep things moving to prevent burning. The key is purposeful movement—stir in smooth, deliberate motions rather than frantic constant stirring. If you hear sizzling and smell aromatics, you’re on track. If you smell burning, move more frequently. If things seem to be steaming rather than sizzling, give them more time between stirs and check your heat level.
Mistake #6: Adding Sauce Too Early I’ve seen many home cooks add sauce directly to vegetables, hoping to speed things up. This is a critical mistake in Chicken Stir-Fry preparation because the sauce prevents proper caramelization and browning. Vegetables must be nearly cooked before sauce introduction, or they’ll simply boil in liquid. The sauce goes in during the final minutes, just long enough to thicken and coat, not to cook the vegetables.
Mistake #7: Overcooked Chicken Dry, rubbery chicken ruins even the best Chicken Stir-Fry. Remember that chicken continues cooking from residual heat even after leaving the pan. Remove it when it’s just barely cooked through (or even slightly underdone), knowing it will finish cooking when returned to the pan with the sauce. A quick-read thermometer showing 160-165°F is your friend here.
Mistake #8: Forgetting to Prep the Sauce in Advance The few seconds it takes to thicken the sauce is not the time to be whisking cornstarch into liquid. Have your sauce completely mixed before you start cooking. Many failed Chicken Stir-Fry attempts happen because cooks are trying to mix sauce while vegetables are burning.
Mistake #9: Insufficient Heat Fear of burning often leads home cooks to use medium or medium-high heat. However, authentic Chicken Stir-Fry requires high heat. The solution is proper preparation (so you work quickly) and staying attentive. Don’t start cooking, then walk away to check your phone. Stir-frying demands your full attention for those 10-12 active cooking minutes, but that focused time produces dramatically better results.
Mistake #10: Serving Immediately Over Rice You Just Started Cooking I learned this the hard way! If serving your Chicken Stir-Fry over rice or noodles, start cooking your base before you begin the stir-fry. There’s nothing more frustrating than having a perfect stir-fry sitting and getting soggy while you wait 20 minutes for rice to cook. Plan your timing so everything finishes together.
Serving, Presentation, and Storage Tips
Creative Presentation Ideas That Impress
A beautifully presented Chicken Stir-Fry elevates a simple weeknight dinner into something special that makes your family feel valued and guests feel impressed. The good news? Most presentation techniques are surprisingly simple.
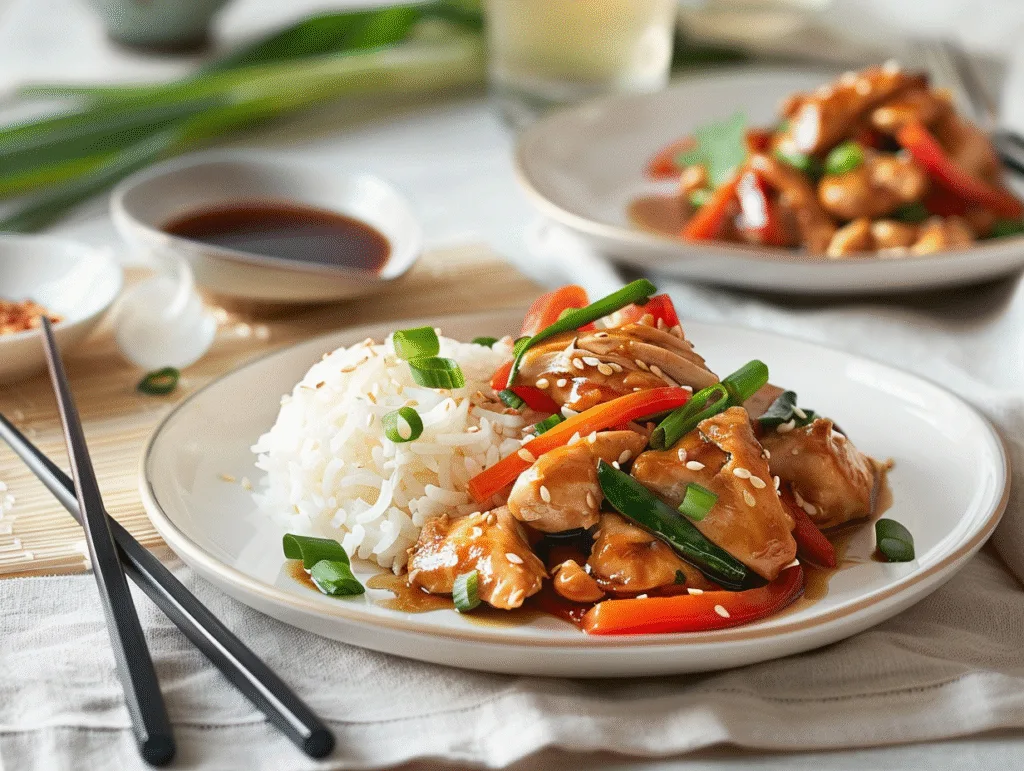
The Foundation Matters Start with how you serve your base. If using rice, don’t just dump it on a plate. For an elegant presentation, pack cooked rice into a small bowl, then invert it onto the center of your serving plate, creating a dome shape. Arrange your Chicken Stir-Fry around this rice mountain, allowing the colorful vegetables to cascade artfully down the sides. For noodles, use tongs to twist a portion into a nest shape before topping with the stir-fry. This simple technique transforms the visual appeal dramatically.
Color and Height The natural rainbow of vegetables in Chicken Stir-Fry is already visually appealing, but strategic placement enhances it further. When plating, try to distribute colors evenly rather than clumping all the peppers or broccoli together. Use tongs or a large serving spoon to create height rather than flattening everything—food piled with dimension looks more appetizing than a flat layer. For family-style serving, use a shallow, wide serving bowl rather than a deep one, which allows diners to see all the beautiful ingredients.
Garnish Like a Pro The right garnish transforms Chicken Stir-Fry from homemade to restaurant-quality. Start with those reserved dark green tops of green onions, sliced thinly on a sharp diagonal (this creates more surface area and looks more sophisticated than straight cuts). Sprinkle them over the top just before serving. Add a tablespoon of toasted sesame seeds for nutty flavor, visual interest, and a professional finish. For special occasions, add a small handful of fresh cilantro leaves (not chopped—whole leaves look more intentional) or Thai basil. A lime wedge on the side isn’t traditional, but the bright acidity it offers is delicious, and the pop of green adds visual appeal.
Plating Technique for Individual Servings For weeknight family dinners, family-style serving is practical. But when you want to impress with your Chicken Stir-Fry, individual plating makes an impact. Use dinner plates with a wide rim (it frames the food). Place your rice or noodles slightly off-center, then arrange the stir-fry artfully next to and partially over the base, ensuring a variety of ingredients shows on top. A drizzle of the glossy sauce over everything catches light beautifully. Wipe any drips from the plate rim with a damp cloth for a clean, professional look.
Special Occasion Presentation Hosting a casual dinner party? Serve your Chicken Stir-Fry in individual cast-iron skillets or small woks (if you have them) for dramatic, restaurant-style presentation. These hold heat beautifully, keeping food hot throughout the meal. Just be sure to warn guests that the handles are hot! Alternatively, serve in Asian-style rice bowls, which are deeper than plates and excellent for keeping everything contained while eating. Pair with chopsticks alongside forks for an authentic touch.
The Instagram Shot If you enjoy food photography, Chicken Stir-Fry is wonderfully photogenic. Natural lighting is your friend—avoid the overhead kitchen light. Shoot from a 45-degree angle to show depth, or directly overhead for a full view of the colorful ingredients. Scatter a few whole snap peas, a small pile of sesame seeds, or a neat stack of green onion slices nearby to add interest to the composition. A pair of chopsticks resting against the bowl or a linen napkin partially in frame adds context and warmth.
Perfect Pairings and Side Dish Recommendations
While Chicken Stir-Fry is satisfying as a complete one-dish meal, the right accompaniments can transform it into a more substantial feast or provide contrasting textures and flavors that enhance the overall dining experience.
Classic Base Options The most traditional pairing for Chicken Stir-Fry is steamed jasmine rice, which offers a fragrant, slightly sticky base that absorbs the delicious sauce. For a healthier option, try brown rice, quinoa, or cauliflower rice (which you can make by pulsing raw cauliflower florets in a food processor, then sautéing briefly). Noodles are another excellent choice—try lo mein noodles, rice noodles, soba noodles, or even spaghetti in a pinch. Each provides a different textural experience. For a lower-carb approach, serve your Chicken Stir-Fry over a bed of shredded lettuce or cabbage for a “lettuce wrap” experience without the wrapping.
Appetizer Pairings If you’re creating a more elaborate meal around your Chicken Stir-Fry, start with complementary appetizers. Homemade egg rolls or spring rolls (or store-bought ones) are classic and well-loved. Pot stickers or dumplings (steamed or pan-fried) add variety and can often be made ahead or kept frozen for convenience. A simple cucumber salad dressed with rice vinegar, a touch of sugar, and sesame seeds provides refreshing contrast. Edamame sprinkled with sea salt is healthy, easy, and loved by kids and adults alike. Wonton soup offers a light, warm start that doesn’t compete with the main dish’s flavors.
Vegetable Side Dishes While your Chicken Stir-Fry already contains vegetables, additional vegetable sides can round out the meal. Bok choy steamed or lightly sautéed with garlic provides a mild, pleasant contrast. Asian-style coleslaw made with a sesame-ginger dressing adds crunch and brightness. Sautéed green beans with garlic offer simple elegance. A simple cucumber and carrot pickle (quick-pickled in rice vinegar with a pinch of sugar) adds tangy brightness that cuts through the richness of the stir-fry.
Soup Pairings Light soups pair wonderfully with Chicken Stir-Fry without making the meal feel heavy. Miso soup is quick, authentic, and provides warming, umami-rich sips between bites. Egg drop soup offers comfort and simplicity. Hot and sour soup creates interesting contrast with its spicy, tangy profile. Wonton soup provides a bit more substance while remaining light enough not to overwhelm.
Beverage Suggestions The right beverage enhances your Chicken Stir-Fry experience. For non-alcoholic options, jasmine tea (hot or iced) is traditional and its floral notes complement the dish beautifully. Green tea is another classic choice. For something different, try ginger ale or sparkling water with a squeeze of lime. If you enjoy alcoholic pairings, light beers (like Asian lagers) are refreshingly crisp against the savory stir-fry. For wine lovers, a Riesling or Gewürztraminer brings fruity sweetness that balances the soy-based sauce, while Pinot Grigio offers a lighter, crisper alternative. Sake, served warm or cold, is a natural pairing that echoes the Asian flavor profile.
Dessert Options Keep dessert light after a satisfying Chicken Stir-Fry meal. Fortune cookies are fun and traditional. Fresh fruit like sliced mango, lychee, or mandarin oranges provides sweet refreshment without heaviness. Coconut ice cream or mango sticky rice offer a bit more indulgence while maintaining the Asian theme. Green tea ice cream or mochi ice cream balls are modern options that guests often find intriguing. For simplicity, excellent quality dark chocolate served with green tea is sophisticated and effortless.
Meal Prep Strategy When planning a complete meal featuring Chicken Stir-Fry, work backward from serving time. Start rice 30 minutes before serving (it takes about 20 minutes to cook, then should rest covered for 5-10 minutes). While rice cooks, prep all your stir-fry ingredients. Start your stir-fry about 15 minutes before serving time. If making soup, it can simmer while you prep the stir-fry ingredients. This timing ensures everything arrives hot and fresh at the table simultaneously.
Storage Tips and Reheating Strategies
One of the best things about Chicken Stir-Fry is that it’s not just a fantastic fresh meal—it also stores and reheats remarkably well, making it perfect for meal prep or enjoying leftovers throughout the week.
Proper Storage Techniques Allow your Chicken Stir-Fry to cool to room temperature before storing, but don’t leave it out longer than two hours (one hour if your kitchen is particularly warm). Transfer the stir-fry to airtight containers—glass containers with secure lids are ideal as they don’t retain odors and can go from refrigerator to microwave safely. Store the stir-fry and any rice or noodles in separate containers if possible. This prevents the base from absorbing too much sauce and becoming mushy, and it allows you to refresh each component optimally when reheating. Properly stored, your Chicken Stir-Fry will maintain excellent quality in the refrigerator for 3-4 days.
Freezing for Future Convenience While Chicken Stir-Fry is best enjoyed fresh or within a few days, it can be frozen for up to 3 months if needed. Keep in mind that some vegetables (particularly those with high water content like snap peas) may become softer upon thawing and reheating. For best freezing results, let the stir-fry cool completely, then portion it into freezer-safe containers or heavy-duty freezer bags, removing as much air as possible to prevent freezer burn. Label with the date and contents. When you’re ready to enjoy it, thaw overnight in the refrigerator rather than at room temperature for food safety.
Reheating Methods That Preserve Quality The reheating method you choose dramatically affects the quality of leftover Chicken Stir-Fry. Here are the best approaches:
Stovetop Method (Best Option): This method most closely recreates the original texture and is my preferred approach. Heat a large skillet or wok over medium-high heat with a teaspoon of oil. Add your refrigerated Chicken Stir-Fry and stir frequently, heating for 4-5 minutes until everything is hot throughout. If the mixture seems dry, add a tablespoon or two of water or chicken broth to create steam and prevent sticking. This method helps restore some of that desirable wok hei character and keeps vegetables from becoming too soft. The added moisture also helps rehydrate any components that dried out during storage.
Microwave Method (Fastest Option): While not ideal for texture, the microwave works when you need speed. Transfer your Chicken Stir-Fry to a microwave-safe dish and add a tablespoon of water, then cover with a damp paper towel or microwave-safe lid (leave a small vent for steam to escape). Heat on medium power (not high, which can make chicken rubbery) in 1-minute intervals, stirring between each, until heated through. This usually takes 2-3 minutes total depending on portion size. The medium power and added moisture help maintain tenderness rather than creating overcooked, tough textures.
Oven Method (For Larger Portions): If you’re reheating a large batch of Chicken Stir-Fry, the oven can be efficient. Preheat to 350°F, spread the stir-fry in an even layer in an oven-safe dish, add a few tablespoons of water or broth, cover tightly with aluminum foil, and heat for 15-20 minutes until hot throughout. Stir halfway through the heating time for even temperature distribution. This gentle, even heat works well but takes longer than stovetop methods.
Air Fryer Method (For Crispy Results): Here’s an unconventional approach that creates interesting textural contrast: preheat your air fryer to 350°F, spread the Chicken Stir-Fry in a single layer in the basket (work in batches if necessary), and heat for 3-4 minutes, shaking the basket halfway through. This method actually crisps up the chicken and vegetables, creating a different but delicious result that some people prefer to the original. It won’t have the saucy quality of fresh stir-fry, so it’s best for portions where the sauce has been mostly absorbed.
Repurposing Leftovers Creatively Don’t feel obligated to reheat and serve your Chicken Stir-Fry the same way every time. Here are creative ways to enjoy leftovers:
- Fried Rice Integration: Chop your leftover stir-fry into smaller pieces and incorporate it into fried rice for a super-flavorful twist on two classics.
- Wrap or Burrito: Warm a large flour tortilla, add a scoop of stir-fry, and roll it up with some shredded lettuce and a drizzle of sriracha mayo for an Asian-fusion wrap.
- Grain Bowl: Serve cold or room temperature stir-fry over mixed greens, quinoa, or brown rice as a hearty grain bowl. Add sliced avocado and a drizzle of sesame dressing.
- Egg Scramble: Chop the stir-fry finely and incorporate it into scrambled eggs or an omelet for a protein-packed breakfast.
- Soup Addition: Add your leftover Chicken Stir-Fry to vegetable or chicken broth along with some rice noodles for a quick, satisfying soup.
- Pizza Topping: Unconventional but delicious—use it as a pizza topping on flatbread with mozzarella cheese for an Asian-fusion pizza.
Meal Prep Excellence Because Chicken Stir-Fry stores so well, it’s perfect for meal prep. On Sunday, prepare a double batch and portion it into individual containers for grab-and-go lunches throughout the week. Some people prefer to prep and cut all ingredients on Sunday, storing them separately, then quickly stir-frying fresh each night—this takes only 15 minutes from start to finish when everything is prepped. Others prefer fully cooked stir-fry ready to reheat. Both approaches work beautifully, so choose based on your schedule and preferences.
Quality Check Before Eating Before consuming stored Chicken Stir-Fry, always check for signs of spoilage. It should smell fresh and appetizing, not sour or “off.” Look for any signs of mold (though this is rare within 3-4 days if properly stored). When in doubt, throw it out—food safety always comes first.
 DINNER
 LUNCH
LUNCH Desserts
 BREAKFAST
For more amazing recipes, be sure to check out our other sections to explore a variety of ideas that will enrich your cooking experience. Each section offers its own unique flavors to ensure a delightful culinary journey:
Easy and Quick Recipes: A collection of dishes that guarantee delicious meals with minimal effort and time.
Healthy Recipes: Discover healthy and delicious options that fit your lifestyle.
Desserts: A diverse selection of sweets that will add a special touch of sweetness to your table.
Lunch Recipes: Tasty lunch ideas that you can easily prepare to delight your family.
Dinner Recipes: Delicious and easy-to-make recipes that will make your dinner a memorable occasion.
FAQ: Your Chicken Stir-Fry Questions Answered
Q1: Can I make Chicken Stir-Fry ahead of time for a party or busy week?
Absolutely! Chicken Stir-Fry is excellent for advance preparation, though the approach depends on your timeline. For meal prep 3-4 days ahead, you can fully cook the stir-fry, let it cool completely, and store it in airtight containers in the refrigerator. Reheat using the stovetop method for best results. However, if you want the absolute freshest taste and texture, I recommend the “mise en place” approach: cut all your chicken, vegetables, and aromatics, and mix your sauce 1-2 days ahead. Store everything separately in containers or bags in the refrigerator. When it’s time to cook, you’ll have all the time-consuming prep work done, and the actual cooking takes just 10-12 minutes. This gives you the convenience of advance planning with the quality of a freshly cooked dish. For parties, consider setting up a “stir-fry station” where you cook the Chicken Stir-Fry right before serving—guests often enjoy watching, and the aromatic smells build anticipation beautifully.
Q2: How can I make my Chicken Stir-Fry taste more like restaurant takeout?
The secret to restaurant-quality Chicken Stir-Fry at home comes down to several key factors. First, restaurants use extremely high heat—much higher than most home cooks dare to use. Don’t be timid; crank that burner to high and keep it there. Second, restaurants often use a technique called “velveting” for the chicken: marinate your chicken pieces in a mixture of 1 tablespoon soy sauce, 1 tablespoon rice wine or dry sherry, 1 teaspoon cornstarch, and 1 teaspoon oil for 15-30 minutes before cooking. This creates incredibly tender, silky chicken. Third, don’t skip the sesame oil—it’s that distinctive aromatic note you recognize from takeout. Fourth, consider adding a small amount (1/2 teaspoon) of MSG or mushroom powder if you’re comfortable with it; this enhances the umami savoriness significantly. Finally, that slightly charred, smoky flavor called “wok hei” comes from high heat and minimal stirring initially—let ingredients make contact with the hot metal long enough to develop color before moving them. If you have an outdoor gas burner or grill side burner, using it to cook your Chicken Stir-Fry can actually get closer to restaurant wok temperatures than most home stovetops can achieve.
Q3: What’s the best way to cut chicken for stir-fry, and does it really matter?
The way you cut chicken dramatically affects the final texture and eating experience of your Chicken Stir-Fry, so yes, it really matters! The golden rule is to slice against the grain—this means cutting perpendicular to the direction of the muscle fibers you can see running through the meat. When you cut against the grain, you’re shortening those muscle fibers, which makes each piece more tender and easier to chew. For stir-fry specifically, I recommend first slicing the chicken breast horizontally to create thinner cutlets (about 1/2 inch thick), which reduces cooking time and improves surface area for browning. Then, cut those cutlets into 1-inch cubes or bite-sized strips. All pieces should be uniform in size—this ensures everything cooks at the same rate and you don’t end up with some pieces dry while others are undercooked. If using chicken thighs, the process is similar, though you’ll first need to trim away excess fat. Some cooks prefer to partially freeze the chicken (about 30 minutes in the freezer) before cutting, as firmer meat is easier to slice precisely. Taking these extra few minutes for proper cutting technique transforms your Chicken Stir-Fry from decent to outstanding.
Q4: My vegetables always turn out soggy. What am I doing wrong?
Soggy vegetables are one of the most common frustrations with homemade Chicken Stir-Fry, but the solution is straightforward once you understand the culprits. The primary issue is almost always moisture—either from wet vegetables, overcrowding the pan, or insufficient heat. Here’s how to achieve that perfect crisp-tender texture restaurants accomplish: First, thoroughly dry all vegetables after washing them. Even a little surface water turns to steam and prevents browning. Second, don’t overcrowd your pan. When too many vegetables are added at once, they steam instead of sear. If your pan looks crowded, cook in batches. Third, ensure your pan is genuinely hot before adding vegetables—if they don’t sizzle immediately upon contact, your heat is too low. Fourth, avoid the temptation to stir constantly; vegetables need time in contact with the hot surface to develop those flavorful browned spots. Fifth, add vegetables in stages based on cooking time: harder vegetables like broccoli and carrots first, then quicker-cooking ones like peppers and snap peas. Finally, don’t add the sauce until vegetables are nearly done—if you add it too early, vegetables will simply boil in liquid rather than stir-fry. Following these techniques, your Chicken Stir-Fry vegetables should emerge beautifully crisp on the outside, tender on the inside, with gorgeous caramelized spots that deliver incredible flavor.
Q5: Can I use this recipe for meal prep, and how should I portion it?
Chicken Stir-Fry is genuinely one of the best recipes for meal prep—it stores well, reheats beautifully, and provides balanced nutrition with protein, vegetables, and carbohydrates if you include rice or noodles. For successful meal prep, I recommend preparing a double batch on Sunday (or your designated prep day), which provides 4-6 servings depending on portion size. Use individual meal prep containers (glass ones are ideal and microwave-safe) with divided sections if possible. In the larger section, place about 1.5 cups of stir-fry, and in a smaller section, add your rice or noodles (about 3/4 to 1 cup cooked). Keeping them separate prevents the base from absorbing too much sauce and becoming mushy. Store sealed containers in the refrigerator for up to 4 days. When you’re ready to eat, you can reheat the entire container in the microwave (with a damp paper towel over it) for 2-3 minutes, or transfer just the stir-fry to a pan and reheat on the stovetop while microwaving the rice separately. For portion control and nutritional tracking, this recipe makes approximately 6 servings at about 350-400 calories per serving (without rice), with roughly 35g protein, 12g fat, and 25g carbohydrates. Add rice for additional calories and carbohydrates based on your needs. The beauty of Chicken Stir-Fry for meal prep is its versatility—you can vary your vegetable combinations each week to prevent boredom while using the same basic technique you’ve mastered.
Conclusion: Your Journey to Stir-Fry Mastery Begins Now
You’ve now got everything you need to create restaurant-quality Chicken Stir-Fry in your own kitchen—from understanding why each ingredient matters to mastering the techniques that separate good from exceptional results. This isn’t just another recipe to try once and forget; this is a foundational skill that will serve you countless times throughout your cooking life.
What makes Chicken Stir-Fry so special isn’t just the delicious flavors or the impressive speed—it’s the confidence it builds. The first time you successfully pull off a vibrant, perfectly cooked stir-fry with tender chicken, crisp vegetables, and that glossy, clingy sauce, you’ll feel like a culinary rockstar. That feeling never gets old, even after you’ve made this dish a hundred times.
I encourage you to approach your first attempt with patience and presence. Set aside a relaxed evening when you’re not rushed, get all your ingredients prepped and organized, and enjoy the process. The sizzle of chicken hitting a hot wok, the fragrance of garlic and ginger blooming in oil, the vibrant colors coming together in the pan—these are simple pleasures that transform cooking from a chore into a joy.
Don’t be discouraged if your first Chicken Stir-Fry isn’t perfect. Maybe your vegetables are a bit softer than ideal, or your sauce is slightly thin, or your chicken is marginally overcooked. Every expert started exactly where you are now. With each attempt, you’ll develop better instincts for heat management, timing, and technique. Soon, you’ll be improvising with whatever vegetables look good at the market, adjusting the sauce to your family’s preferences, and confidently wielding your spatula like the experienced home chef you’re becoming.
Once you’ve mastered this recipe, the variations are endless. Try it with shrimp, beef, or tofu. Experiment with different vegetable combinations based on the season. Adjust the sauce to be spicier, sweeter, or more garlicky. Make it a weekly ritual, and watch how it becomes a beloved family tradition—one that your kids might someday recreate in their own kitchens, remembering those weeknight dinners around your table.
I’d absolutely love to hear about your Chicken Stir-Fry adventures! Did you discover a vegetable combination your family devoured? Did you develop a signature sauce variation? Did your picky eater surprise you by requesting seconds? Share your experiences, questions, and photos—your journey might inspire someone else to take the leap into stir-fry cooking.
So what are you waiting for? Your new favorite easy weeknight dinner is just 30 minutes away. Grab your wok, fire up that burner, and let the delicious journey begin. Trust me—your future self will thank you for adding this invaluable recipe to your repertoire. Happy cooking, and enjoy every flavorful bite of your homemade Chicken Stir-Fry!