Table of Contents
Table of Contents
There’s something magical about transforming ordinary ingredients into extraordinary treats that make both kids and adults squeal with delight. Among all the easy homemade recipes I’ve shared over the years, mummy hot dogs hold a special place in my heart – and my family’s Halloween tradition.
I’ll never forget the first time I made these adorable mummy hot dogs for my daughter’s school Halloween party. I was frantically searching for something quick, kid-friendly, and festive when I stumbled upon this brilliant 3-ingredient wonder. What started as a last-minute panic creation has now become our most requested family favorite recipe every October. The pure joy on children’s faces when they see these spooky-cute creatures emerging from the oven is absolutely priceless.
These mummy hot dogs have earned their reputation as the ultimate party snack because they’re incredibly simple to make, budget-friendly, and guaranteed to be Instagram-worthy. Whether you’re hosting a Halloween bash, need a fun weeknight dinner idea, or want to surprise your family with something deliciously playful, this recipe delivers every single time.
Spooky Cute Mummy Hot Dogs – 3-Ingredient Party Snack
Ingredients
Nutrition
Tried this recipe?
Let us know how it was!Ingredients: The Magic Behind Your Mummy Hot Dogs
The Three Essential Ingredients and Their Starring Roles
Creating perfect mummy hot dogs requires just three simple ingredients, but each one plays a crucial role in bringing these adorable creatures to life. The beauty of this recipe lies in its simplicity – you likely already have everything you need in your kitchen right now.
Hot dogs serve as the foundation of your mummies, providing that familiar, comforting flavor kids absolutely love. They become the “body” that gets wrapped in our edible bandages, creating the perfect canvas for your spooky masterpiece.
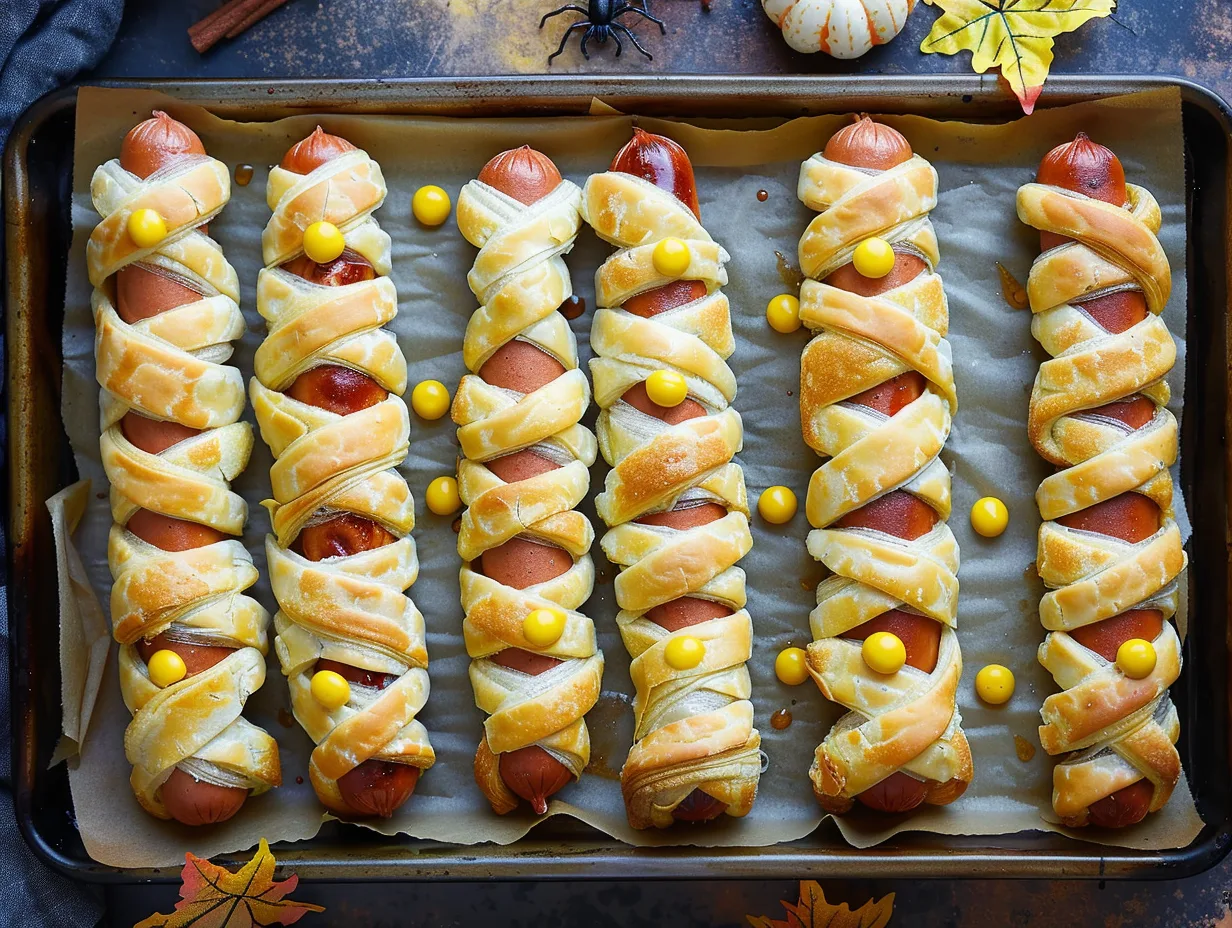
Puff pastry transforms into those characteristic mummy wrappings with minimal effort. When baked, it becomes golden, flaky, and perfectly mimics the appearance of ancient bandages. This ingredient is what makes your mummy hot dogs so visually stunning and adds that delightful textural contrast.
Yellow mustard might seem like a small detail, but it’s essential for creating those expressive mummy eyes. This simple condiment transforms your wrapped hot dogs from ordinary snacks into personality-filled characters that seem to peer right back at you from the plate.
Selecting the Best Quality Ingredients for Perfect Results
When shopping for your mummy hot dogs ingredients, quality makes a noticeable difference in both taste and appearance. For hot dogs, choose your family’s favorite brand – whether that’s all-beef, turkey, chicken, or plant-based options. The key is selecting hot dogs that hold their shape well during baking and have a flavor profile your guests will enjoy.
For puff pastry, frozen varieties work beautifully and are readily available in most grocery stores. Look for pastry that’s evenly rolled and free from cracks or tears. Pepperidge Farm and similar brands consistently deliver excellent results. Always check the expiration date and ensure the pastry feels firm but not rock-hard when you purchase it.
Yellow mustard should be the classic, bright variety rather than fancy Dijon or whole grain types. The vibrant color and smooth consistency are crucial for creating those perfect mummy eyes. French’s Classic Yellow Mustard works wonderfully, but any standard yellow mustard will achieve the desired effect.
Creative Substitutions and Dietary Alternatives
The versatility of mummy hot dogs extends far beyond the basic recipe, making it easy to accommodate various dietary needs and preferences. These delicious dishes can be customized without losing their spooky charm or crowd-pleasing appeal.
For those avoiding traditional hot dogs, turkey dogs, chicken sausages, or even plant-based alternatives work exceptionally well. Vegetarian and vegan hot dogs wrap beautifully and taste amazing. Just ensure your alternative has similar dimensions to regular hot dogs for consistent wrapping results.
If puff pastry isn’t available or suitable for your needs, phyllo dough strips create an equally impressive mummy effect. You can also use crescent roll dough cut into thin strips, though the texture will be slightly different. For gluten-free options, several brands now offer gluten-free puff pastry that works perfectly for this recipe.
Instead of yellow mustard for eyes, consider using small dots of ketchup, ranch dressing, or even tiny pieces of olive or cheese. Creative bakers have successfully used sesame seeds, poppy seeds, or small candy pieces to create different eye expressions and personalities for their mummy hot dogs.
Preparation Steps: Bringing Your Mummy Hot Dogs to Life
Initial Prep and Essential Setup Tips
Success with mummy hot dogs begins with proper preparation, and taking a few extra minutes for setup ensures smooth sailing throughout the cooking process. This is definitely one of those easy homemade recipes where preparation makes all the difference between good results and absolutely stunning ones.
Start by preheating your oven to 400°F (200°C) – this temperature creates the perfect balance of golden pastry and properly heated hot dogs. Line a large baking sheet with parchment paper to prevent sticking and make cleanup effortless. If you’re making a large batch for a party, prepare two baking sheets to avoid overcrowding.
Remove your puff pastry from the freezer about 20-30 minutes before you plan to start cooking. You want it thawed enough to unroll easily but still cold enough to handle without becoming sticky. While it’s thawing, take your hot dogs out of the refrigerator to bring them closer to room temperature, which helps ensure even cooking.
Gather your tools: a sharp knife for cutting pastry strips, a small spoon or squeeze bottle for applying mustard eyes, and perhaps a small brush if you want to add an egg wash for extra golden color. Having everything within arm’s reach makes the assembly process much more enjoyable and efficient.
Step-by-Step Instructions with Professional Secrets
Creating perfect mummy hot dogs is an art form that becomes easier with each batch you make. These step-by-step instructions include insider tips I’ve discovered through years of making this family favorite recipe.
Begin by carefully unrolling your thawed puff pastry on a clean, lightly floured surface. Using a sharp knife, cut the pastry into strips approximately ¼ to ½ inch wide. Don’t worry about making them perfectly uniform – slightly irregular strips actually look more authentic and mummy-like. You’ll need about 6-8 strips per hot dog, depending on their size.
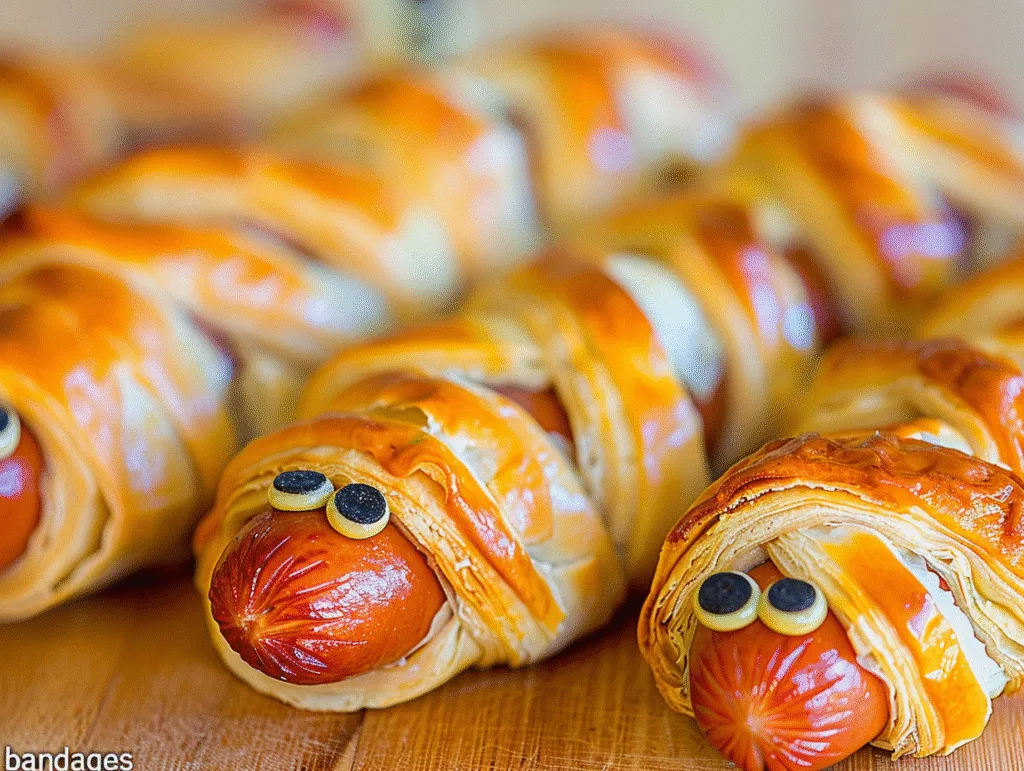
Take each hot dog and begin wrapping it with pastry strips, leaving a small gap near one end for the “face” area where you’ll add eyes later. Start from the bottom and work your way up, overlapping the strips slightly and allowing some loose ends to create that authentic bandage effect. The secret is not wrapping too tightly – you want the pastry to have room to puff up during baking.
Place your wrapped mummy hot dogs seam-side down on your prepared baking sheet, spacing them about 2 inches apart. For extra golden color, lightly brush the pastry with beaten egg, though this step is optional. Bake for 15-20 minutes until the pastry is golden brown and puffed. The timing may vary slightly based on your oven and the thickness of your pastry strips.
Avoiding Common Mistakes for Perfect Results
Even with such a simple recipe, there are several common pitfalls that can affect the final appearance and taste of your mummy hot dogs. Learning to avoid these mistakes ensures consistent, impressive results every time you make this delicious dish.
The most frequent mistake is wrapping the hot dogs too tightly with pastry strips. When pastry bakes, it puffs and expands, so wrapping too snugly can cause the strips to shrink back or even break. Leave a little breathing room – your mummies should look comfortably wrapped, not squeezed into their bandages.
Another common error is using pastry that’s either too warm or too cold. Overly warm pastry becomes sticky and difficult to handle, while extremely cold pastry cracks when you try to wrap it. The ideal consistency feels pliable but not sticky, similar to working with play dough.
Timing the mustard eyes is crucial for the best visual impact. Adding them before baking can cause the mustard to spread or discolor, while waiting too long after baking means the pastry isn’t warm enough for the mustard to adhere properly. The sweet spot is about 2-3 minutes after removing from the oven, when the pastry is still warm but has stopped actively steaming.
Serving & Final Touches: Presenting Your Mummy Hot Dogs
Creative Presentation Ideas That Wow Your Guests
The presentation of your mummy hot dogs can transform them from simple snacks into the centerpiece of your Halloween celebration. These spooky treats deserve staging that matches their adorable appearance and enhances the overall party atmosphere.
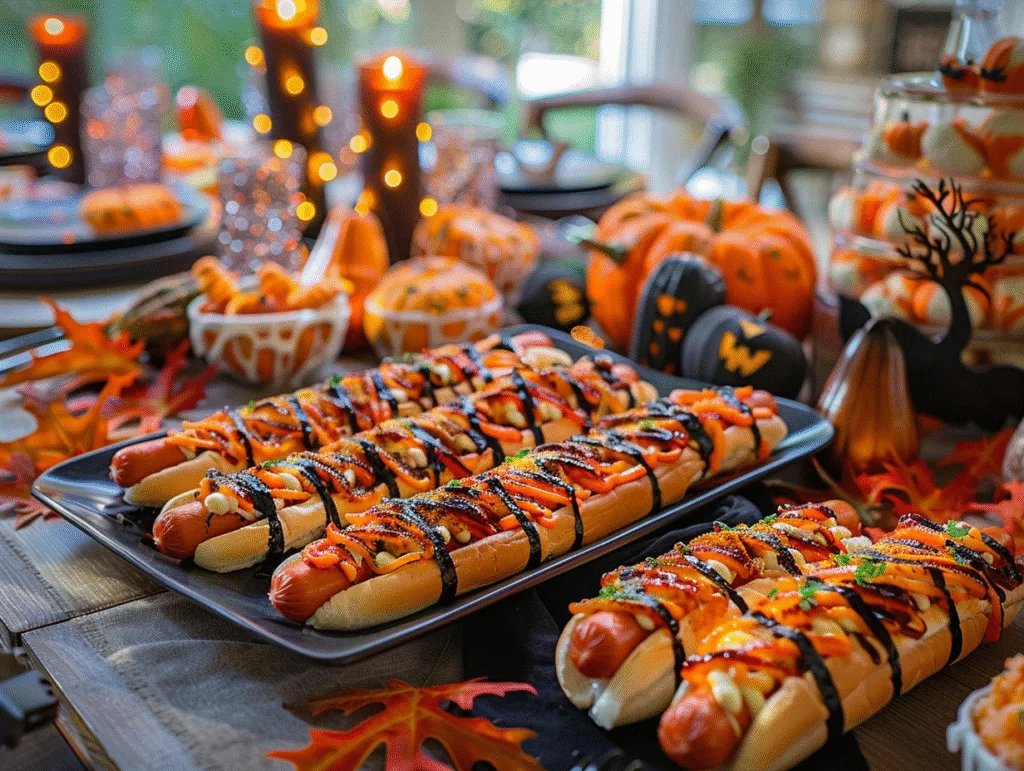
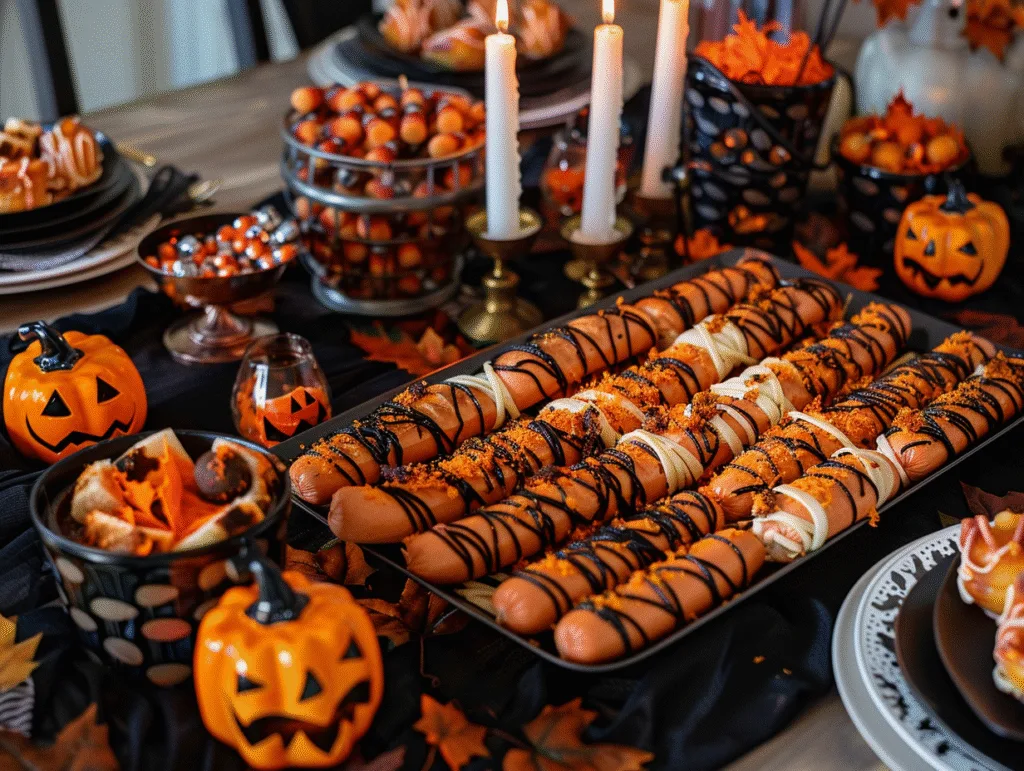
Create a “mummy’s tomb” serving platter by lining a large, dark-colored tray or cutting board with black parchment paper or a Halloween-themed tablecloth. Arrange your mummy hot dogs in rows, as if they’re ancient mummies lying in their sarcophagi. Add small battery-operated tea lights around the edges for an eerie glow that highlights their golden pastry wrapping.
For a more playful approach, set up a “mummy awakening” scene on your serving table. Place the mummy hot dogs at various angles, some sitting up as if they’re emerging from their tombs. Scatter some fake spider webs, plastic spiders, or autumn leaves around the platter to create a spooky but fun Halloween atmosphere that kids absolutely love.
Consider serving them on individual small plates with Halloween-themed napkins, allowing guests to appreciate each mummy’s unique personality. The beauty of these easy homemade recipes is that no two mummies ever look exactly alike, giving each one its own character and charm.
Perfect Pairings and Complementary Side Dishes
While mummy hot dogs are delicious on their own, pairing them with complementary sides creates a more substantial and satisfying meal. The key is choosing accompaniments that enhance rather than compete with your adorable main attraction.
Classic sides work beautifully with this family favorite recipe. Serve alongside crispy baked sweet potato fries cut into “finger” shapes, or regular potato wedges seasoned with paprika for a warm, autumn flavor. Mac and cheese, whether homemade or from a box, appeals to kids and provides a comforting contrast to the flaky pastry.
For a complete Halloween-themed menu, consider “graveyard” dip made with layered bean dip and arranged to look like cemetery dirt, complete with tortilla chip “tombstones.” A simple green salad with orange and black elements – like shredded carrots and black olives – adds nutrition while maintaining the festive color scheme.
Beverage pairings can be just as fun and thematic. Serve “witches’ brew” (any dark-colored punch or soda), “monster blood” (red fruit punch), or simply stick with Halloween-themed cups filled with your guests’ favorite drinks. The goal is creating a cohesive experience where every element contributes to the spooky fun.
Storage Tips and Reheating for Maximum Enjoyment
Proper storage ensures your mummy hot dogs remain delicious even as leftovers, though they’re typically so popular that storage rarely becomes an issue. Understanding the best practices for keeping and reheating these delicious dishes helps you plan ahead for larger gatherings.
Fresh mummy hot dogs are best enjoyed within 2-3 hours of baking for optimal texture and temperature. If you need to hold them longer, keep them in a warm oven (around 200°F) loosely covered with foil to prevent the pastry from becoming soggy while maintaining food safety temperatures.
For leftover storage, allow the mummy hot dogs to cool completely before placing them in an airtight container in the refrigerator. They’ll stay fresh for up to 3 days. Avoid storing them while still warm, as this creates condensation that can make the pastry soggy.
Reheating requires a gentle approach to restore the pastry’s crispiness. The best method is using a 350°F oven for 5-7 minutes, which re-crisps the exterior while warming the interior evenly. Avoid microwaving, as this tends to make the pastry chewy rather than flaky. If you must use a microwave, place them on a paper towel and heat in 15-second intervals to minimize texture changes.
 DINNER
 LUNCH
LUNCH Desserts
 BREAKFAST
For more amazing recipes, be sure to check out our other sections to explore a variety of ideas that will enrich your cooking experience. Each section offers its own unique flavors to ensure a delightful culinary journey:
Easy and Quick Recipes: A collection of dishes that guarantee delicious meals with minimal effort and time.
Healthy Recipes: Discover healthy and delicious options that fit your lifestyle.
Desserts: A diverse selection of sweets that will add a special touch of sweetness to your table.
Lunch Recipes: Tasty lunch ideas that you can easily prepare to delight your family.
Dinner Recipes: Delicious and easy-to-make recipes that will make your dinner a memorable occasion.
Frequently Asked Questions
Q: Can I make mummy hot dogs ahead of time for a party? A: Yes! You can wrap the hot dogs in pastry strips up to 4 hours ahead and refrigerate them until ready to bake. This actually helps the pastry adhere better. Add 2-3 minutes to the baking time if cooking straight from the refrigerator.
Q: What if my puff pastry keeps tearing while I’m wrapping? A: This usually means your pastry is too cold. Let it sit at room temperature for another 5-10 minutes until it becomes more pliable. You can also gently press torn pieces together – they’ll bake together seamlessly.
Q: Can I use different types of hot dogs or sausages? A: Absolutely! Turkey dogs, chicken sausages, bratwurst, or vegetarian alternatives all work wonderfully. Just ensure they’re similar in size to regular hot dogs for consistent cooking times and wrapping ease.
Q: How do I prevent the mustard eyes from running during baking? A: Always add the mustard eyes AFTER baking, when the pastry has cooled for 2-3 minutes. This prevents spreading and ensures clean, crisp eye shapes that really make your mummies come to life.
Q: Can I freeze assembled but unbaked mummy hot dogs? A: Yes, you can freeze them for up to one month. Place assembled mummy hot dogs on a baking sheet and freeze until solid, then transfer to freezer bags. Bake directly from frozen, adding 5-7 minutes to the cooking time.
Conclusion: Create Magical Memories with Mummy Hot Dogs
These mummy hot dogs represent everything I love about cooking with family – they’re simple enough for kids to help make, impressive enough to wow party guests, and delicious enough to become a treasured tradition. In a world of complicated recipes and expensive ingredients, sometimes the most memorable dishes come from the simplest combinations.
What makes this recipe truly special isn’t just how cute these mummy hot dogs look (though they’re absolutely adorable), but how they bring people together. I’ve watched shy kids at parties bond over decorating mummy eyes, seen teenagers forget they’re “too cool” for cute food, and observed adults taking just as many photos as the children.
The beauty of these mummy hot dogs lies in their imperfection – each one develops its own personality during the baking process. Some emerge looking surprised, others appear sleepy, and a few seem to wink at you with one partially covered eye. This uniqueness makes them conversation starters and memory makers.
I encourage you to gather your family in the kitchen and give this recipe a try. Let the kids help with wrapping and decorating – their creativity will surprise you, and the laughs you’ll share are worth far more than any perfectly uniform result. Don’t forget to take pictures of your creations and share them with friends and family. These little mummy characters have a way of spreading joy far beyond the kitchen where they’re born.
So grab those three simple ingredients and create some magic. Your mummy hot dogs are waiting to come to life, bringing smiles, delicious flavors, and precious memories to everyone lucky enough to enjoy them. Happy cooking, and here’s to making every meal a little more fun!