
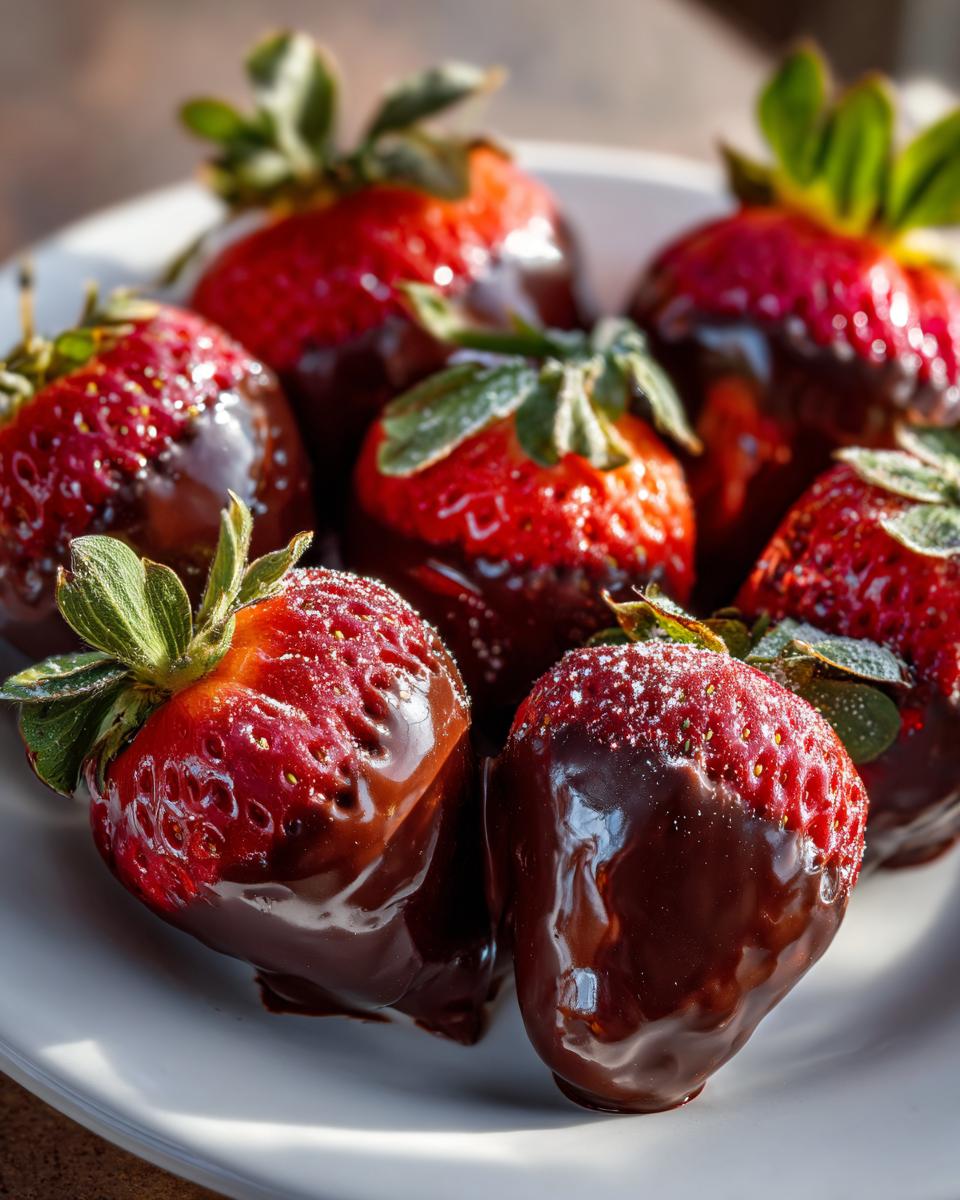
There’s something magical about chocolate covered strawberries, isn’t there? That perfect combination of juicy, sweet berries and rich, velvety chocolate gets me every time. I remember making my first batch for Valentine’s Day years ago – they looked so fancy, yet were ridiculously easy to whip up! Now they’re my go-to when I want to impress guests or just treat myself. What I love most is how these elegant little bites work for any occasion, from romantic dinners to girls’ nights to dessert tables at parties. The best part? With just two main ingredients and about 20 minutes, you can create something that looks and tastes like it came from a fancy chocolatier.
Why You’ll Love These Chocolate Covered Strawberries
Oh my goodness, where do I even begin? These chocolate covered strawberries have been my secret weapon for everything from last-minute dinner parties to bridal showers. Here’s why they’ll become your go-to dessert too:
- Effortlessly elegant – They look fancy but take barely any time to make. I love how people always assume I spent hours when really, it’s just 20 minutes of simple prep!
- Always a hit – Whether it’s kids at a birthday party or foodie friends at a wine night, nobody can resist that perfect chocolate-berry combo.
- Endlessly customizable – Keep them classic or get creative with toppings. I’ll share all my favorite variations later!
- Happy stomach, happy wallet – Way cheaper than store-bought versions, and honestly? They taste so much better when the chocolate’s freshly melted.
Trust me, once you see how easy and delicious homemade chocolate covered strawberries are, you’ll wonder why you ever bought them!
Ingredients for Perfect Chocolate Covered Strawberries
Here’s the beautiful thing about chocolate covered strawberries – you only need two main ingredients to create pure magic! But choosing the right ones makes ALL the difference. After years of trial and error, I’ve got my system down pat:
- 1 lb fresh strawberries – And I mean fresh! Look for berries that are firm, bright red all over (no white shoulders!), and smell sweet. Oh, and here’s my golden rule – wash and dry them THOROUGHLY before dipping. Water is chocolate’s arch-nemesis!
- 8 oz semisweet chocolate – Chopped bars or chips work fine – I often grab chocolate chips when I’m in a hurry. But if you want that pro-level id=”ingredients” snap and shine? Splurge on good quality chocolate (between 60-70% cacao is my sweet spot). The cheap stuff just doesn’t coat as nicely.
That’s seriously it! Though I always keep extra chocolate on hand because… let’s be real… I’m absolutely going to “test” a few spoonfuls of melted chocolate before dipping starts!
How to Make Chocolate Covered Strawberries
Alright, let’s get to the fun part – turning those beautiful berries into chocolatey masterpieces! I’ve made hundreds of these over the years (okay, maybe thousands… I have a problem), and I’ve learned all the little tricks to make them perfect every time. Follow these steps, and you’ll be dipping like a pro in no time!
- Prep your workspace: Line a baking sheet with parchment paper – this is crucial unless you want chocolate-covered pans! Make sure your strawberries are completely dry (I pat them with paper towels just to be safe).
- Melt the chocolate: This is where most people go wrong, but don’t worry – I’ll walk you through it below with all my best tips!
- Dip with confidence: Hold each strawberry by the stem (or use a toothpick if the stems are short) and swirl it in the chocolate. Let the excess drip off for about 5 seconds – this prevents those annoying chocolate puddles underneath.
- Let them set: Place each berry on your prepared sheet. Now comes the hard part – waiting! They’ll set at room temperature in about 30 minutes, or you can pop them in the fridge for 15 minutes if you’re impatient like me.
Pro tip from my many “learning experiences”: Work in small batches of about 10 strawberries at a time. The chocolate stays smoother, and you won’t stress about it setting up too fast. And whatever you do, resist the urge to move them while they’re setting – those chocolate fingerprints are impossible to fix!
Melting the Chocolate
Okay, let’s talk chocolate melting – the make-or-break step! I use two methods depending on how fancy I’m feeling:
Double boiler method (my favorite for special occasions): Fill a saucepan with about an inch of water and bring it to a simmer. Place a heatproof bowl on top (make sure it doesn’t touch the water!) and add your chocolate. Stir constantly with a silicone spatula until it’s about 75% melted, then remove from heat and keep stirring – the residual heat will finish the job perfectly. This gentle heat prevents that awful grainy texture.
Microwave method (for when I’m in a hurry): Use a microwave-safe bowl and zap the chocolate in 30-second bursts at 50% power, stirring well between each. Stop when there are still a few unmelted chunks – they’ll melt as you stir. Overheating is the enemy here! If your chocolate seizes up (gets thick and clumpy), don’t panic – stir in a teaspoon of vegetable oil or shortening to smooth it out.
Whichever method you choose, remember: chocolate burns easily, so low and slow is the way to go. And never let any water get into your chocolate – it will turn into a weird lumpy mess. Trust me, I learned that the hard way when a drop of condensation fell in once!
Dipping and Setting
Now for the most satisfying part – the dip! Here’s how I get that perfect, even coating every time:
Grab your strawberry by the stem (clean hands, please!) and dip it about three-quarters of the way into the melted chocolate. Gently swirl it around to coat evenly, then lift straight up. Hold it over the bowl for a few seconds to let the excess drip off – this is key for that professional look. If you’re feeling fancy, you can twist your wrist slightly as you lift to create a little chocolate curl at the top.
Place each dipped berry on your parchment-lined tray, leaving about an inch between them. Now, here’s the big question: room temp or fridge? I prefer room temperature setting (about 30 minutes) because it gives the chocolate a beautiful shine. The fridge is faster (15 minutes), but can sometimes cause condensation or a dull finish. If you must refrigerate, let them come to room temperature before serving – the flavors really pop when they’re not ice-cold!
Want to get creative? After the initial chocolate sets, you can drizzle with white chocolate or sprinkle with crushed nuts for extra flair. Just work quickly before the base layer fully hardens!
Tips for the Best Chocolate Covered Strawberries
After years of making chocolate covered strawberries (and yes, eating way too many in the process), I’ve picked up some game-changing tricks that take them from good to “oh-my-goodness-where-did-you-buy-these” amazing. Here are my absolute must-know tips:
- Dry those berries like your dessert depends on it – Because it does! I wash mine early, then let them air dry on paper towels for at least an hour. Right before dipping, I give each one an extra pat-down with a clean kitchen towel. Any water will make your chocolate seize up – learned that the messy way during my first Valentine’s Day attempt!
- Temperature matters more than you think – Room temp strawberries and slightly cooled (but still fluid) chocolate give the smoothest coating. If your berries are cold from the fridge, the chocolate sets too fast and gets thick. If your chocolate’s too hot, it slides right off. Aim for chocolate around 90°F – it should feel warm but not hot to the touch.
- Go for quality chocolate – I know it’s tempting to grab the cheap chips, but trust me, the good stuff makes all the difference. Look for chocolate with cocoa butter (not vegetable oil) in the ingredients. My favorite is a 60% dark chocolate – sweet enough to please everyone but with enough depth to balance the berries’ sweetness.
- Get creative with toppings – but time it right – Sprinkles, crushed nuts, or coconut flakes need to go on immediately after dipping, while the chocolate’s still wet. For drizzles, wait until the first layer sets (about 10 minutes), then go wild with contrasting chocolate colors. Pro tip: Put toppings in small bowls so you can roll the sides of dipped berries for even coverage.
- The twist-and-lift technique – Instead of just dunking straight down, try this: dip about 3/4 of the berry, then as you lift, give your wrist a little twist. This creates a beautiful, smooth finish at the top and helps excess chocolate drip off cleanly. Takes practice, but wow does it make them look professional!
One last bonus tip from my many kitchen experiments: Make extra chocolate! There’s nothing worse than running out mid-dip. Plus, you can use the leftover to make chocolate shards or clusters with any remaining berries. Waste not, want not – especially when chocolate’s involved!
Creative Variations for Chocolate Covered Strawberries
Okay, here’s where we get to play! Once you’ve mastered the classic chocolate covered strawberry, it’s time to have some fun. I love experimenting with different toppings and drizzles – it’s like being a kid in a candy store (literally!). Here are my favorite ways to jazz them up:
- White chocolate drizzle – Melt some white chocolate and use a fork or squeeze bottle to make pretty zigzags over the dark chocolate. The contrast looks so elegant!
- Crushed nuts – Roll the freshly dipped berries in finely chopped pistachios, almonds, or pecans. The crunch takes them to another level.
- Festive sprinkles – Perfect for birthdays! Use colored sprinkles, edible glitter, or even crushed freeze-dried berries for a pop of color.
- Sea salt flakes – Just a tiny sprinkle of good quality salt makes the chocolate taste even richer. My foodie friends go crazy for this version.
- Coconut flakes – Toasted or not, coconut adds a tropical twist that’s surprisingly delicious.
Want to get really fancy? Try mixing cocoa powder into the melted chocolate for an ultra-rich version, or use dark chocolate with orange zest for a sophisticated flavor combo. The possibilities are endless – I’ve even done crushed pretzels for a sweet-salty crunch! Whatever you choose, have fun with it. That’s the beauty of homemade treats – you get to make them your own.
Storing and Serving Chocolate Covered Strawberries
Now, here’s the bittersweet truth about chocolate covered strawberries – they’re best enjoyed the same day you make them! The berries start releasing moisture after about 24 hours, which can make the chocolate get that weird sweaty look. But if you must store them (I get it – sometimes you need to prep ahead), here’s how I do it:
Line an airtight container with parchment paper and arrange the strawberries in a single layer. Pop them in the fridge, but take them out about 30 minutes before serving – that chill dulls both the flavor and the chocolate’s beautiful shine. For absolute peak deliciousness, I try to serve mine within 12 hours of making them.
As for serving? Oh, the possibilities! These beauties are perfect on their own, but I love pairing them with champagne for special occasions – the bubbles cut through the richness so nicely. For dessert parties, arrange them on a tiered stand with other bite-sized treats. Or go all out and make them the star of a chocolate fondue spread! Just be prepared for them to disappear fast – they always do at my house.
Chocolate Covered Strawberries FAQs
Over the years, I’ve gotten so many questions about chocolate covered strawberries – and made plenty of mistakes myself! Here are the answers to the most common questions I hear:
Can I use milk chocolate instead of semisweet?
Absolutely! I actually use milk chocolate when making these for kids – it’s sweeter and milder. Just know it sets softer than dark chocolate, so handle the dipped berries extra gently. White chocolate works too, but you’ll need to temper it properly or it won’t set firmly.
How do I prevent streaks in my chocolate coating?
Those annoying white streaks happen when the chocolate gets too hot. My trick? Melt it slowly (like I described earlier) and don’t over-stir once it’s melted. If you see streaks forming, try adding a teaspoon of coconut oil – it helps smooth everything out beautifully.
Can I freeze chocolate covered strawberries?
Technically yes, but I don’t recommend it. The berries get mushy when thawed, and the chocolate loses its snap. If you must freeze them, do it uncovered on a tray first, then transfer to an airtight container. Eat within a week, and expect texture changes.
Why does my chocolate get thick and clumpy?
Ah, the dreaded “seized” chocolate! This happens when even a tiny bit of water gets in. Always make sure your bowls and strawberries are completely dry. If it happens, stir in a bit of vegetable oil (not water!) to smooth it out.
How far in advance can I make these?
For the best texture and shine, make them the same day you plan to serve them. They’ll last overnight in the fridge, but the berries start weeping moisture after about 12 hours. If you must prep ahead, store them uncovered in a single layer in the fridge.
Remember – even “imperfect” chocolate covered strawberries still taste amazing! Don’t stress too much about getting them picture-perfect. The joy is in the making (and the eating, of course!).
Nutritional Information
Now, I’m no nutritionist, but I know we all like to keep an eye on what we’re eating – especially when it comes to indulgent treats like these! Here’s the scoop on what you’re getting in each luscious chocolate covered strawberry (remember, these are estimates and can vary based on your specific ingredients):
- Calories: About 150 per serving (that’s 3-4 strawberries)
- Fat: 9g (mostly from the heart-healthy cocoa butter!)
- Carbs: 18g (nature’s candy meets actual candy)
- Fiber: 3g (thank you, strawberry skins!)
- Sugar: 14g (mostly natural fruit sugars with a chocolate boost)
Honestly? For something that tastes this decadent, I’d say that’s not bad at all! And hey – strawberries are packed with vitamin C, so really, you’re practically eating a health food. That’s my story and I’m sticking to it!

Chocolate Covered Strawberries
Ingredients
Equipment
Method
- Line a baking sheet with parchment paper.
- Melt the chocolate in a double boiler or microwave in 30-second intervals, stirring until smooth.
- Hold each strawberry by the stem and dip into the melted chocolate, letting excess drip off.
- Place on the prepared baking sheet and let set at room temperature or refrigerate for 15 minutes.
Nutrition
Notes
Tried this recipe?
Let us know how it was!For more amazing recipes, be sure to check out our other sections to explore a variety of ideas that will enrich your cooking experience. Each section offers its own unique flavors to ensure a delightful culinary journey:
Easy and Quick Recipes: A collection of dishes that guarantee delicious meals with minimal effort and time.
Healthy Recipes: Discover healthy and delicious options that fit your lifestyle.
Desserts: A diverse selection of sweets that will add a special touch of sweetness to your table.
Lunch Recipes: Tasty lunch ideas that you can easily prepare to delight your family.
Dinner Recipes: Delicious and easy-to-make recipes that will make your dinner a memorable occasion.