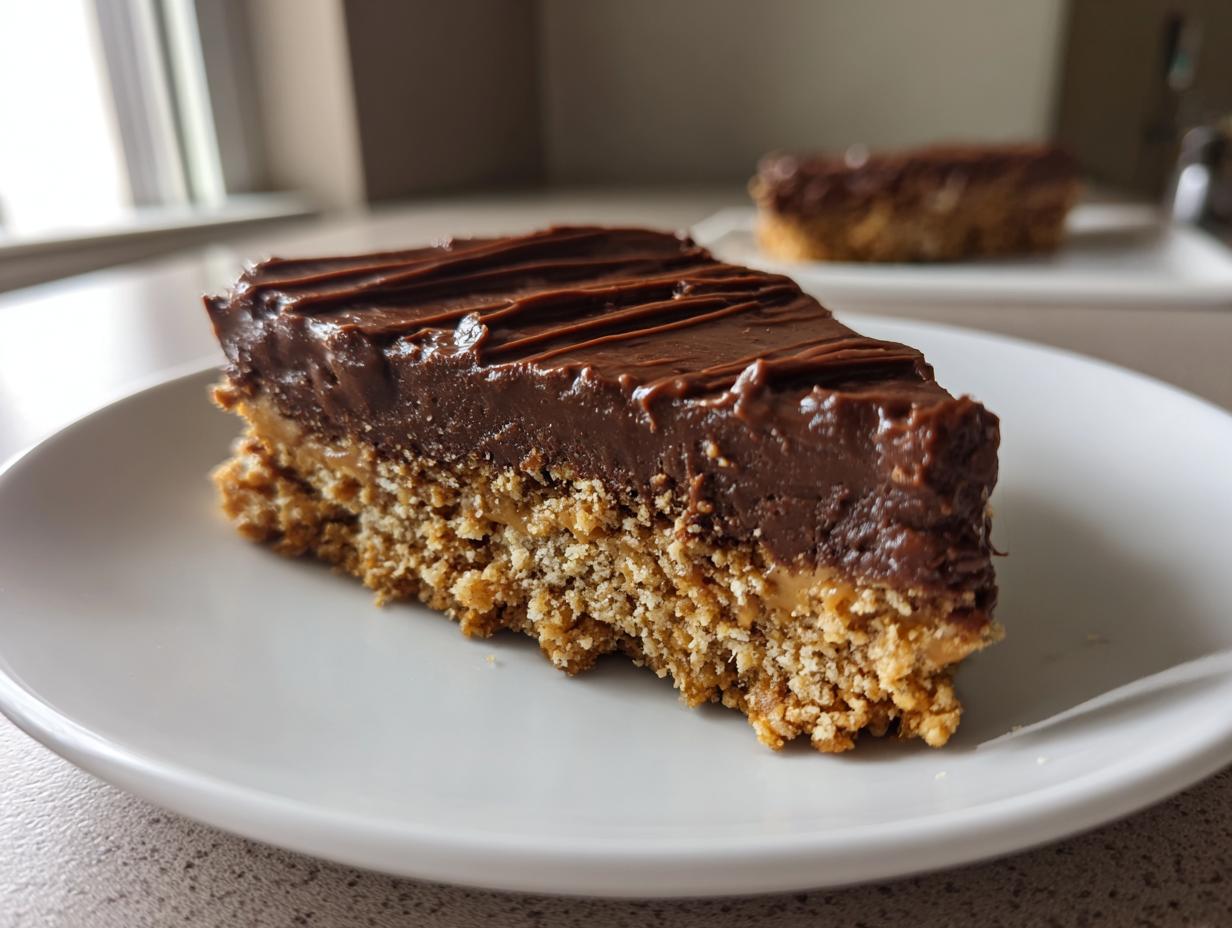
There’s nothing like whipping up these quick sweet treats when that sugar craving hits or when friends drop by unexpectedly! I can’t tell you how many times this recipe has saved me during last-minute get-togethers. My kids think I’m a kitchen magician when I disappear for five minutes and come back with these chocolatey delights. What I love most is how ridiculously simple they are – just a handful of ingredients and barely any waiting time. They’re my go-to when I need something sweet now without any fuss. Seriously, if you can stir and melt, you can make these! Check out more of my favorite easy dessert recipes that’ll have everyone thinking you spent hours in the kitchen. These treats remind me of baking with my mom – simple, satisfying, and always good for a happy tummy.

Why You’ll Love These Quick Sweet Treats
Oh my goodness, where do I even start? These little bites of joy check all the boxes for when you need something sweet fast. First off – they’re ready before you can say “dessert emergency!” Just 15 minutes from pantry to plate. No oven required, which means no waiting around while your kitchen turns into a sauna.
Here’s what makes them magical:
- Pantry staples only: I bet you’ve got everything in your kitchen right now!
- No baking skills needed: If you can stir and melt, you’re golden.
- Endless possibilities: Swap peanut butter for Nutella, add marshmallows – make it yours!
- Kid-approved: My little ones love helping press the crust and lick the spoon (shh, our secret).
They’re the perfect solution when you need instant gratification without the hassle. Trust me, once you try these, you’ll wonder how you ever lived without this recipe in your back pocket!
Ingredients for Quick Sweet Treats
Okay, let’s talk ingredients – and I promise you won’t need to make a special trip to the store! These quick sweet treats come together with just a few pantry staples I always have on hand. Here’s what you’ll need, divided into the base and topping because that’s how my brain works when I’m throwing these together:
For the Base
- 1 cup graham cracker crumbs – packed firmly (I just crush whole crackers in a bag – so therapeutic!)
- 1/4 cup melted butter – the real stuff, please! It makes all the difference in getting that perfect crumbly texture.
For the Topping
- 1 cup chocolate chips – semi-sweet is my go-to, but milk chocolate works great too if you’ve got a sweet tooth
- 1/2 cup peanut butter – creamy or crunchy, your choice! I’ve used almond butter in a pinch and it was delicious
See? Told you it was simple! The beauty of this recipe is that these basic ingredients transform into something magical with just a few minutes of work. Now let’s get mixing!
How to Make Quick Sweet Treats
Alright, let’s get to the fun part – making these irresistible quick sweet treats! I’ve made this recipe so many times I could probably do it with my eyes closed (though I don’t recommend trying that with melted chocolate). Follow these simple steps and you’ll have dessert ready before your coffee finishes brewing!
Step 1: Create Your Crumbly Base
First, grab that mixing bowl and toss in your graham cracker crumbs. Pour in the melted butter and mix until it looks like wet sand – you know, the perfect kind for sandcastles! Here’s my trick: I use the back of a spoon to really press the mixture together until it holds its shape when squeezed.
Step 2: Press It Down Like You Mean It
Now, transfer your crumb mixture to whatever dish you’re using (I love my little square baking dish for this). Press it down firmly with your fingers or the bottom of a glass – this is key to getting that perfect crust that won’t crumble apart. Pro tip from my many kitchen experiments: if you wet your fingers slightly, the crumbs won’t stick to them!
Step 3: Melt Your Chocolatey Goodness
Time for the magic! Combine your chocolate chips and peanut butter in a microwave-safe bowl. Microwave in 30-second bursts, stirring between each one. Watch it closely – chocolate burns faster than you’d think! You want it smooth and glossy. If you’re feeling fancy like I sometimes do, check out my no-bake Oreo cheesecake for more microwave melting tips.
Step 4: Spread and Chill
Pour that luscious chocolate-peanut butter mixture over your crust and spread it evenly with a spatula. Here’s where patience comes in – pop it in the fridge for at least 5 minutes. I know, waiting is hard when it smells this good! But trust me, that short chill time makes all the difference in getting clean slices.
And voila! You’ve just made the easiest, most satisfying quick sweet treats that’ll have everyone begging for the recipe. Now go grab a piece before someone else does!
Tips for Perfect Quick Sweet Treats
After making these quick sweet treats more times than I can count (okay fine, it’s at least twice a week), I’ve picked up some tricks that’ll take yours from “pretty good” to “oh-my-gosh-can-I-have-the-recipe” amazing. First lesson learned the hard way: always line your dish with parchment paper! That time I forgot? Let’s just say we ate delicious chocolate crumbles instead of neat squares.
Here are my can’t-live-without tips:
- Let your chocolate mixture cool for about 2 minutes before spreading – it’ll be less runny and won’t soak into the crust
- Press the crust mixture firmly – I use the bottom of a measuring cup now after my finger-pressing disasters
- For clean cuts, run your knife under hot water between slices
Trust me, these little adjustments make a huge difference. My neighbor still talks about the “great chocolate pool incident of 2021” when I didn’t let the topping cool first. Learn from my mistakes, friends!
Variations for Quick Sweet Treats
Oh, the fun part! This recipe is basically a blank canvas for your sweet tooth’s wildest dreams. I can’t tell you how many versions I’ve tested on my very willing family – they never complain about being my taste testers! Here are my favorite twists when I want to shake things up:
- Nut butter switch-up: Swap peanut butter for almond butter (so fancy!), Nutella (my daughterInternationalldaughterdaughterdarling’s favorite), or even cookie butter if you’re feeling naughty
- Crunch factor: Stir chopped nuts or crushed pretهر쳌F待 돌 into the chocolate topping before it sets for that perfect texture contrast
- Fruity flair: Sprinkle dried cranberries or chopped dried apricots on top before chilling – the tartness balances the sweetness beautifully
- Kid’s choice: My littles love when we mix in mini marshmallows and call it “s’mores bark”
The best part? You really can’t mess this up. Whatever you’ve got in your pantry will probably work. Last week I used leftover biscuit crumbs instead of graham crackers and drizzled caramel sauce on top. Divine! Experiment and make it your own.

Serving Suggestions for Quick Sweet Treats
Oh, let me tell you how I love to serve these quick sweet treats – they’re perfect with just about anything! My absolute favorite is pairing them with a cold glass of iced coffee – the bitterness balances the sweetness so perfectly. For special occasions, I’ll scoop vanilla ice cream on top while the chocolate layer is still slightly warm. Trust me, it’s heavenly!
Here’s how I make them look extra special:
- Cut into bite-sized squares for parties – they disappear fast!
- Drizzle with melted white chocolate for a fancy touch
- Serve on a vintage cake stand for that homemade charm
- Top with a sprinkle of sea salt for that gourmet feel
My kids love when I cut them into fun shapes with cookie cutters – hearts for Valentine’s Day, stars for the Fourth of July. Whatever way you serve them, they’re guaranteed to bring smiles!
Storage Instructions for Quick Sweet Treats
Okay, let’s talk about keeping these quick sweet treats tasting fresh (not that they’ll last long in my house!). The secret is an airtight container – I’m obsessed with my glass ones with the locking lids. Pop them in the fridge, and they’ll stay perfect for up to 3 days. Honestly though? They’ve never made it past day 2 at my place!
Want them a tiny bit soft? Take them out 10 minutes before serving. Accidentally left them out overnight (oops!)? No worries, they’re still good – just maybe a little melty like mine were last weekend. Not that anyone complained!
Nutritional Information
Just between us – these quick sweet treats aren’t exactly health food, but everything in moderation, right? The nutritional values will vary depending on your exact ingredients (like how generous you are with that peanut butter – no judgment here!). My rule of thumb? If it brings you joy, it’s worth savoring every bite!
FAQs About Quick Sweet Treats
Can I use gluten-free graham crackers?
Absolutely! I’ve made these with gluten-free graham crackers plenty of times when baking for friends with dietary restrictions. They work just as well – just make sure to pack the crumbs firmly so your base holds together. My gluten-free neighbor actually prefers this version now!
How long do they need to chill?
At least 5 minutes if you’re impatient like me, but 15 minutes is ideal for perfect slices. If you can wait (I rarely can), 30 minutes in the fridge makes them extra firm. Pro tip: pop them in the freezer for 3 minutes if you’re in a real hurry!
Can I freeze these treats?
You bet! I always keep a stash in my freezer for emergencies (you know, those “I need chocolate NOW” moments). Just wrap them tightly in plastic wrap first – they’ll keep for up to 2 months. Thaw at room temperature for about 10 minutes before eating. The texture stays perfect!
Quick Sweet Treats
Ingredients
Equipment
Method
- Mix graham cracker crumbs and melted butter in a bowl.
- Press the mixture into a dish to form the base.
- Melt chocolate chips and peanut butter together, then spread over the base.
- Chill for 5 minutes before serving.
Notes
Tried this recipe?
Let us know how it was!For more amazing recipes, be sure to check out our other sections to explore a variety of ideas that will enrich your cooking experience. Each section offers its own unique flavors to ensure a delightful culinary journey:
Easy and Quick Recipes: A collection of dishes that guarantee delicious meals with minimal effort and time.
Healthy Recipes: Discover healthy and delicious options that fit your lifestyle.
Desserts: A diverse selection of sweets that will add a special touch of sweetness to your table.
Lunch Recipes: Tasty lunch ideas that you can easily prepare to delight your family.
Dinner Recipes: Delicious and easy-to-make recipes that will make your dinner a memorable occasion.