Table of Contents
Table of Contents
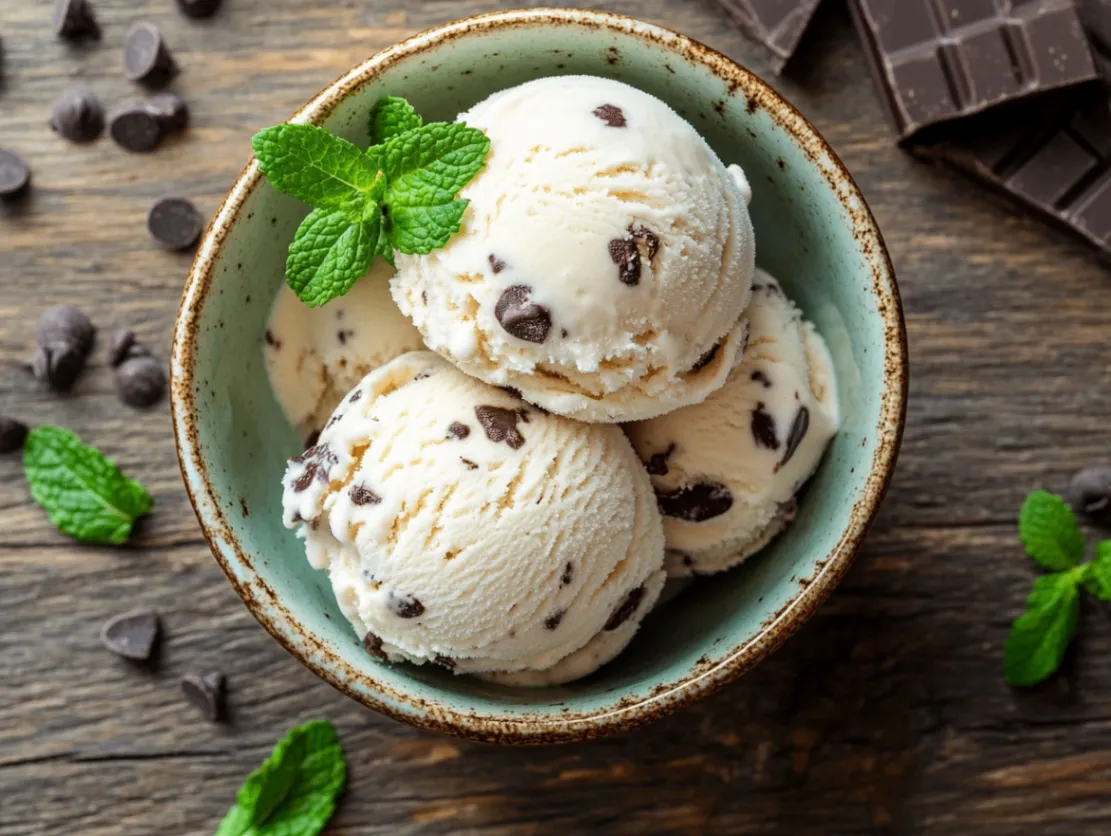
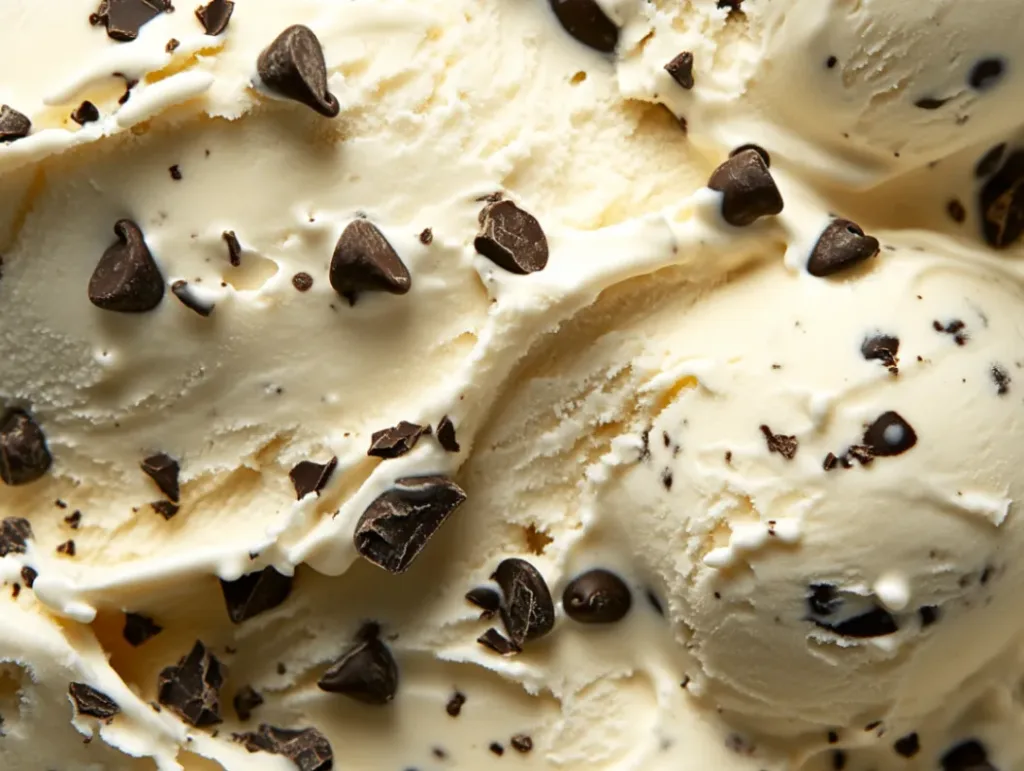
There’s something magical about the first spoonful of homemade chocolate chip ice cream – the way the creamy vanilla base melts on your tongue while those perfect little chocolate morsels provide delightful bursts of sweetness. As someone who has been perfecting this chocolate chip ice cream recipe for over a decade, I can confidently say it’s become one of my most treasured family recipes.
I still remember the summer when my grandmother first taught me how to make chocolate chip ice cream from scratch. We spent an entire afternoon in her kitchen, cranking that old-fashioned ice cream maker while she shared stories about her own childhood. That experience ignited my passion for homemade ice cream, and this particular recipe has been the crown jewel of my dessert repertoire ever since. Whether you’re looking to impress guests at a dinner party or create lasting memories with your children, this chocolate chip ice cream will deliver pure joy in every scoop.
Chocolate Chip Ice Cream from Scratch
Ingredients
Nutrition
Tried this recipe?
Let us know how it was!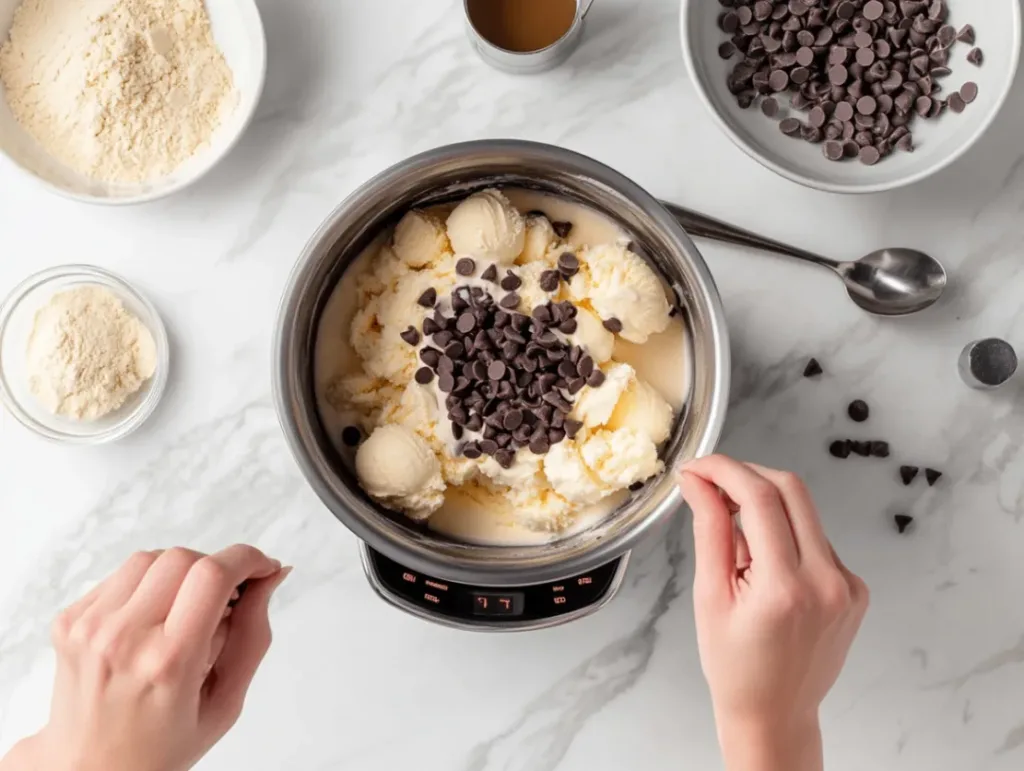
Ingredients: Building the Foundation of Perfect Chocolate Chip Ice Cream
Understanding Key Ingredients and Their Essential Roles
Creating exceptional chocolate chip ice cream starts with understanding how each ingredient contributes to the final product. Heavy cream forms the luxurious base that gives our ice cream its signature richness and smooth texture. The fat content in heavy cream (typically 35-40%) is crucial for achieving that perfect creamy consistency that coats your spoon beautifully.
Egg yolks serve as natural emulsifiers, binding the fat and water molecules together to prevent ice crystals from forming. This is what separates professional-quality chocolate chip ice cream from grainy, homemade attempts. The proteins in egg yolks also contribute to the custard-like richness that makes each bite unforgettable.
Sugar plays multiple roles beyond sweetness – it lowers the freezing point of our mixture, ensuring the ice cream remains scoopable even when frozen solid. Vanilla extract adds depth and complexity, while the chocolate chips provide textural contrast and bursts of cocoa flavor that make this recipe truly special.
Selecting the Highest Quality Ingredients for Superior Results
When making chocolate chip ice cream, ingredient quality directly impacts the final taste and texture. Always choose heavy cream with the highest fat content available – look for brands that specify 36% or higher fat content. Fresh, organic eggs with bright orange yolks will create a richer custard base and more vibrant color.
For vanilla extract, invest in pure vanilla rather than artificial flavoring. The depth and complexity of real vanilla beans shine through in frozen desserts, making your chocolate chip ice cream taste professionally made. Madagascar vanilla offers classic, sweet notes, while Tahitian vanilla provides floral undertones that complement chocolate beautifully.
Choose chocolate chips specifically designed for baking and freezing. Mini chocolate chips distribute more evenly throughout the ice cream, while standard-sized chips provide satisfying chunks. Dark chocolate chips (60-70% cocoa) offer sophisticated flavor balance, while semi-sweet chips appeal to broader palates and children.
Smart Substitutions and Dietary Alternatives
Creating delicious chocolate chip ice cream doesn’t require strict adherence to traditional ingredients. For those avoiding dairy, coconut cream (full-fat canned) creates surprisingly rich results when substituted cup-for-cup with heavy cream. The natural coconut flavor complements chocolate beautifully, though it will be noticeable in the final product.
Egg-free versions can use cornstarch as a thickening agent instead of egg yolks. Mix two tablespoons of cornstarch with a small amount of cold milk before adding to the heated cream mixture. While the texture won’t be quite as rich, you’ll still achieve creamy, scoopable chocolate chip ice cream.
Sugar alternatives like erythritol or stevia work well, though they may require adjustments to achieve proper texture. Maple syrup or honey can replace granulated sugar, adding unique flavor dimensions to your chocolate chip ice cream. Remember that liquid sweeteners will affect the freezing properties, so you might need to reduce other liquids slightly.
Preparation Steps: Mastering the Art of Homemade Ice Cream
Initial Preparation and Essential Setup Tips
Success with chocolate chip ice cream begins long before you start cooking. Ensure your ice cream maker bowl has been frozen for at least 24 hours – a partially frozen bowl will result in ice cream that never properly sets. If you’re using a traditional hand-crank freezer, prepare your ice and salt mixture in advance.
Prepare a fine-mesh strainer and set it over a clean bowl. This will be crucial for straining your custard base and ensuring silky-smooth chocolate chip ice cream without any lumps from cooked egg pieces. Have your vanilla extract and chocolate chips measured and ready, as timing becomes important once you start the custard-making process.
Create an ice bath by filling a large bowl with ice and water. This will help rapidly cool your finished custard base, preventing overcooking and reducing the time needed before churning your chocolate chip ice cream.
Step-by-Step Instructions with Professional Secrets
Begin by heating two cups of heavy cream in a heavy-bottomed saucepan over medium heat until small bubbles form around the edges – never let it boil. In a separate bowl, whisk six egg yolks with three-quarters cup of sugar until the mixture becomes pale and ribbon-like when lifted with the whisk.
Here’s my secret technique: slowly drizzle about half of the hot cream into the egg mixture while whisking constantly. This process, called tempering, prevents the eggs from scrambling. Return the entire mixture to the saucepan and cook over low heat, stirring constantly with a wooden spoon, until it coats the back of the spoon (about 170°F on a thermometer).
Immediately strain the custard through your prepared fine-mesh strainer to remove any lumps. Stir in two teaspoons of pure vanilla extract and the remaining cup of heavy cream. Cool the mixture completely in your ice bath, then refrigerate for at least four hours or overnight. This aging process allows flavors to meld and improves the final texture of your chocolate chip ice cream.
Avoiding Common Mistakes for Perfect Results
The most common mistake in making chocolate chip ice cream is rushing the cooling process. Hot custard will melt the ice in your ice cream maker and prevent proper freezing. Always ensure your base is completely cold before churning – I recommend using a thermometer to verify it’s below 40°F.
Never add chocolate chips at the beginning of churning, as they’ll sink to the bottom. Instead, add them during the final two minutes of churning when the ice cream has thickened significantly. This ensures even distribution throughout your chocolate chip ice cream.
Overcooking the custard base is another frequent error that results in a grainy texture. Keep the heat low and stir constantly once you’ve added the eggs. If you notice any lumps forming, immediately remove from heat and strain the mixture – it’s better to have slightly less thick custard than scrambled eggs in your ice cream.
Serving & Final Touches: Elevating Your Chocolate Chip Ice Cream Experience
Creative Presentation Ideas That Wow
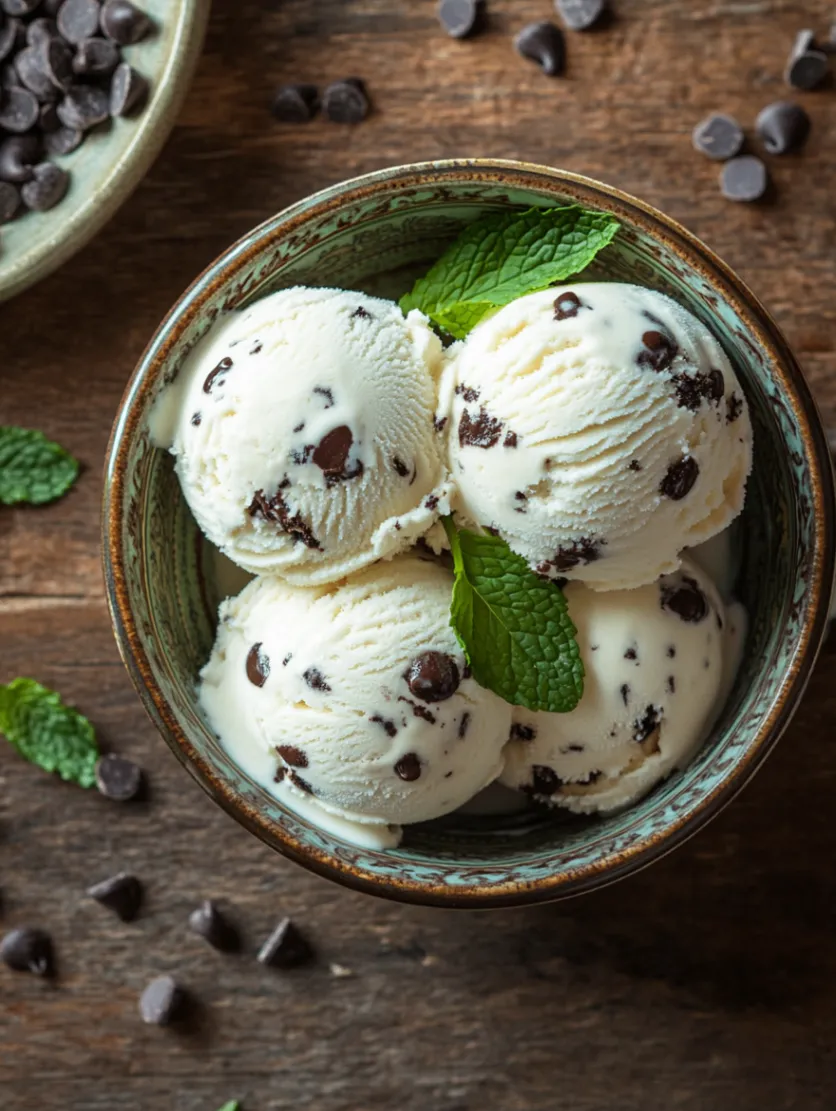
Transform your homemade chocolate chip ice cream into a restaurant-worthy dessert with thoughtful presentation. Serve scoops in chilled bowls that have been placed in the freezer for 15 minutes beforehand. Use an ice cream scoop dipped in warm water between each portion for perfectly round, professional-looking servings.
Create an elegant sundae bar by offering complementary toppings alongside your chocolate chip ice cream. Warm chocolate fudge sauce, caramel drizzle, and whipped cream allow guests to customize their experience. Fresh berries add color and bright flavor that balances the richness of the ice cream.
For special occasions, consider serving chocolate chip ice cream in homemade waffle cones or alongside warm brownies. The temperature contrast between warm desserts and cold ice cream creates an irresistible sensory experience that guests will remember long after the meal ends.
Perfect Pairings and Complementary Flavors
Chocolate chip ice cream pairs beautifully with warm desserts that highlight its cool, creamy texture. Serve alongside apple pie, warm chocolate chip cookies, or fresh-baked brownies for classic combinations that never disappoint. The vanilla base complements fruit-forward desserts like berry cobblers or peach tarts.
Consider creating ice cream sandwiches using homemade cookies or even slices of pound cake. The possibilities are endless when you have a batch of fresh chocolate chip ice cream ready to enhance other desserts. Coffee and espresso-based beverages also pair wonderfully, as the bitter notes highlight the sweet vanilla and chocolate flavors.
For adult gatherings, consider serving small scoops of chocolate chip ice cream alongside dessert wines or even a splash of bourbon or rum. The alcohol enhances the vanilla flavors while the cold temperature makes it a refreshing end to heavy meals.
Storage Tips and Maintaining Peak Quality
Proper storage ensures your chocolate chip ice cream maintains its perfect texture and flavor for weeks. Transfer the finished ice cream to an airtight container, pressing plastic wrap directly onto the surface before adding the lid. This prevents ice crystals from forming and maintains the smooth, creamy texture you worked so hard to achieve.
Store your chocolate chip ice cream in the back of your freezer where temperatures remain most consistent. Avoid the door compartments where temperature fluctuations can cause texture changes. For best quality, consume within two to three weeks, though properly stored ice cream can last up to two months.
When serving, remove the container from the freezer about 10-15 minutes before scooping, depending on your freezer’s temperature. This slight softening makes scooping easier while maintaining the integrity of your chocolate chip ice cream’s texture.
 DINNER
 LUNCH
LUNCH Desserts
 BREAKFAST
For more amazing recipes, be sure to check out our other sections to explore a variety of ideas that will enrich your cooking experience. Each section offers its own unique flavors to ensure a delightful culinary journey:
Easy and Quick Recipes: A collection of dishes that guarantee delicious meals with minimal effort and time.
Healthy Recipes: Discover healthy and delicious options that fit your lifestyle.
Desserts: A diverse selection of sweets that will add a special touch of sweetness to your table.
Lunch Recipes: Tasty lunch ideas that you can easily prepare to delight your family.
Dinner Recipes: Delicious and easy-to-make recipes that will make your dinner a memorable occasion.
Frequently Asked Questions
Q: Can I make chocolate chip ice cream without an ice cream maker? A: Yes! Pour your prepared custard base into a freezer-safe container and freeze for 45 minutes. Remove and whisk vigorously to break up ice crystals, then return to freezer. Repeat this process every 30-45 minutes for 3-4 hours until completely frozen. Add chocolate chips during the final mixing session.
Q: Why is my homemade chocolate chip ice cream too hard to scoop? A: This usually indicates too little fat or sugar in your recipe, or your freezer temperature is too low. Ensure you’re using heavy cream with at least 35% fat content, and consider adding an extra tablespoon of sugar. Some freezers run very cold, so adjust accordingly.
Q: How long should I churn chocolate chip ice cream in my ice cream maker? A: Most ice cream makers require 20-25 minutes of churning time. Your chocolate chip ice cream is ready when it reaches the consistency of soft-serve and pulls away from the sides of the bowl. Over-churning can result in a grainy texture.
Q: Can I add other mix-ins besides chocolate chips? A: Absolutely! Cookie dough pieces, crushed cookies, nuts, or fruit work wonderfully. Add mix-ins during the final 2-3 minutes of churning to ensure even distribution throughout your ice cream base.
Q: What’s the best way to prevent ice crystals from forming? A: Ensure your custard base is completely smooth and properly strained. Cool it thoroughly before churning, store with plastic wrap pressed directly onto the surface, and maintain consistent freezer temperatures. Higher fat content also helps prevent crystallization.
Q: How can I make my homemade ice cream extra creamy?A: Use a custard base made with egg yolks, as they add richness and improve texture. Incorporating a bit of corn syrup or a small amount of cream cheese can also enhance creaminess. Be sure not to over-churn—the ice cream should be just thick enough to hold its shape before freezing.
Conclusion
Making chocolate chip ice cream from scratch is more than just following a recipe – it’s an experience. It’s about slowing down, embracing the process, and creating moments of pure joy with the people you love. The gentle hum of the mixer, the rich aroma of sweet cream, and the excitement of that first taste—it all becomes a cherished ritual, one that brings comfort, fun, and delicious satisfaction.
This homemade chocolate chip ice cream recipe isn’t just about flavor, although the taste certainly speaks for itself—silky, creamy, and loaded with rich chocolate pieces in every bite. What makes it special is the personal touch you bring to it. It’s about knowing exactly what’s going into your food and taking pride in creating something from scratch, without artificial ingredients or preservatives. You’re not just making ice cream; you’re crafting memories, smiles, and little moments of happiness.
One of the best parts about homemade ice cream is how customizable it is. Want to use dark chocolate instead of semi-sweet? Go for it. Craving a hint of sea salt, a swirl of peanut butter, or a ripple of raspberry jam? Add it in. You can fold in toasted coconut, brownie bits, crushed cookies, or roasted nuts. Whether you like it light and milky or decadently rich, this recipe is your canvas. Each batch can reflect your mood, the season, or the occasion.
Even better, making ice cream together is a bonding activity. It’s a fun way to bring your kids into the kitchen, to laugh and learn while measuring, mixing, and waiting (impatiently!) for the ice cream to churn. It’s also a great surprise for guests, a thoughtful gift for neighbors, or a nostalgic treat to bring to summer parties. Homemade ice cream has a way of bringing people together, melting away stress and replacing it with sweetness.
Share your creations proudly! Post your scoops on social media, tag us in your photos, and let your friends and family in on the joy. There’s something magical about seeing someone’s face light up when they taste a dessert you made with your own hands. It’s a simple act that says, “I care.”
And remember: the best recipes aren’t meant to be kept secret—they’re meant to be shared. Teach your kids. Pass it down. Make it a tradition. Because in the end, the best desserts aren’t just about taste; they’re about love, connection, and celebration.
Happy ice cream making! May each batch bring a little more happiness to your home. Keep experimenting, keep tasting, and above all, keep enjoying every scoop of life’s sweetest moments.
For more mouthwatering ideas, don’t forget to browse our other recipe sections. Whether you’re looking for easy weeknight dinners, healthy meals, or indulgent desserts, you’ll find inspiration to make every day delicious.